 Skip to content
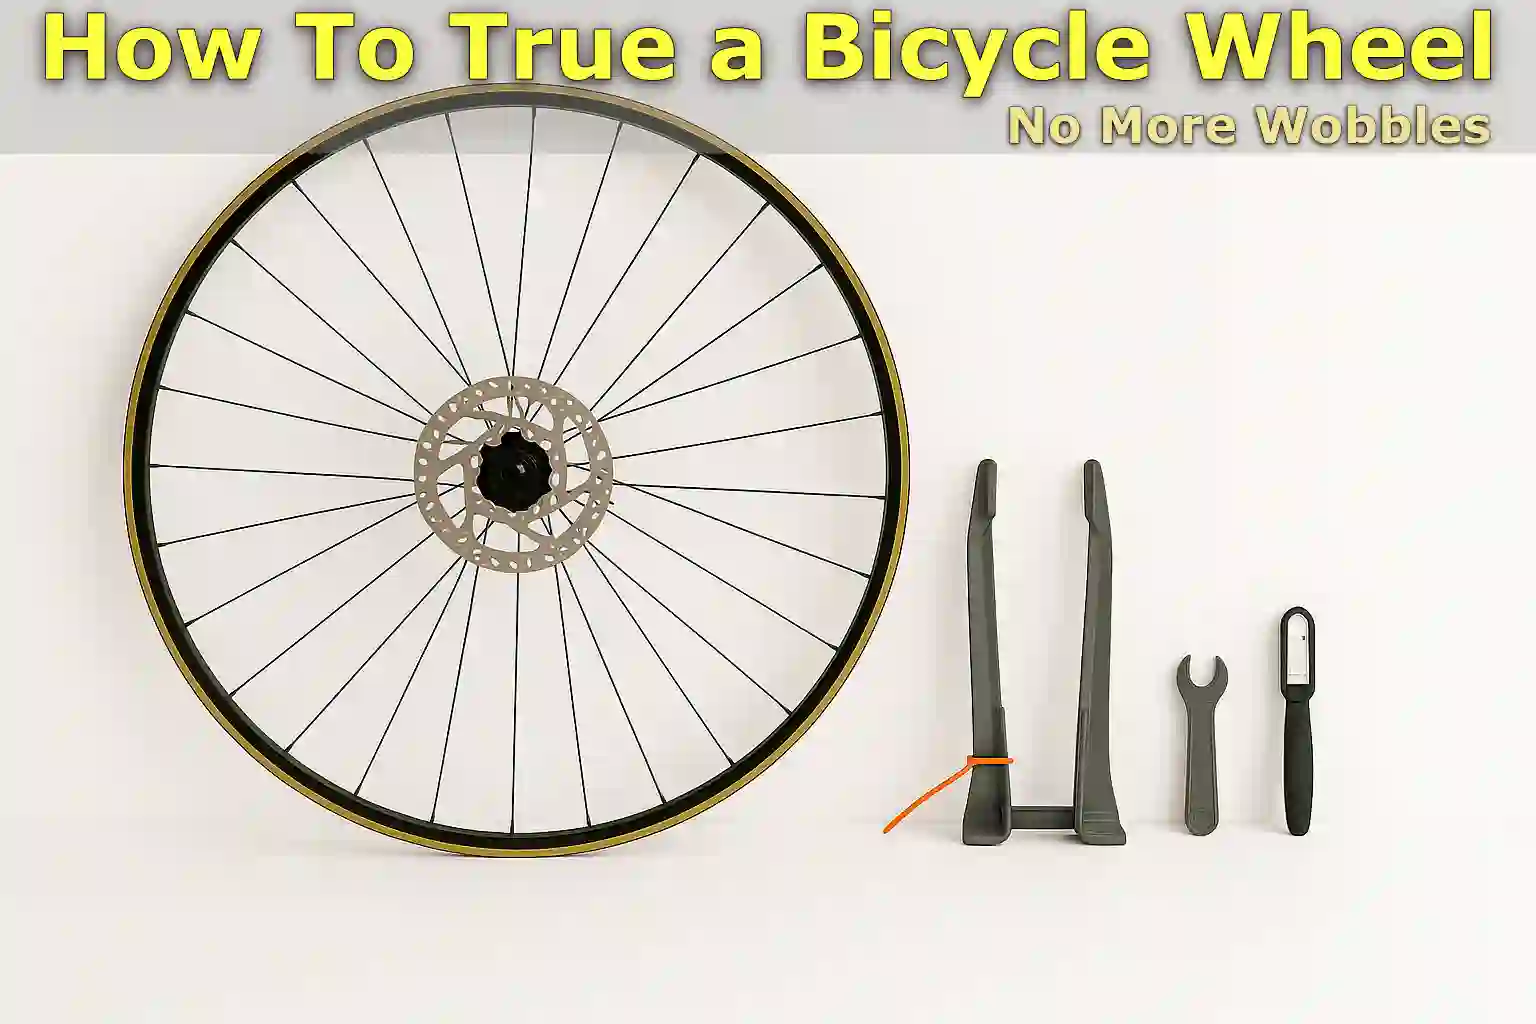
Written By: Jonathan
Fact Checked By: Caroline Dezendorf
Reviewed By: Matt Tanner
In simple way just keeping your bicycle wheel straight is called bicycle tire tuning, yes indeed it is one of the most important parts of the bicycle which needs proper maintenance from time to time.
When you tube the wheel correctly it will also help your bicycle in various parts as you can ride easily, this objectively improves braking performance and you will notice that the long term damage to your rims, spokes and even your tires will be substantially reduced.
As time goes on it is completely normal for your wheels to stop working properly, this is not your fault, it is just a normal thing that happens when using a bicycle.
It could be because you drive over potholes, cross curbs, drive over rough terrain, or just because of regular use.
A wheel is made up of a rim and a number of tight spokes that pull against each other to keep the rim balanced, so if just one spoke becomes too loose or too tight it can cause the rim to wobble from side to side or bounce up and down.
It’s not just about comfort, but also about safety, especially at high speeds.
So, this is the guide from which you can learn a very easy and effective method on How To True a Bicycle Wheel, even if you are a complete beginner.
1. What is Wheel Truing?
Wheel truing basically means making sure your bicycle wheel spins straight and smoothly, without moving around or bouncing up and down.
Therefore, when a wheel is perfectly “true” it means that the rim, which is the outer circle of the wheel, is perfectly aligned and balanced.
Furthermore, a properly calibrated wheel helps your bicycle ride safely and it also really improves the efficiency of your brakes and prevents damage to your spokes and rims.
Moreover, it helps your tires to wear evenly and last longer for a better cause.
2. Two Types of Wheel Truing
Yes, there are two main types of wheel misalignment that can be easily corrected by truing:
- Lateral Truing: Side-to-Side Movement
- Radial Truing: Up-and-Down Movement
Lateral Truing
Lateral truing means you need to correct side-to-side wobbles in the wheel, If you notice your wheel shifts left and right as you spin, it literally means the tension in the spokes is not balanced from side to side.
So, this can actually cause your brake pads to rub against the rim and make the ride harder and less safe.
This lateral truing also includes tightening or loosening the correct spoke to bring the rim back into a straight line.
Also, a properly trued wheel actually relies on even spoke tension, so when the one side is tighter than the other one then the rim pulls in that direction which leads to a wobble or “lateral runout”.[¹]
Radial Truing
So, radial truing actually corrects the up-and-down bumps also known as “hops” in the wheel. This is actually caused when the rim is not perfectly round.
That is why when you ride a bicycle you feel a kind of push.
So, to fix this you have to adjust the spoke tension near the high or low points of the bump which actually brings the rim back to a smooth and round shape again.
3. Understanding Spoke Tension
Spokes are the thin metal wires that actually connect the rim of your wheel to the hub which is actually the central part of the wheel.
Because each spoke is under tension, it is being pulled tightly, and this tension is what actually keeps the wheel strong, straight, and able to handle your weight and bumps in the road properly.
So how it actually works:
The spokes on one side pull against the spokes on the other side, and if one spoke gets too loose or too tight it actually throws the balance off, and that imbalance actually causes the rim to bend either laterally, or out of round, which is the radial way.
So, trueing a wheel means adjusting the tension of some spokes so that everything is balanced again, For a simple example, you can think of o fit like tuning a musical instrument: for the wheel to “perform” its best each part has to be in exactly the right position.
And according to The Bicycle Wheel, ideal spoke tension is below the point where the spoke can actually stretch permanently, over-tightening can even damage the rim, and too little tension also causes flexing and instability.[²]
2. Signs Your Wheel Needs Truing
With these signs, you can easily know when your bicycle tire actually needs to be serviced and this is very important for staying safe and keeping the bicycle running smoothly.
| Sign | What It Means | Why It Matters |
|---|---|---|
| When your bicycle wobbles or rocks from side to side | This actually means that the rim moves to the left and right as it rotates. | This really indicates uneven spoke tension or a bent rim. Which really affects balance and brake function. |
| When your bicycle brakes rub the rim | Pedaling will be difficult as you may hear a rubbing sound or feel resistance while pedaling. | This indicates that the rim has shifted off center, causing interference with the rim brake. |
| When you notice uneven tire wear | This causes one part of your tire to wear out faster than the other. | Because the wrong wheel can cause uneven pressure, which can lead to premature tire damage. |
| If you hear a clicking or creaking noise | This sound comes from the spoke or rim while riding. | This is because loose or unevenly tensioned spokes can bend under the load and make noise. |
Tools
| Tool | Purpose | Notes |
|---|---|---|
| Spoke Wrench | It is necessary to tighten or loosen individual spokes. | You will need to match your spoke nipple size for a proper fit. |
| Truing Stand | It actually holds the wheel securely and allows side-to-side and up-and-down movement. | This really does provide the most accurate setup, especially for precise truing. |
| Zip Ties (Alternative) | So, if you don’t have a truing stand a zip tie is an option to use as a DIY indicator on the frame or fork. | You need to place them close to the rim to detect any wobble or bounce. |
| Bike Frame + Brake Pads | Yes, this is also an alternative method to identify rim movement. | Simply flip the bike upside down and use the brake pads as a visual guide. |
| Spoke Tension Meter (Optional) | You can use this tool to measure the tension of each spoke to ensure evenness. | This proves very useful for accuracy, especially in advanced or professional wheel work. |
Also, wheels should be checked every 500 to 1,000 miles, yes it depends on riding conditions and terrain.[³]
4. Pre-Truing Checks
Yes, you need to check some important things before attempting to adjust any spokes or fine-tune your bike’s wheel.
Therefore, these pre-truing checks are really helpful, allowing you to avoid wasting time or preventing the problem from getting worse.
Inspect for Damaged or Broken Spokes
You need to start the inspection by looking carefully at each spoke on the bicycle wheel, and the spokes are the thin metal roads that run between the rim and the center hub.
If you notice that even one spoke is broken, cracked or too loose, it can literally throw off the balance of the entire wheel and become impossible to correct unless you replace it.
So just pay attention to things like: are any spokes missing, are any spokes visibly bent or broken, and do any spokes move really easily or feel totally loose when you press on them.
Note: If any spoke in a bicycle wheel is damaged then it cannot be repaired unless you replace the broken part, as this is actually very dangerous and also makes the wheel unsafe.
Check for Bent Rim or Structural Issues
Now, you’ll need to take a close look at the rim, which is the metal circle that the tire rests on.
Therefore, you need to make sure that it is not badly bent, broken, or damaged.
If the rim is severely damaged it cannot be repaired, so you may need to replace that rim as well.
Look for dents caused by hitting the kerb or potholes, you’ll also need to look out for cracks near the spoke holes, which are common on older or cheaper rims, and flat spots or large bends that can be potential hazards that can really show up in the shape of the rim.
Just understand that you have to make sure whether the rim is bent or not, so just spin the wheel and see how it actually turns.
If you really notice that large parts are moving or bowing down then truing is the only option to fix it.
Ensure Tire is Fully Inflated
You need to make sure that the tires are properly pumped up and at the recommended pressure.
So a fully inflated tire actually helps the wheel maintain its shape, it also makes it easier to spot wobbles and bumps, as well as giving more accurate results when checking the integrity of the rim.
It doesn’t matter if you are not planning to ride the bicycle immediately after repairing the tire, all you have to do is keep the tire inflated which also helps in keeping the rim stable during the process.
Remove the Tire
You can also choose to remove the tire completely if you want better access and visibility.
Because it helps you see spoke nipples and rim edges clearly, it also prevents confusion caused by tire size or tread, plus you can use truing stands or zip-tie guides more effectively.
So, the point is that removing the tire isn’t really necessary at all, but it is highly recommended especially for beginners as it will make it easier to see and reach everything.
Or if you’re really comfortable with tools and want a clean view of the rim, you can even remove the tire and tube before actually getting started.
Read More:
Why Pre-Truing Checks Matters
So, doing these simple checks before you start truing will definitely save you a lot of time by catching serious issues much earlier, also it really prevents any mistakes or damage to your wheel and really makes the whole process much easier and precise.
So, once you have ensured that the spokes and rim are in good condition your bicycle tire is set up correctly and you are now ready to fit your wheel.
How To True a Bicycle Wheel (Everything Covered)
So our goal is to carefully adjust the spoke tension so that the rim spins straight and round and there are no vibrations or bumps.
1. Set Up Your Truing Station
Now, you will need to begin the process by placing your wheel in a stable position so that you can easily see and access the rim.
Using Truing Stand
Hence, this is the best option available, as the stand itself holds the wheel in place and also has in-built indicators that help you easily detect the side-to-side or up-down movement.
Using Bike Frame
If you don’t have a truing stand you can simply place the wheel on your bicycle and then you can use the brake pads as a guide.
Otherwise you could also put a zip tie on the frame or fork so that the tip stays close to the rim, and all of these things will act as temporary visual markers.
Note: You just need to make sure the wheel spins freely, and you should work in good lighting so you can see the imperfections clearly.
2. Identify Problem Areas
Now, you need to find the parts of the rim that actually need adjustment.
So, you will need to turn the wheel slowly and then watch the rim closely as it moves past your truing guides, which are either stand arms, brake pads, or zip ties.
Now, just pay attention to the wobble and if the rim moves left and right, it literally means it needs lateral truing and if it moves up and down, it clearly means it needs radial truing.
Also, you’ll need to mark trouble spots, so grab a small piece of masking tape or a dry-erase marker to mark the parts of the rim where you notice vibrations or bulges. So, this will help you keep track later on where to make adjustments, and it will be that much easier.
3. Adjust the Spokes
Now that you’ve finally figured out where the uneven spots are, it’s time to adjust the spoke tension which brings the rim back into shape.
How Tightening and Loosening Works
When you tighten a spoke it actually pulls the rim toward that side and if you loosen a spoke it actually moves the rim away from that side.
And you’ll need to use a spoke wrench to turn the spoke nipple at the rim end of each spoke to perform this process.
Adjusting for Lateral Truing
So, you’ve figured out that you need to fix side-to-side wobbles and if you notice that the rim wobbles to the left you need to tighten the right side spoke at that spot.
Otherwise, you’ll need to tighten the left side spoke if it wobbles to the right.
Additionally, you can also loosen the opposite side a little to balance the tension.
Also, for the best possible result you need to adjust two or three spokes located near the affected area and not just one spoke located near the affected area.
Also, you should always turn the nipple clockwise to tighten and anti-clockwise to loosen, but this can also be reversed depending entirely on how you actually look at it, so it’s always a good idea to double-check your direction.
Adjusting for Radial Truing
When you have to bounce the wheel up and down and you feel these bounces, the wheel is “bouncing,” which means the rim is out of round shape.
Now, you need to decide on a high spot where the rim actually sticks out and then tighten 2 to 4 spokes evenly around that spot.
Also, for low spots that are sloped, you may need to loosen the spoke a little in that area.
The important thing is that you should always adjust the spokes in opposite pairs to each other so that the wheel stays round and centered.
4. Work Gradually
Yes, you have to go slowly and steadily when you are turning the wheel in the right direction, because that is actually the best way to do it right.
Don’t make major changes at once, as this can make the situation worse or even cause serious damage to the rim.
So, just make small adjustments which is usually 1 to 4 revolutions at a time with the spoke wrench, and after each small change you should spin the wheel again and then you have to check the area you are fixing.
Also, repeat this process until you notice that the vibration or bouncing is completely gone or reduced drastically.
If you have to correct the wheel then you must have a lot of patience as it takes time if you are doing it for the first time.
But you can gradually avoid overcorrecting, and you can also reverse your work if necessary.
5. Final Check
Once you have adjusted any unstable or uneven areas, it is time to make sure everything looks and feels right.
So, just give the wheel a full spin and then see if there is any extra speed available.
In addition, you also need to check that the rim does not rub the brake pad or touch your zip-tie guide.
Also, you should gently press a pair of spokes against each other to check spoke tension, and they should all feel the same: not too tight and not too loose.
You need to use a spoke tension meter if you have one, this will allow you to easily confirm if the spoke tension on the wheel is balanced or not.
So, just make sure that a correctly trued wheel always:
It turns smoothly and quietly, it feels really stable when riding and it really makes your brakes work well.
Conclusion On How To True a Bicycle Wheel
You need to have bicycle tire adjusted for smooth and efficient ride, because a well adjusted wheel rolls straight and wears the tire evenly, that is why it virtually improves braking performance also and it also increases the life of your rim and spokes.
As you’ve learned, learning How To True a Bicycle Wheel involves carefully adjusting the spoke tension to correct side-to-side wobbles, which are lateral issues, and up-and-down bumps, which are radial issues.
If your rim is really badly bent, cracked, or you’re just not sure you can do the job properly, it’s perfectly fine to visit a bike shop.
Are you still confused about something?
Just let us know in the comments section and we’ll definitely get back to you!
FAQ’s On How To True a Bicycle Wheel
Q1. What does it mean to “true” a bicycle wheel?
Answer: Trueing a bicycle wheel literally means adjusting the spoke tension to keep the rim rotating straight and evenly, no matter how your wheel rocks from side to side or jolts up and down, they just aren’t true.
Q2. Can I true a wheel without a truing stand?
Answer: Literally yes, you can true a wheel without a truing stand as it is helpful but not necessary at any cost. You can still use your bike frame and brake pads as a guide.
Q3. Can truing fix a badly bent or cracked rim?
Answer: No, if you see that the rim is badly bent, dented or badly broken, then repairing it will not fix it. So in these cases, replacing the rim or taking the wheel to a bike shop is the safe and actually sensible thing to do.
References:
[1] Jambor, E., & Burmeister, D. (2016). Finite element modelling of the spoke wheel truing. Acta Technica Corviniensis – Bulletin of Engineering, 9(2), 75–80. https://www.researchgate.net/publication/302592797
[2] Brandt, J. (1981). The Bicycle Wheel (3rd ed.). Avocet, Inc. Retrieved from https://poehali.net/attach/Bicycle_Wheel_-_Jobst_Brandt.pdf
[3] Park Tool. (n.d.). Wheel Truing (Lateral & Radial). Retrieved from https://www.parktool.com/en-us/blog/repair-help/wheel-and-rim-truing
Jonathan, the passionate owner of Bicycle Time, brings a lifelong love for bikes and automotive craftsmanship, that reflects into every corner of the shop. With deep passion in both cycling and automotive accessories, Jonathan is more than just an expert.
