 Skip to content
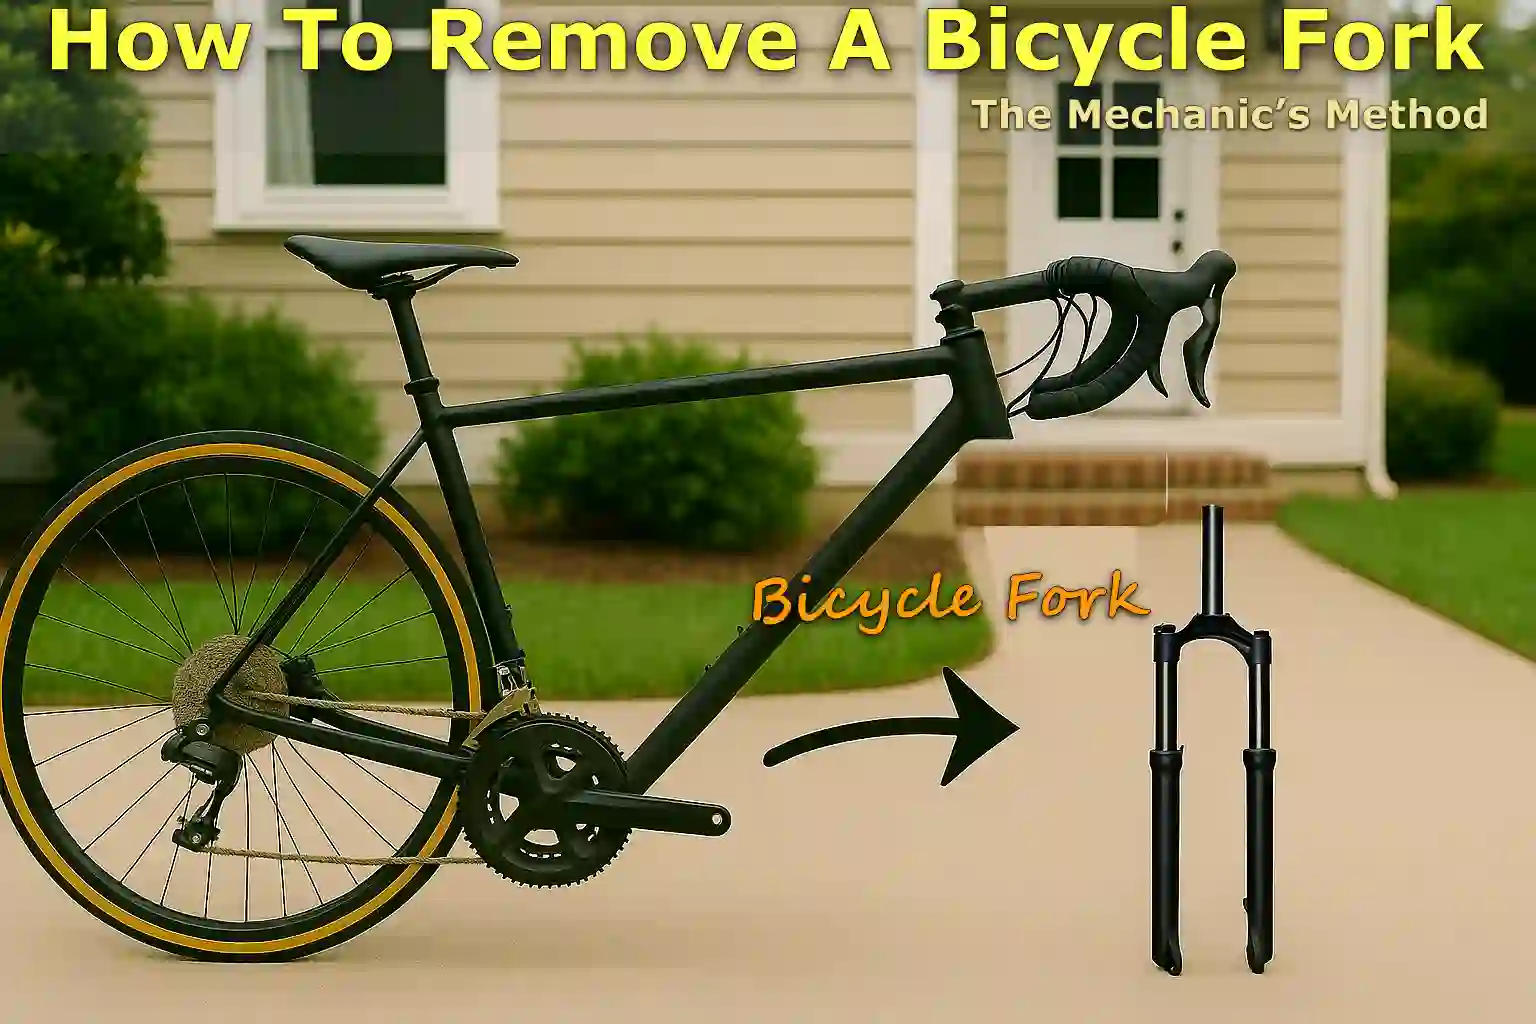
Written By: Jonathan
Fact Checked By: Caroline Dezendorf
Reviewed By: Matt Tanner
It is not actually complex thing to remove a bicycle fork, and yes it is actually very important steps as well to maintain or upgrade your bicycle.
The fork is the part of your bicycle that actually holds the front wheel and connects it to the frame via the headset and steerer tube.
That’s why it plays such a vital role in how your bicycle handles, turns and absorbs impact, so whether you’re looking to replace a damaged fork, install a lighter fork, clean headset bearings or repaint a bicycle frame:
You should learn How To Remove A Bicycle Fork in the correct and proper way, which can really save a lot of time and money too.
In terms of steering wheel problems, according to expert mechanics and cycling repair manuals, if your fork is improperly installed or poorly maintained, this is also a major cause of steering problems and uneven bearing wear.
Also, there are two types of headset systems available: most modern bicycles have a threadless headset system and older or budget models may use a threaded system, so before we begin we need to understand which key you actually have.
Tools
| Tool / Supply | Purpose | Usage Tips |
|---|---|---|
| Allen wrenches (4–6mm) | It is used to loosen stem bolts, top caps, brake calipers. | Yes, you must use the correct size so you can avoid stripping the bolts and also keep a metric set on hand. |
| Headset wrench | This is actually all that is needed to loosen the locknut on a threaded headset. | You should be aware that the thin profile wrench is fit for narrow lockrings, but is not actually needed for threadless systems. |
| Torque wrench | This allows you to correct torque when tightening the bolts during reassembly. | You can easily use it for stem bolts, top caps and caliper bolts and it also prevents overtightening. |
| Rubber mallet | It is used to gently pull out a stuck thorn or to loosen a quill stem. | You should never use a metal hammer, instead you can just tap lightly. |
| Bike repair stand | It is important to keep the bike stable during this process. | If you don’t have a bike repair stand, don’t worry about it at all, as you can turn the bike upside down by placing padding under its seat and bars. |
| Grease (bike-specific) | Lubricating headset bearings, steerer tubes and spacers. | You need to use a thin layer on all contact points, and you should also avoid over-greasing. |
| Clean rag or towel | It simply cleans the headset parts and also holds the removed bearings and spacers. | This is used to prevent small parts from getting lost, so keep several rags with you. |
| Degreaser (optional) | Yes, this is completely optional but it cleans the old grease off the headset parts before applying fresh grease. | You should only use it on metal components and avoid contact with bearings if they are sealed. |
| Penetrating oil (e.g., WD-40) | Used to loosen stuck bolts or seized stems/forks. | You can apply it around the joints and wait for 10-15 minutes before removing it. |
| Zip ties or string | It is used to temporarily move brake calipers or cables out of the way. | In fact it prevents stress on hoses or wires when removing the fork. |
| Camera or smartphone | It may be helpful to record the order of the parts during disassembly. | You should take photos of the position of the spacers and cable routing before removing the components, this will help you reassemble it. |
Tools such as cone pullers, crown race setters and torque wrenches: These are also very important for safely removing and later reinstalling the forks without damaging components.[¹]
Understand Your Fork Type
First of all you must know what type of fork and headset your bicycle actually has, and this is very basic to avoid mistakes and you can also ensure compatibility with new parts.
Threaded Vs Threadless Headset Systems
Yes, there are generally two main types of headset systems available that attach the fork to the frame: threaded and threadless.
The threaded headset is actually most often found on older bicycles or entry-level commuter models, and you can easily identify it because there is a visible top locknut available on the top of the headset and the screw inserts downward inside the steerer tube. So, basically removing it requires a headset wrench to loosen the top nut and then the quill stem is easily removed.
Threadless headsets are actually on most modern bicycles, so instead of screwing into the steerer tube, the stem clamps around it. And you’ll notice that there are several spacers and a top cap that bolts on top. Therefore threadless systems are much easier to adjust and are more commonly found on road bicycles, mountain bicycles, and newer hybrid bicycles.
In fact, most bicycles sold after the mid-1990s actually use threadless systems because they provide better stiffness, are easier to customize, and are simpler to maintain.
Suspension Fork Vs Rigid Fork
Therefore, forks also come in two main structural types: suspension and rigid, which is why knowing which one your bicycle has is ideally important for both removal and replacement.
Suspension forks have built-in shock absorbers that reduce bumps, and are commonly found on mountain bicycles and also used in some hybrid bicycles. Not only that, suspension forks are heavier as they involve internal moving parts and are also often brand-specific designs such as: RockShox, SR Suntour or Fox, and these factors affect how they will actually be removed or replaced.
A rigid fork usually does not come with a shock absorption feature, and is a solid, non-moving structure typically found on road bicycles, city bicycles, and some gravel bicycles. Yes, these are really easy to remove and are also light in weight and require really little maintenance too.
Note: Suspension forks often come with tapered or straight steerer tubes and specific crown races for the headset, and this is something you will need to match accordingly when converting them.
Compatibility Matters
If you want to replace the fork instead of removing it, you must also have a compatible one.
So you need to make sure that the following characteristics match:
- Steerer Tube Diameter and Length: Common sizes are 1”, 1 1/8”, or tapered 1.5” to 1 1/8”.
- Axle type: Which can be quick release or thru-axle.
- Brake type: disc brake vs rim brake, mounts must also match.
- Wheel size: It could be 700c, 27.5”, 29” something like this.
- Fork rake and travel: You need to make sure you match this for handling and fit too, and especially in suspension forks.
So, if you install a fork that doesn’t actually match the specifications of your bicycle frame, it can literally lead to poor handling, it can make riding conditions unsafe or even damage the frame.
IMPORTANT: You should always measure the current fork or you can also consult the specifications of your bicycle manufacturer before purchasing a new fork.
Prepare the Bicycle To Remove a Bicycle Fork
You actually have to prepare your bicycle first, because if you do it properly, it will actually ensure safety, it will prevent damage and it will also make the process easier.
1. Shift to the Smallest Chainring and Cog
You shift your bicycle to the smallest chainring on the front and the smallest cog on the rear, as this also reduces the tension on the derailleur and brake cables.
Not only that, reducing the tension actually helps to avoid strain on the cable and this makes it easier to detach the components if necessary and it also makes everything more manageable during the process.
2. Place the Bike in a Stand or Flip It Upside Down
If you want to adopt the best method that keeps the bike secured in one place then use a bike repair stand, as this keeps the frame really stable and also higher off the ground, giving you clear access to the front fork, headset and brake components.
Or if you don’t have a bike stand, you can also turn the bicycle upside down: as such it will rest on the handlebars and seat, which is a simpler option, so just make sure you place it on a towel or a soft surface so that its components are protected from any kind of scratches.
Not only is this more convenient, but it also prevents virtually any accidental slackening, and damage to the frame or fork during removal.
3. Remove the Front Wheel
Now, that your bike is fully secured, it’s time to remove the front wheel by loosening the quick release skiver or axle bolt.
So, if your bicycle uses a thru-axle, which is commonly found on newer mountain or gravel bicycles, simply use an Allen key to open the thru-axle and then simply slide it out.
Simply removing the wheel makes the fork lighter and easier to handle, as well as clearing the way for the brakes and headset to work.
4. Remove Brake Caliper or Disconnect Rim Brakes
Now, you have to disconnect the front brake or you can remove it completely, and yes it also depends on the type of bike you have:
As far as rim brakes are concerned, release the brake cable or quick-release mechanism so that it disengages the brake arms.
For disc brakes, you can use an Allen key to unscrew its front brake caliper from the fork, this is really important as the caliper is usually attached directly to the fork, this is why if you leave it alone it can actually cause stress or even scratches when you remove the thorn.
Read More:
Remove the Handlebars & Stem
To successfully remove a bicycle fork, you will first need to remove the handlebars and stem, as they are actually located directly at the top of the steerer tube and hold the fork in place.
1. Threadless Setup
If your bicycle has a truly threadless headset: found on almost all bicycles made after the mid-1990s, you’ll need to remove the handlebars and stem, which is also relatively simple.
a. Loosen the Stem’s Pinch Bolts
Now, first of all you need to loosen the pinch bolts on the side of the stem with the help of a 4mm or 5mm Allen key, as these bolts actually clamp the stem to the steerer tube, so you just need to loosen them enough so that the stem can rotate or slide upwards.
b. Remove the Top Cap and Bolt
You’ll notice at the top of the stem, that there’s a top can that’s secured by a single bolt, and it actually helps preload the headset bearings but doesn’t actually hold the fork in place, so simply use the Allen key so that you can remove this bolt and lift the cap off easily.
c. Slide the Steam Off the Steerer Tube
So, once the pinch bolts are loosened and the upper cap is finally removed, gently slide the stem in the upward direction and remove it from the steerer tube.
If it is stuck due to dirt or rust, you will need to gently turn it from side to side while pulling it upwards, make sure you do not use force or metal tools as this may be harmful to the steering.
2. Threaded Setup
So, if your bicycle actually uses a threaded headset, you’ll need to look for a locknut that sits on top of the headset bearing cup and also a piece of the quill stem inserted into the steerer tube.
a. Just Loosen the Top Locknut with a Headset Wrench
You can use a thin headset wrench or an adjustable spanner to easily loosen the upper locknut, as this nut is what actually secures the top of the bearing race and also holds the fork tightly to the frame, so just turn it anti-clockwise until it is truly free.
b. Remove the Quill Stem Carefully
So, now it’s time to loosen the bolt located at the top of the quill stem with the help of an Allen key, so gently tap the bolt with a rubber mallet so that you can loosen the internal wedge, and then pull the whole stem straight up and out of the steerer tube with ease.
You really have to be patient, as quill stems can settle in over time, especially seen on older bikes.
IMPORTANT: If you see that the quill stem is really stuck, just apply a bit of penetrating oil such as: WD-40 and then wait a few minutes before trying again, and you should always avoid turning it too hard as this can bend the stem or possibly even damage the fork.
Remove the Headset Bearings & Spacers
Now, the next important step is to safely remove the headset spacers and bearings, as these are the components that actually allow your fork to move freely inside the head tube.
1. Remove Spacers Carefully
If you have a threadless headset, you’ll probably see some circular spacers mounted on the steerer tube above or below the stem.
Because these spacers really help in adjusting the handlebar height and properly preloading the headset bearings.
So, you have to carefully slide each spacer up and remove it from the steerer tube, as it is very important to keep in mind their order and size, because when you replace them in the wrong order it can really affect both comfort and bearing performance.
So, lay them out in order on a clean towel or you can even take a quick picture on your phone which will definitely help during reassembly.
2. Gently Pull Out Bearings
Now, you’ll also be able to access the headset bearings, and yes, this also depends on your bike:
- If you have sealed cartridge bearings: Since these are self-contained units, they are very easy to remove and reinstall.
- If your ball bearings are loose: These are usually found in older or budget bicycles, and also make sure to handle them carefully to avoid losing any small balls.
So, gently tilt or tap the frame so that the fork actually comes down a bit and the upper and lower headset bearings are also exposed, and then you have to carefully pull out each of the bearings using your fingers.
Also, you’ll want to take photos of the bearings, as they are actually directional, so you’ll need to place them in exactly the right spot.
Slide Out or Remove A Bicycle Fork
Now, every component that holds the bicycle fork in place is being removed such as: spacers, stem and headset bearings, so it’s time to remove the bicycle fork.
1. Carefully Pull the Fork Downward Out of the Head Tube
Now, you will need to gently pull the fork downwards from the head tune, as the steerer tube which is the vertical part of the fork should now slide freely through the opening in the frame.
Also, it may feel a bit tight if there is grease, dirt, or old bearings stuck to it, yet you can still pull it as it doesn’t require much force.
NOTE: The steerer tube actually passes through both the top and bottom headset bearings, which is why it also supports the fork, acting as a guide, which is why it’s important for it to be removed smoothly to prevent any wear or damage.
2. Support the Frame to Prevent Damage or Sudden Drop
When you remove the fork, you’ll also need to make sure the bike’s frame is properly supported, especially if it’s on a repair stand.
Therefore, when the fork is fully extended, the front of the bicycle will not be supported and may tip forward or fall over.
And if you’re working without a stand, you can gently rest the frame on a towel or padding which will protect it from getting scratched or hitting the ground.
IMPORTANT: Therefore, if the fork is removed while the front brake or wheel is engaged, it could also pull the cables or cause sudden movement, which is why you should always remove them first.
3. If Fork is Stuck, Then Gently Tap with a Rubber Mallet
Yes, this can happen as sometimes rust, grime or a tight headset race can cause the fork to get stuck.
So, in this case, you can use a rubber mallet or your palm to gently tap the top of the steerer tube to loosen it, and never use a metal hammer or excessive force, as using a hard object can literally bend the fork or even damage the head tube.
NOTE: If you find that it still won’t budge, you should apply a small amount of penetrating lubricant around the headset area and let it sit for 10 to 15 minutes before attempting to remove the fork again.
Additionally, according to Orucase, a trusted bike-packing design company, removing a fork, including the stem, spacers, headset cover and fork, typically takes less than 5 minutes with practice, showing that this saves a significant amount of time, especially for trip packing.[²]
Conclusion On How To Remove A Bicycle Fork
You can easily remove a bicycle fork, whether you’re installing a lighter fork, inspecting for damage, or just want to have the headset cleaned and serviced.
So with this step-by-step guide on How To Remove a Bicycle Fork, you can easily start by identifying the type of headset you have, removing the stem, bearings, and finally taking the fork out.
If you wanted to ask some questions regarding this guide, then you can ask them by the commenting below this guide.
FAQ’s On How To Remove A Bicycle Fork
Q1. Can I remove a bicycle fork without a bike stand?
Answer: Absolutely, yes, you can remove the fork easily even without a bike repair stand, as you can do so easily by turning the bicycle upside down and placing it on the bike seat and handlebars.
Q2. Do I need to replace the headset bearings when removing the fork?
Answer: Not always, if you find the bearings are clean, smooth and not rusted then you can clean them and grease them for reuse.
References:
[1] Fork general information and installation guide – caution to support frame/fork during removal.
https://tech.ridefox.com/bike/owners-manuals/689/fork–general-information-and-installation-guide
[2] Fork Removal 101 – remove and reassemble headset/fork under 5 minutes.
https://www.orucase.com/blogs/news/fork-removal-101
Jonathan, the passionate owner of Bicycle Time, brings a lifelong love for bikes and automotive craftsmanship, that reflects into every corner of the shop. With deep passion in both cycling and automotive accessories, Jonathan is more than just an expert.
