 Skip to content
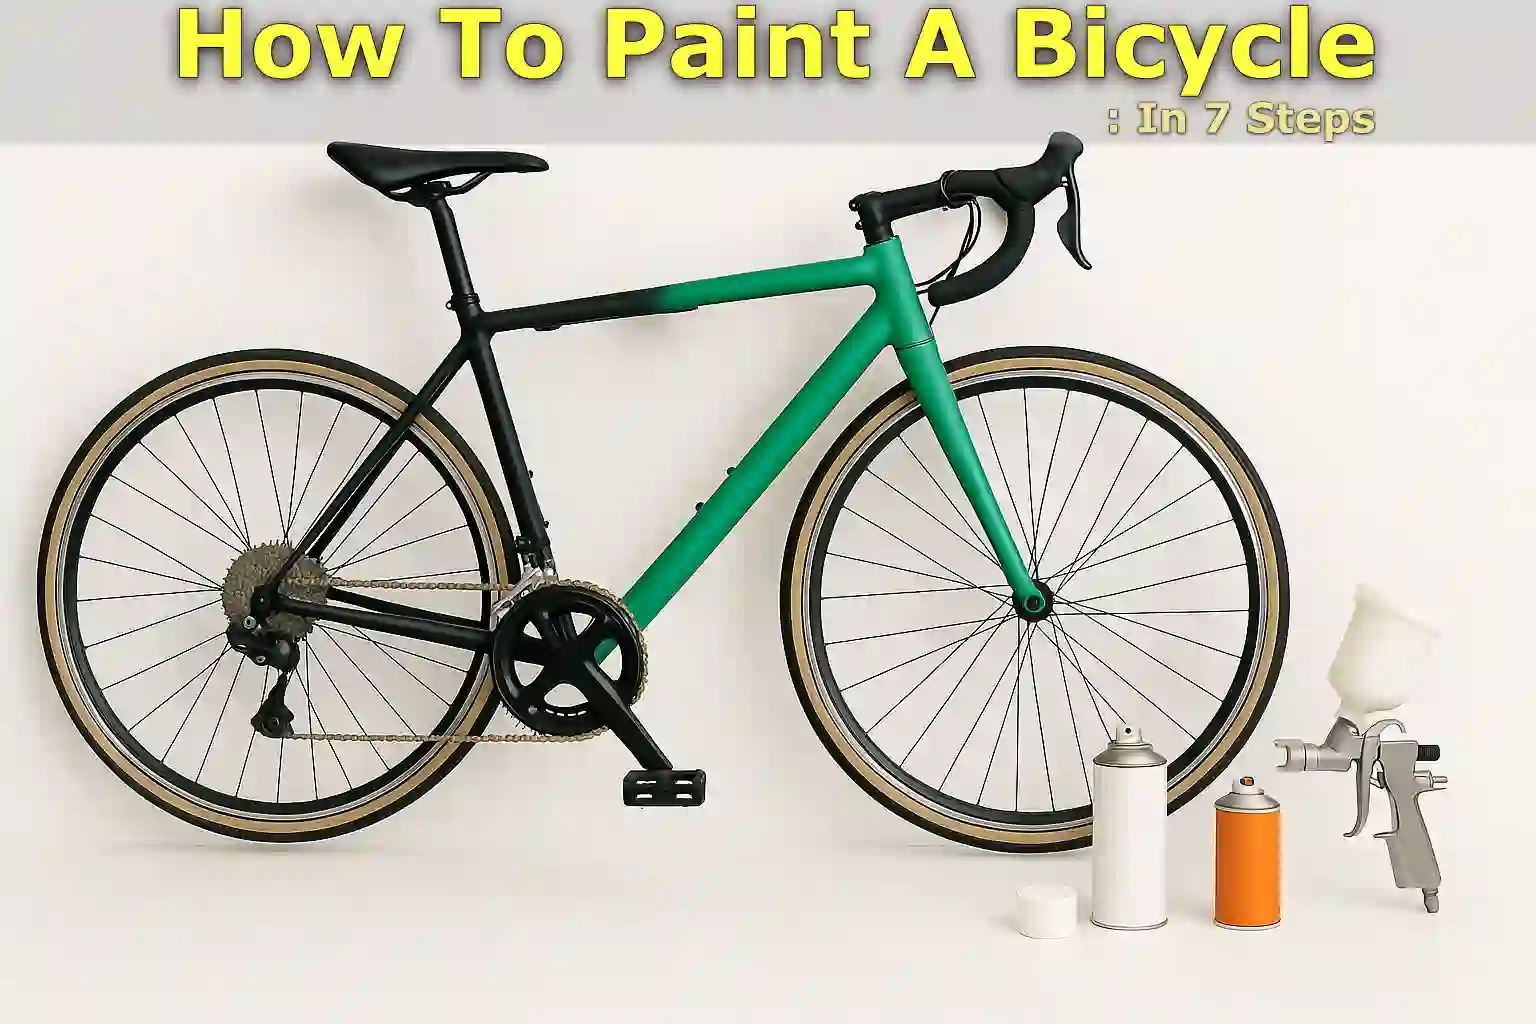
Written By: Jonathan
Fact Checked By: Caroline Dezendorf
Reviewed By: Matt Tanner
Practically speaking, painting a bicycle is a great way to restore an old frame, give it a custom look, protect it from rust and if you simply want to give your bicycle a new look.
You need to use the right method, as most bicycle frames are made of steel, aluminum or carbon fiber and each type can be painted safely with the right method.
If you get a painting job done professionally it can cost $200 or more, and it is much more economical to do it yourself at home with spray paint and a few other basic tools.
Now, this is a guide that explains the entire process on How To Paint A Bicycle, step-by-step, including preparation, painting, and reassembly so that you get a clean and long-lasting finish.
Tools to Paint the Bicycle
| Category | Item | Purpose |
|---|---|---|
| Tools | Allen keys / Wrenches | This is necessary for removing bicycle parts. |
| Screwdrivers | It is necessary to separate the smaller components. | |
| Sandpaper (various grits) | Before painting you will need to remove old paint and smooth the surface. | |
| Wire brush or sanding block | It is used to remove hardened paint or rust. | |
| Masking tape | It’s important to cover up areas you don’t want to paint and to avoid a mess. | |
| Plastic bags / Ziplock bags | It protects larger components or group small parts. | |
| Cleaning Items | Degreaser or rubbing alcohol | Yes, you will need to clean off dirt, oil, and grease. |
| Clean rags or paper towels | It is also necessary to wipe the frame. | |
| Paint Supplies | Primer (spray can) or Brush | This helps the paint stick and prevents rust. |
| Spray paint (for metal or bike-specific) | Main color coat as you wanted to change. | |
| Clear coat (optional) | This is necessary to protect the paint and increase the shine. | |
| Safety Gear | Gloves | To protect your hands from paint and everything. |
| Dust mask or respirator | You’ll need to avoid breathing in paint fumes. | |
| Safety glasses | This is actually to protect your eyes from dust or paint |
These are very easily available and cost-effective tools and materials that you can easily use to paint a bicycle.
1. Prep work: Completely Disassemble
The first and most important step is to disassemble the bicycle and “completely disassemble the bicycle”, meaning you have to remove all those parts of the bicycle that you don’t want to get painted otherwise unnecessary paint will get applied on it and it will get messy.
This actually includes the wheels, chain, crankset, handlebars and possibly also derailleurs and cables.
Yes, this is really important, as removing these parts gives you better access to the frame and allows you to perform a clean, even paint job without damaging any of the moving parts of the bicycle.
Wheels: To remove bicycle wheels you’ll need to use a wrench or quick-release lever, depending on exactly what type of bike you have.
Chain: There is a chain tool available to remove it, or you can undo the quick link if your chain has one of these: If you don’t really know how to look for the type of chain you have, just use a chain wear tool that helps you identify it easily.
Crankset: This is the part where the pedals attach, and for most bicycles, this will require a crank puller tool, you will need to be very careful when removing this crankset not to damage the bottom bracket threads.
Handlebar: Loosen and remove the handlebar with an Allen key.
Derailleurs and Cables: If your cables run through the frame consider removing them, this will give a cleaner finish and also avoid getting paint on the cable housing, yes this isn’t always necessary but it does matter.
Keep Bags: As you remove each part of the bike, you need to keep all types of bolts, nuts and small pieces in labeled bags or containers, as this will make them easier to reassemble later.
Take Clear Pictures: Yes, it really is one of the best tips to take clear pictures with your phone at every step, especially for intricate parts like the derailleur setup of brake alignment. And these pictures will definitely be very helpful when it’s time to put everything back together.
You need to take the time to clean the bike properly, this will save you from mistakes and frustration later on, and it will also help ensure that your paint job looks neat and professional.
2. Clean and Sand the Frame
Once you have completely disassembled the bicycle, it’s time to prepare the frame for painting, yes this is a very important step as paint adheres best to a clean and smooth surface.
Remove the Paint
First, you’ll need to remove any old paint or clear coat, and there are two ways to do this easily: using sandpaper or a chemical paint stripper.
Chemical Stripper: It is true that chemical stripper works faster, but you have to be very careful with it, such as using gloves and a mask in a well-ventilated area. Simply spray it on the frame and wait until the paint bubbles up, then you can easily remove it by gently scraping it off with a plastic scraper.
Sandpaper: If you want to avoid using chemicals, you have to do sanding by hand, as it is a much safer and cleaner option, just start with a coarse grit sandpaper like 80 or 120 grit, so you can easily remove paint and rust.
Then you need to use a medium grit which is around 220 grit, that will smooth out the surface, and finally you need to use a fine grit like 400 to 600 grit which creates a smooth but slightly rough texture that really helps the new paint adhere well.
NOTE: Always sand in the same direction along the tubes so you can avoid deep scratches, you can also use a sanding sponge or block to keep even pressure on the curved parts.
Clean the Frame
Now, you have to clean the frame thoroughly, as it is necessary to wipe the entire frame with a clean cloth and degreaser, rubbing alcohol, or warm soapy water to remove dust, grease, and leftover residue.
You even have to take a closer look and recognize that small particles should not be left on the surface as it can ruin your paint job later by causing bumps or peeling.
Once the frame is cleaned, let it dry completely, you can leave it to air dry or you can use a clean and dry towel, whatever you want to do it is up to you but just make sure that there is no moisture left in it.
Always remember that a clean and dry frame is the foundation of a long-lasting and really smooth painting, so you have to look after it carefully.
3. Cover The Areas You Don’t Want To Paint
Yes, it is important to protect the parts of the bicycle frame that should not be painted before you start painting.
Typically many people do not want areas where other components connect, such as threads or places with tight tolerances.
As such, if we paint in those areas it may make reassembly difficult or even damage the parts if it gets into the threads.
Bottom Bracket
Yes, you will need to remove the bottom bracket shell, you can find this area where the crankset attaches, and it has internal threads that must be stayed clean.
Head Tube
Also, you need to cover the head tube: this is available at the headset bearings and the fork connect, as even a thin layer of paint here can make it difficult to reinstall the bearings smoothly.
Dropouts
Also you will need to cover the dropouts, you will find those slots where the wheels attach, yes literally, paint buildup in that area can affect wheel alignment and make it harder to fit the wheels back on.
Threaded Areas
Also, you shouldn’t forget to cover up threaded holes, such as those for bottle cages, derailleur hangers, and brake mounts, as they may seem small to you, but paint inside the treads can prevent the bolts from being tightened properly.
Use High Quality Masking Tape
Now, you also have to use very high quality masking tape so that you can seal those areas tightly, as blue painter’s tape or automotive masking tape is available, that works best in this situation, as it sticks well but doesn’t leave any residue or peel off the paint during removal.
And for larger areas, like the inside of the frame or headset cups, that you can’t remove, you’ll need to use a plastic bag secured with tape. For example, if you want a two-tone color then you would also have to wrap the parts of the frame that do not need to be painted.
So, take your time pressing the tape firmly along the edges and joints, as this virtually prevents the paint from spreading underneath.
Yes, you have to be very careful when masking parts as this helps ensure that your final paint job looks clean and truly professional, with clear lines and no messy overspray in critical areas.
4. Apply Primer
Now, it’s time to apply the primer and don’t consider it a useless task, as this is an important step that should never be skipped while painting a bicycle frame.
Why Primer Is Important
Actually it serves two important purposes:
- This actually helps the paint adhere better to the metal body.
- Yes, it protects the frame from rust and corrosion.
Therefore, without a primer, the paint can easily crack or peel off over time, especially if the frame is exposed to sunlight, regular wear, or rain.
And before applying the primer, you must make sure that the frame is completely clean and dry, just shake the primer spray can well for at least 1 to 2 minutes so that it mixes the ingredients properly.
Now, hold the can about 8 to 10 inches (that’s 20 to 25 cm) away from the surface, and spray using light, sweeping motions.
To spray it evenly, start spraying a little above the frame and spray evenly across the frame, as this prevents pooling and really helps you avoid dripping or running.
Keep in mind not to try to cover everything in one thick coat, as this is usually a mistake.
How Many Coats To Apply
For the best possible results you will need to apply 2 to 3 thin coats of primer, and allow each coat to dry for at least 10 to 20 minutes, or check the drying time listed on the can you are using.
Just be aware that if the weather is cold or humid, it may take longer to dry, so after the final coat, you should let the primer dry for at least an hour before applying paint, or even overnight if you prefer.
Once it dries, the surface will feel smooth but slightly rough to the touch, this is helpful as it helps the paint grip better.
Just check the surface, if you see any bulges or rough spots, sand them lightly with fine-grit sandpaper, use 400 to 600 grit sandpaper, before moving on to the next step.
A well-prepared frame literally gives your paint job a strong, level base that can last longer and look more professional.
5. Spray Painting the Frame
Now, your bicycle is ready as it is prepared so now it is time to apply the main color.
Choose Right Type of Paint
Now, you have to choose the right type of paint and this is very important, and for the best possible results you need to use a spray paint designed for metal surfaces such as: automotive paint, appliance enamel or bicycle specific spray paint if you can find any.
And yes, these paints are very durable and prevent cracking, rusting and any damage caused by the weather.
Just keep in mind that you’ll want to avoid basic craft spray paints, as they may not stick well or last under regular use.
Best Method For Spray Painting:
So, before painting you need to shake the can for at least 1 to 2 minutes so that it mixes well into the paint, and then hold the can about 6 to 10 inches away which is about 15 to 25 cm away from the frame.
Don’t start each spray just a little above the surface at first, and then use long, even strokes over the frame.
Light & Even Coats
Now, you have to make sure that the coat should be light and thin rather than a heavy coat, as it may drip, hang or even create bubbles.
Then shake the can steadily and overlap slightly each time, so as not to leave streaks or gaps.
Recommended Drying Time Between Coats
Just apply 2 to 3 coats for smooth, even coverage, and allow 10 to 30 minutes to dry between each coat—don’t rush.
In addition, it depends on the brand of paint and the weather conditions, so you should always check the instructions on the spray can for specific recommendations.
Just don’t rush this step, because if you apply the next coat too soon, the paint may wrinkle or peel later.
This takes time, and after the final coat you will need to allow the frame to dry in a dust-free and well-ventilated space for several hours or overnight.
Just do not touch or move the frame at all during this time, as getting a smooth and flat finish completely depends on technique as well as patience.
And if you notice any small paint bleeds or rough spots after drying, you can lightly sand them down with fine-grit sandpaper before applying the clear coat.
IMPORTANT: Taking your time with each coat is the key to a long-lasting and professional-looking paint job, it’s as simple as that.
6. Apply a Clear Coat
Yes, this is a completely optional step, but highly recommended, as it really helps your bicycle’s new paint last longer and look more professional.
Benefits of Clear Coat
Yes, the clear coat acts as a protective barrier over the paint, as it virtually helps prevent chips, scratches, and color fading caused by sun, rain, dirt, and regular use.
Not only that, it also provides a smooth, glossy finish that really enhances the color and makes the cycle much easier to clean.
And you don’t need to select a clear coat that must be compatible with the type of paint you used previously, just prefer the same brand if possible.
You’ll need to shake the can well before spraying, just as you did with the primer and paint before.
Now hold it 6 to 10 inches (that’s 15 to 25 cm away from the frame) and apply light, even coats.
This requires you to use long, steady strokes and avoid spraying too much at once to prevent drips or smudges.
How Many Coats To Apply
For good protection you need to apply at least 2 to 3 coats, just allow each coat to dry for at least 10 to 20 minutes and yes it depends on the product instructions and room temperature as well.
And after the final coat, you need to let the clear coat completely dry, this literally means letting it completely harden, not just dry to the touch.
Curing Times
Because most clear coats actually need 24 to 48 hours to cure, and yes, there are some high-durability coats that can take up to 7 days to reach full hardness.
Therefore, you should avoid touching or assembling the bike during this time so that its finish remains smooth and does not get fingerprints or dust on it.
So, a properly applied clear coat really preserves your hard work and gives your frame a glossy, long-lasting finish that holds up even in real-world riding conditions.
7. Reassemble the Bicycle
Once you see that both the paint and clear coat are completely dried, you can begin reassembling your bicycle.
Tips for Reattaching Parts
Just have a look at the photos you took when disassembling it earlier, it will surely help you remember where each part is and how they were attached at that time.
Start with the bottom bracket and crankset first, followed by the headset, handlebars, and fork.
You will then have to reinstall the wheels, chain, derailleurs, seats, cables, brakes, bicycle tires and other accessories one by one.
Yes, you have to take your time and work carefully, do not rush at this stage as it may lead to mistakes or messiness.
Double-Check Alignment & Tightness
When you reassemble each part, make sure everything is properly aligned and screwed down securely.
So as far as possible, use the correct tool and torque setting to avoid over-tightening or fraying the threads.
And you should pay special attention to moving parts like brakes, gears and wheels to make sure they work smoothly and don’t rub or move at all.
Yes, don’t forget to lubricate the chain, derailleurs and pivot points as this is the best time to do so, which will keep your bicycle running efficiently.
Test Ride Before Regular Use
Now, you need to take it for a short test trip in a safe, flat area to check that the brakes engage properly, the gears shift smoothly and the wheels are straight and secure.
If you feel anything loose, noisy or misaligned, simply stop and adjust it carefully, as careful reassembly ensures that your bicycle will not only look good, but will also be safe and ready to hit the road.
Conclusion
Painting a bicycle really takes time, but the end results are truly amazing, it doesn’t matter if you were looking to restore an old frame or customize your door with a new color, doing it yourself saves a lot of money and virtually gives you complete control over the look and finish.
You have to dismantle the bicycle, and prepare the surface properly and then apply the paint in thin but even layers and this way you can get a clean, durable finish that lasts a really long time.
So, that’s it for this guide on how to paint a bicycle and I’m sure it really helps you, and if you have questions just ask them in the comments below.
Frequently Asked Questions (FAQs)
Q1. Can I paint a bike without taking it apart?
Answer: Technically we can say yes, why not, but it is definitely not recommended at all, as painting a bicycle without removing the parts may lead to overspray on components such as gears, it may damage brakes and bearings or severely affect performance.
Q2. Do I need to remove all the old paint?
Answer: This is not always necessary, because if the original paint is in good condition and not chipping at all, you can sand it lightly to create a rough surface for the new paint to stick to, and if you discover it’s rusted, damaged, or the paint is peeling, it’s best to remove it altogether.
Q3. Do I really need a clear coat?
Answer: This is completely optional, but it really helps protect the paint from scratches, UV damage and all weather conditions, not only that it also gives the frame a polished finish and makes cleaning easier.
Jonathan, the passionate owner of Bicycle Time, brings a lifelong love for bikes and automotive craftsmanship, that reflects into every corner of the shop. With deep passion in both cycling and automotive accessories, Jonathan is more than just an expert.
