 Skip to content
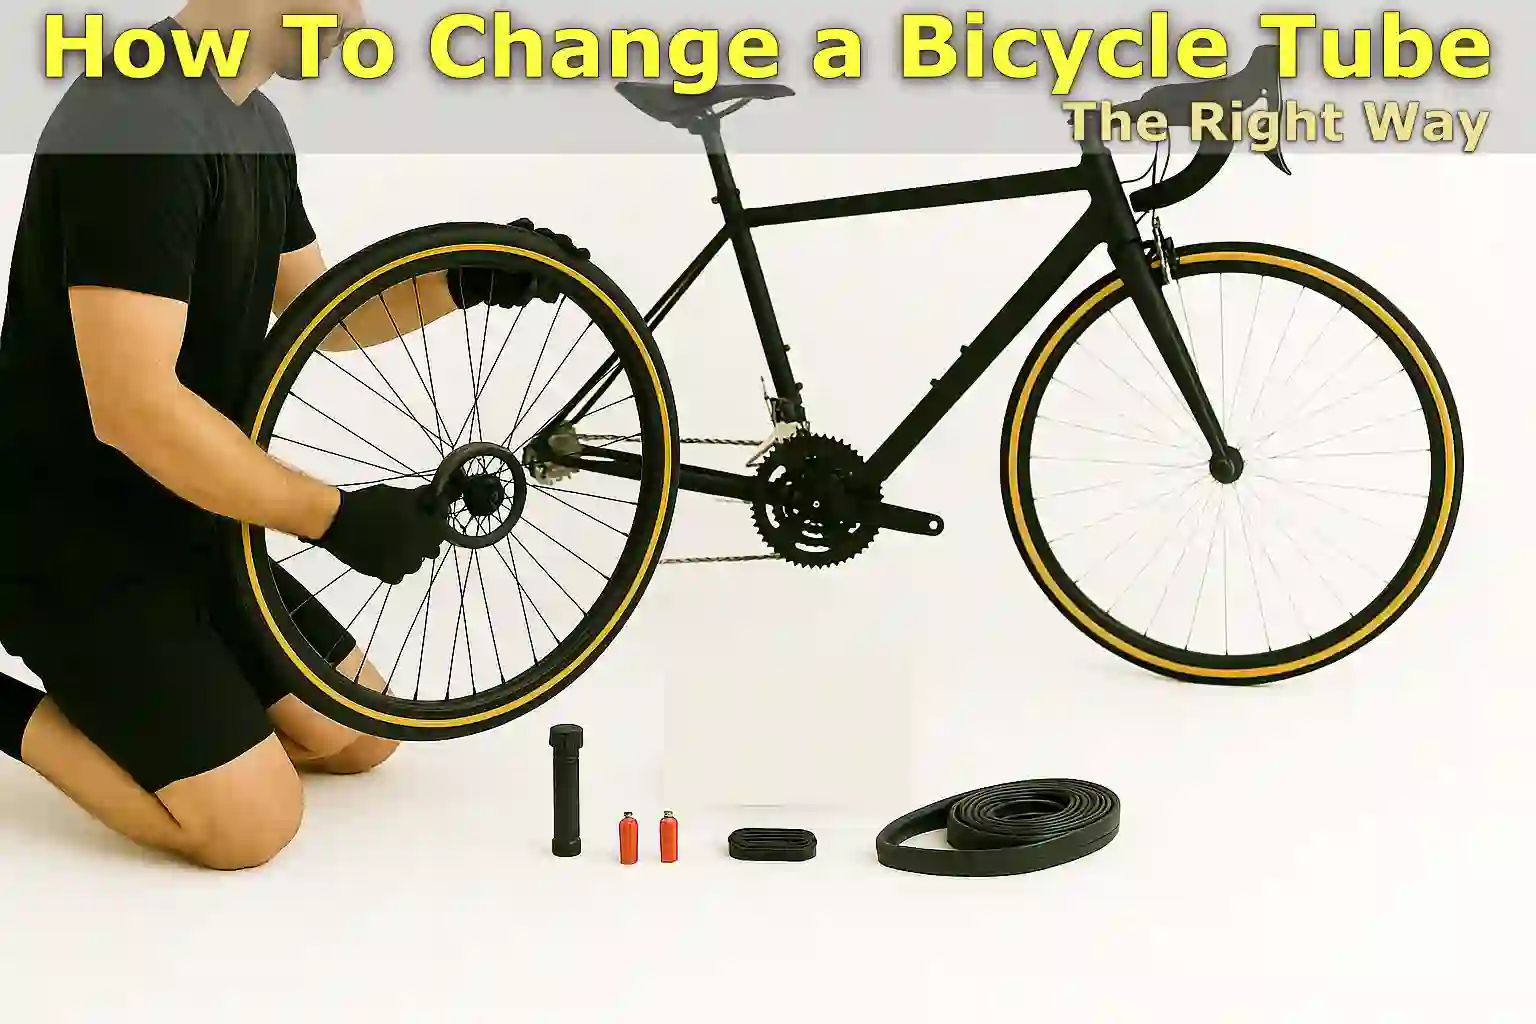
Written By: Jonathan
Fact Checked By: Caroline Dezendorf
Reviewed By: Matt Tanner
This is one of the most common problems faced by cyclists, in fact all cyclists face it.
In fact, studies show that most bicycle punctures are caused by minor punctures caused by debris such as sharp stones, glass, and thorns.
At the very least, you must learn this method on How To Change a Bicycle Tube, as it will prove to be most useful and will enhance your skills as a rider.
You don’t even need to be a professional to do it as it is actually a beginner-friendly skill that everyone should learn.
Most modern bikes use inner tubes inside the tires, and when these tubes become damaged or worn out, you have to replace them, which is pretty simple and should only take about 15 to 30 minutes if you know how to do it.
This is the guide where we will take you through everything from removing the wheel to fitting a new tube, in clear simple steps.
Averagely cyclists do experience a puncture approximately every 8 months, so you have to know this skill asap.[¹]
2. Tools & Materials
Yes, changing a bicycle tube does require tools, and it is important to have the right tools as this will make the process much quicker and smoother.
1. New Inner Tube
The inner tube is the part inside your tire that actually holds the air, it looks like a soft rubber donut.
Yes, tubes come in different sizes based on the diameter and width of your tire as well for example 700x25c or 26×2.0.
If you are not sure about the size, you can check the side of your old tyre or tube which has the size printed on it, just to make sure you get the right size: because if it is too small or too big it will either not fit at all or may burst when inflated.
2. Tire Levers
These are small and flat tools usually made of plastic for bicycles that actually help you remove the tire from the rim.
The tires fit really tightly on the wheel, so you have to use levers as this job might be difficult using hands alone.
The job of tire levers is that they gently lift the edge of the tire so that you can easily pull it off without damaging the tube or rim.
That’s why most cyclists keep two tire levers in their repair kit.
3. Bicycle Pump
When you replace or repair your tube you will definitely need to inflate the tire, so you must have a bicycle pump which is the most common tool used for this job, no matter if the bicycle pump is floor or hand held.
But just make sure it should be compatible with your valve type, as there are two types of valve types available: Presta which is thin and long valve, or Schrader which is wide and short like a car tire.
Additionally, there is a compact option available for emergency use called a CO₂ inflator that fits instantly into the tube with the help of compressed gas, but these cannot be reused unless you carry extra cartridges with you.
Read More:
4. Patch Kit (Optional)
If you don’t have a spare tube to replace at the time, or if you want to save your old tube, a patch kit can help you repair minor punctures.
In the kit you will usually find sandpaper which is used to roughen the surface of the tube, rubber glue and small patches.
Yes, these are not as reliable as new tubes, but patching them can be a temporary solution that will surely help you complete the journey home.
5. Wrench
Older models or budget-friendly bikes use axle nuts to hold the wheels in place instead of quick-release levers to hold the wheels in place.
If your bike has an axle nut then you will only need a wrench which is usually 15mm which is used to loosen and remove the wheel.
But check your bike first to know what type of wheel is fitted in your bike.
Step 1: Remove the Wheel from the Bike
It’s necessary to take the bicycle wheel off before replacing the inner tube, it’s actually quite simple once you know what to do.
So removing the wheel properly helps you access the tube inside the tyre without causing any damage.
1. Shift to the Smallest Gear
If you want to remove the rear wheel then firstly you need to shift the bike into the smallest gear on the rear cassette, this literally means turning the gear shifter until the chain is on the smallest cog, that’s it.
2. Loose Lever or Axle Nuts
Nowadays, most modern bikes come with a quick-release lever, which is actually a small metal lever located in the center of the wheel axle: So to remove the wheel:
All you have to do is unscrew the lever and then loosen the opposite side slightly by turning the nut anticlockwise.
If your bicycle does not have a quick release system, you will need to loosen both nuts by turning them counterclockwise using a 15mm wrench or an appropriately sized axle nut, and just make sure to keep the nuts and washers in a safe place because you’ll actually need them to put the wheel back on.
3. Lift the Bike or Flip It
To make this job easier, you can either lift the bicycle up slightly and support it with a repair stand if you have one, or you can turn the bicycle upside down and rest it on the handlebars and seat.
This will virtually give you better access to both wheels and will also prevent the bicycle from falling over while you work on it.
So, be careful to place the bicycle on a soft surface like grass or you can use a towel to avoid scratching the seat or handlebars.
Things to Remember
Front Wheels: Once the quick release or axle nut is loose you can easily remove the front wheel simply by pulling the wheel straight out.
Rear wheel: You will need to gently lift the chain out of the gear and slide the wheel down and then out of the dropout as well.
Rim Brakes: If your bicycle has rim brakes, such as V-brakes or caliper brakes, you will need to disconnect them first to completely remove the wheel.
Step 2: Deflate & Remove the Tire
Once you have the wheel off, the next step is to simply remove the tire so you can access the inner tube inside.
As tires fit tightly onto the rim, you must remove them carefully, which is important to avoid damaging the tube or rim.
With a little practice and the right tools, you can do this easily.
1. Deflate the Tire
Most likely your bike tire is already deflated, but if not, you will need to deflate the tire by removing all of the air from the tire’s inner tube.
Because this softens the tyre and makes it easier to remove from the rim.
Schrader Valve
This is the same type of valve you might see on car tires, so simply press the small pin in the center of the valve using a tool or your fingernail.
Read More:
Presta Valve
It is a narrow and long valve, first you need to unscrew the small brass cap on the top, and then press it down to let the air out.
If it has too much air you will hear a hissing noise, so keep pressing until all the air is out and the tyre is completely flat.
Read More:
2. Insert Tire Levers
Now, that your tire is completely deflated, simply grab the tire levers which are small, flat plastic tools specifically designed to remove tires without damaging the wheel.
So, start by simply inserting a lever between the tire bead (which is the edge of the tire) and the mile rim of the wheel.
Now, gently push the lever downward and away from the rim, so you can lift the tire bead up from the edge.
Then hook the other end of the lever onto the spoke to hold it in place.
Now, you need to take your other tire lever and repeat the same step a few inches away.
3. Off the Tire’s One Side
Once you’ve removed one part of the tire, you can easily slide the other tire lever over the edge of the rim.
This will gradually lift more of the tire off the rim, and continue doing this until an entire section of the tire is completely above the rim.
You don’t actually need to remove the whole tyre, just remove one side, this will give you full access to the inner tube, allowing you to remove or replace it easily.
Now, if you notice that the tire is stuck, do not use force to remove it, just make sure that all the air is out of it and then continue to use the levers around the wheel slowly, as most tires come out easily once a portion of the tire is removed.
Step 3: Remove the Old Tube
Now that you’ve removed one side of the tire from the rim, it’s time to remove the old inner tube.
In this step you will find out exactly what caused the tire puncture so we can make sure it doesn’t happen again.
1. Pull Out the Inner Tube
Now, you’ll need to locate the valve stem, which is actually the part that sticks through the hole in the rim and connects the tube to your pump when you want to inflate it.
Now, gently push the valve back out of the hole in the rim and carefully pull the tube out from inside the tire.
If you think the tube is stuck, just wiggle it a bit to loosen it up, just make sure you always avoid using sharp objects to pull it out as this could burst the tube or even scratch the rim.
Now, you need to slowly pull out the remainder of the tube by moving around the tire until the tube is completely free from the wheel.
2. Inspect the Tube
Once you have the tube out it is important to investigate why exactly it burst in the first place so you can repair it with a patch kit or at least understand what exactly caused the damage.
So, inflate the tube slightly with your pump, which will make it easier to spot the hole or leak.
Now, place the tube near your ear or cheek and listen or feel the air coming out.
You’ll need to look out for small cuts, holes or wear spots: as these are really common causes including sharp debris, tire wear or holes caused by improper installation, also known as “snake bite” holes.
3. Check Inside the Tire
Before inserting a new tube, you should always inspect the inside of the tire, as many people skip this step and later end up with a second puncture because the object that caused the first puncture is still stuck inside the tire.
- So, yes, you will have to gently run your fingers over the inner surface of the tire and be very careful to avoid cuts.
- Simply check and feel for sharp objects like small pieces of glass, metal wires, thorns, or nails.
- If you actually find any, use tweezers or a small tool to remove them completely.
- Not only that, you should also check the rim strip which is a rubber or fabric layer that covers the spoke holes inside the wheel, so that you can be sure that it is in its place and not damaged at all: and if you see that it is torn or missing, the spokes can re-pierce the new tube from the inside.
Step 4: Install the New Tube
Now that you’ve removed the old inner tube and the tire is free of sharp objects, it’s time to install the new tube.
1. Slightly Inflate the New Tube
Before inserting the new tube into the tire, you need to inflate it slightly so that the tire takes shape, but is still soft and bendable.
Yes, it matters because:
A tube with some air inside it is much easier to fit evenly inside the tyre.
Plus, it’s less likely to have bends or twists, which could later lead to air leaks or flattening.
Plus, you can get a better feel for its condition when you place it in the tire.
Therefore, you can slowly add a small amount of air using a pump, which is usually only enough to fill 10 to 20% of its full capacity.
2. Insert the Valve
Now, you first need to place the valve stem of the new tube into the valve hole that is available in the rim, as this will hold the tube in place and it will also serve as your starting point.
Yes, the valve must be straight and not bent under any circumstances, as a bent valve can tear the tube over time.
And if you’re using a Presta valve, tighten the small lock nut on the trim that loosely secures it in place.
If you’re working with a Schrader valve just make sure it’s seated snugly and pointing straight out.
3. Tuck the Rest
Once you have the valve in place, now begin gently inserting the remainder of the tube into the tire around the wheel.
Just start near the valve and work your way up either side, making sure the tube isn’t bent or bunched up anywhere, and that the tube sits evenly inside the tire, meaning it shouldn’t stick out over the edge of the rim.
You should always take extra care near the valve, as this is the area that is more delicate and prone to damaging the tube.
Also, you can gently press the tube into the tire using your fingers, but avoid using sharp tools as they could accidentally puncture the tire.
Step 5: Reinstall the Tire
Now, you have the new inner tube properly placed inside the tire and then the next step is to put the tire back on the rim.
1. Work the Tire onto the Rim
Now, the inner edge of the tire is the tire bead which sits tightly inside the wheel rim.
So, you need to start on the opposite side of the valve and then use your thumb to push the tire bead onto the rim.
And then work evenly around the wheel, just pushing the bead into more space with each motion.
So, try to end it near the valve itself, as it will be much easier to adjust the tube if necessary.
The safest way to reinstall the tire is to use your hands because this helps you feel if the tube is in the right place.
While most tyres can be fully seated with just your hands, the last few inches may feel a little tight.
Read More:
2. Use Tire Levers Only
If the end of the tire bead feels too tight to push by hand, you can use a tire lever, but be sure to do this very carefully.
First, insert the lever under the bead and then slowly raise it above the rim, and then keep the lever close to the rim and do not go too deep, as you may accidentally pinch it or even puncture the tube.
Clamping the tube is one of the most common mistakes when using tire levers, so you’ll have to do this with your hands first, especially if the tube is not completely inside the tire.
3. Check Both Sides
Before you inflate a tire, you should double-check that the tire tube is not stuck between the tire and the rim, as there is a high chance this will happen, called “pinching,” and the tube could burst when you inflate the tire.
Carefully inspect both sides of the wheel and gently rotate the wheel to make sure the tube is completely inside the tire and not sticking out anywhere.
Now, you have to pay special attention near the valve area, as there are higher chances of the tube moving out of place easily.
Remember that a pinched tube can literally cause a “pinch flat” or “snakebite puncture”, this occurs because when the tube gets pinched between the tire and the rim it creates two small holes that look like snake bites.
Step 6: Inflate the Tire
Once you have reinstalled the tire, all you have to do is inflate it correctly.
1. Inflate to the Recommended PSI
Yes, it is necessary to inflate tires only to the recommended PSI, as this is the pressure limit that is measured in PSI range, you can find this number printed on the sidewall of the tire, something like “Inflate to 40 to 65 PSI” or “Maximum pressure: 100 PSI.”
Therefore, you have to use a bicycle pump with a pressure gauge that will help you inflate the tire correctly, and just don’t inflate it too much, as it can literally burst or damage the tire completely, generally road bike tires require 80 to 130 PSI and while mountain bike tires usually require 30 to 50 PSI, so inflate it accordingly.
When you inflate your tyres to the correct PSI value, it ensures optimum performance, safety, and comfort while riding.
2. Check for Even Seating
When you begin inflating a tire, you should stop when it becomes slightly firm, which usually occurs after adding 10 to 20 PSI, and then inspect the tire bead on both sides of the wheel.
Because we have to make sure the tire bead sits evenly inside the rim and isn’t bulging out or warped.
Also, a properly seated tire should look perfectly symmetrical on both sides with no part of the inner tube showing.
Also, if you feel the tyre feels uneven then deflate it a little and then adjust it by pushing it evenly into the rim.
Yes, you have to, as improper seating can actually cause a “blowout”, where the tube slips out of the rim and bursts during full inflation.
3. Listen for Hissing or Leaks
When you fill the tyre with air, listen carefully for any hissing noises, as this could be a sign that air is escaping the tube for a number of reasons, such as: There may be a small puncture or cut in the tube, which could be caused by improper valve connection or a problem with the valve core, or the tube may be pressed under the tire bead.
Therefore, when you hear such a hissing sound, stop inflating immediately and re-check the tube and tyre seating as well.
If everything is normal and the tire is firm at the correct pressure you’re done, great.
Step 7: Reattach the Wheel
Once you have successfully inflated the tire and secured it, it’s time to reattach the wheel to your bicycle.
1. Place the Wheel
You will need to carefully put the wheel back into the dropouts which are actually the slots on your bike frame where the wheel axle actually fits.
Front Wheel
If you are re-installing the front wheel then lift the fork up a little and position the axle evenly on both sides of the fork and that is it.
Rear Wheel
You’ll need to make sure your bike is in the lowest gear possible and then carefully lift the chain into that gear while aligning the axle with the dropouts, so these are the things you’ll need to do when you reassemble the rear wheel.
Just be patient and double-check that the axle is fully seated on both sides of the frame before tightening anything.
2. Tighten Quick Release or Axle Nuts
Now, there are different things you’ll need to do to secure the wheel depending on what type of wheel or axle your bicycle has:
Quick-Release Lever
If your bicycle has a quick-release skewer, you need to ensure that the lever is open and thread the nut in the opposite direction until it is properly tightened.
Then close the lever firmly, as you should feel resistance when closing.
Also, it should leave a clear impression on your palm when closed, just make sure the lever should be pointing upwards or backwards to avoid getting stuck in objects during your ride.
Axle Nuts (Bolt-On Wheels)
If your bicycle actually uses a bolt-on axle, use a wrench, usually 15mm, to tighten the nuts evenly on both sides.
And just make sure the wheel is in the middle of the fork or chain stay before tightening it completely.
So, just tighten it firmly but you have to be very careful not to strip the threads by over-tightening it.
3. Spin the Wheel
Once you have the wheel reattached safely and correctly, you will need to make sure that it moves freely and straight.
So, check the bicycle by gently lifting it and then spinning the wheel to make sure it is moving smoothly, without any wobble.
Then just check that the tyre isn’t actually rubbing against the frame, brakes or fork at all.
And if you notice that the wheel is crooked, loosen it and reposition it, then tighten it again evenly.
And for the rear wheels, you also need to check that the chain is running smoothly on the gears, because if your derailleur or chain has shifted slightly when changing a wheel, simply make minor adjustments to realign them smoothly.
Common Issues
Even when you replace a bicycle tube carefully, you may sometimes run into problems that can be really frustrating, so let’s understand about these common issues and learn how to fix them easily.
1. Tube Keeps Pinching
If you find that your bicycle tube gets pinched or damaged during installation, loose and creases inside the tire could be the main reason why this happened.
So, to prevent this, you need to partially inflate the new tube before inserting it into the tire, to about 10% to 20% of its full pressure.
Since, this gives the tube some shape, making it easier to fit it evenly inside the tire without bending or twisting it.
Also, remember that a tube that holds its shape is less likely to get caught between the tire bead and the rim, and this actually helps reduce the chance of painful pinch flats or punctures.
Otherwise, You have to be sure that inner tubes can be actually last between 2 to 4 years of 2,000 to 5,000 miles and yes it does depends on usage and conditions as well, You will also have to keep this in mind as this can be the reason as well.[²]
2. Tire Won’t Seating Properly
It sometimes happens that after reinstalling the tire, you find that it does not sit evenly on the rim or feels bumpy, so you need to check these things to make sure that is not the case:
There may be a bend in the tire or tube, which means a part of the tire isn’t aligned properly, so just carefully remove it and then reinstall the tire and tube so everything is straight and smooth.
Not only that, you also need to check for damage to the rim such as dents, bends or broken spoke holes, as this can also prevent the tyre bead from seating tightly.
So inspect the rim carefully and if you find it is damaged then it may need professional repair or replacement to ensure a truly safe journey.
3. Slow Leaks After Install
If you notice that even your new tube is slowly losing air over time, a small puncture or a slow leak could be the cause.
This often happens because you may have missed a sharp object such as a thorn, piece of glass, or small metal fragment during tire inspection.
So, simply remove the tire and tube again and carefully check for any debris hidden inside the tire.
Also, use a patch kit to fix minor leaks or replace the tube if the damage is too severe.
Not only this, you also need to check the rim strip that is covering the spoke holes inside the wheel, and if it is damaged or moved out of place then it can cause punctures from inside as well.
Conclusion On How To Change a Bicycle Tube
When you need to replace a bicycle tube, you need to have the right tools and know the clear steps, which is the key to doing it safely and easily.
So, this is the guide on How To Change a Bicycle Tube, now you have understood the different types of parts that are involved in this process such as: tyre, tube, valve and rim.
Plus, if you have successfully patched tubes multiple times, then you will have many recommend limiting patches to two per tube to avoid unexpected failures during rides.[³]
Now only with that said, you will already know how they work together which helps you prevent common problems like flats and pinch punctures.
If you have any queries regarding this guide, you can contact us by commenting below.
FAQ’s On How To Change a Bicycle Tube
1. How often should I change my bicycle tube?
Answer: You should only replace a tube when it has a puncture that cannot be patched or when it shows signs of wear such as cracks, brittleness or multiple leaks. Therefore, tubes usually last for many years if properly cared for.
2. What causes a tube to get pinched?
Answer: When the tube becomes trapped between the tire bead and the rim during the installation process, it can literally cause tiny tears and flats, often referred to as “pinch flats” or “snake bites.”
References:
[1] Muc-Off releases puncture survey results to launch tubeless information hub. https://bikebiz.com/muc-off-releases-puncture-survey-results-to-launch-tubeless-information-hub/
[2] Bike inner tubes: definition, materials, types, sizes, and how to choose. https://rinascltabike.com/bike/parts/tires/inner-tubes/
[3] What is the maximum number of pucture repairs an inner tube can take? https://bicycles.stackexchange.com/questions/770/what-is-the-maximum-number-of-pucture-repairs-an-inner-tube-can-take
Jonathan, the passionate owner of Bicycle Time, brings a lifelong love for bikes and automotive craftsmanship, that reflects into every corner of the shop. With deep passion in both cycling and automotive accessories, Jonathan is more than just an expert.
