 Skip to content
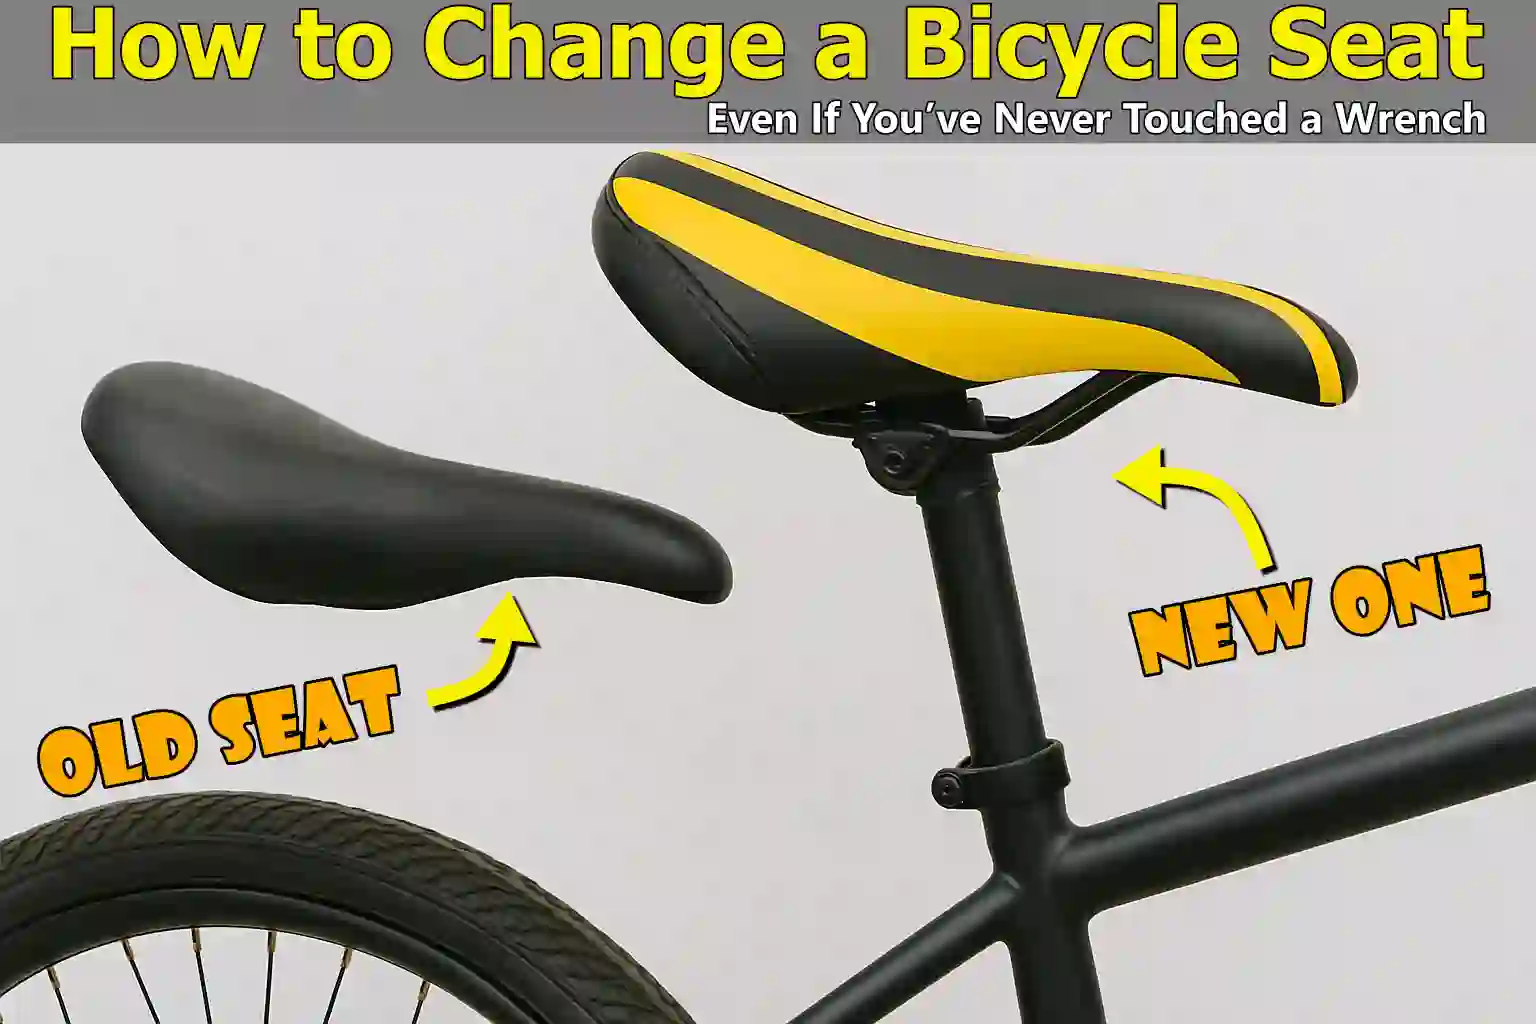
Written By: Jonathan
Fact Checked By: Caroline Dezendorf
Reviewed By: Matt Tanner
When you change your worn out, bent or totally uncomfortable bicycle seat then it actually makes a huge different in your comfort, posture and also overall riding experience greatly enhances and for long rides it is like heaven.
In fact, studies show that bicycle seat discomfort is one of the top three reasons why new cyclists stop cycling regularly.
This is why if your seat is not adjusted properly or is old, it can cause numbness, lower back pain, or even knee strain during long journeys.
And believe it or not, replacing a bicycle seat is a straightforward process that doesn’t really require any kind of advanced tools or skills: that’s why all you need is a little bit of guidance and the right steps to follow.
So, whether you are looking to replace your bicycle seat and upgrade it to a better performing bicycle seat, switch to something more ergonomic or replace a damaged seat, you need to know the proper procedure and step-by-step instructions and this guide tells you How to Change a Bicycle Seat and you will also know how to adjust them.
Tools
| Tool / Material | Purpose / Description |
|---|---|
| Allen Wrench (Hex Key) | In fact most bicycle seat clamps use 5mm or 6mm bolts; which are basically used to loosen and tighten the bicycle seat bolts. |
| New Bicycle Seat (Saddle) | Simply choose a seat that suits your riding style and it should be fully compatible with your bike’s seatpost. |
| Bike Grease (Optional) | Also, you need to apply a small amount of grease on the clamp bolts or rails, this will help prevent rust and stiffness. |
| Torque Wrench (Optional but Recommended) | A torque wrench is actually optional, but it ensures that bolts are tightened to the manufacturer’s recommended torque settings, which is specially important for carbon components. |
| Cleaning Cloth or Rag | Cleaning is very important and a cleaning cloth or rag is really useful for wiping off dirt or grease from the seatpost and clamp area prior to installation. |
| Spirit Level or Smartphone App | This really helps you align the bicycle seat perfectly flat or at your preferred incline. |
| Bike Stand (Optional) | This is actually an option, but if you already have it you might as well use it as it keeps your bicycle stable while you work, making the process easier and safer. |
How to Prepare Your Bicycle Before Changing Your Bicycle Seat
1. Give Your Bicycle Really Stable
Yes, it is very important to keep your bicycle in a really stable and safe position.
And to do this easily you can use a bicycle repair stand if you already have one: because it raises your bicycle off the ground and it keeps it completely stable and thus makes the job much easier.
Not only that, if you don’t have a bicycle repair stand then you can either lean the bicycle against a wall or turn it upside down by placing it on the handlebars and the bicycle seat and you just have to make sure that it is placed on a soft surface like: grass or you can even use a towel.
This step is really important, as it helps prevent your bicycle from tipping over when removing or installing the seat, as this could cause injury or even damage.
2. Take Note of the Current Bicycle Seat: Height, Tilt and Fore-Aft
When you’re going to remove the old seat, first take a look at what condition it’s in, as there are three main aspects to pay attention to: height, tilt and fore-aft position.
- Height: You really need to know how far the seatpost extends from the frame, as this really affects your pedaling efficiency and comfort too.
- Tilt: This is essentially the angle of the bicycle seat, as a flat seat is common, but some riders actually prefer a slight forward or backward tilt as well.
- Fore-Aft Position: This basically depends on how far forward or back the bicycle seat sits on the rails relative to the bottom bracket, and this really affects your balance and knee alignment too.
So, these are the adjustments that directly affect your posture, comfort, and even risk of injury, and that’s why we’ve covered them all.
It’s very important that you position your new bicycle seat as close to the original setting as possible, which is actually a smart starting point, specially if the old position was already comfortable for you.
NOTE: A recent laboratory study showed that when you move the bicycle seat too far back: even by only 10%, it significantly reduces comfort and it also alters the dynamics of the hip, knee and ankle,So you have to be very careful specially at higher effort levels.[¹]
3. Take a Photo: Optional But Effective
It can be incredibly helpful when you take a quick picture of your current bicycle seat setup from the side, as this visual reference actually allows you to easily replicate the exact height, angle, and setback when installing the new seat.
And this is specially useful if you want to make minor changes after installation, as most smartphones are capable of capturing all the necessary details and you’ll be happy to have something to compare during and after the process.
Read More:
How to Remove the Old Bicycle Seat First
1. Identify the Seatpost Clamp Type
Now, before you start loosening anything, just pause for a moment and identify what type of seat clamp your bicycle actually uses.
As the seatpost clamp is actually the mechanism that holds the bicycle seat rail securely in place and it can actually vary depending on the design and quality of the bicycle.
Also, the three most common types are: single-bolt clamps, double-bolt clamps, and integrated clamps.
Single-Bolt Clamp
In fact this is the most common type found on entry level or older bicycles, and it actually uses a bolt under the bicycle seat to tighten the clamp.
And it’s much simpler to make some adjustments with it but it can also be less accurate.
Double-Bolt Clamp
It is found on many mid-range to high-end bicycles or older bicycles.
Also, this system basically uses two bolts: front and rear, and it does indeed provide more precise control over the angle and position of the bicycle seat, but it also requires both bolts to be tightened equally.
Integrated Clamp
Some bicycles, particularly seatmast-style frames or some aero seatposts, actually come with integrated bicycle seat clamps, built into the post design.
These may look really different, but their function is essentially the same: to keep the rail firmly secured in place.
So, when you understand what type you actually have, it affects how you will loosen and adjust the bicycle seat and what tools you will need, which is why it is really important to know.
2. Loosen the Bicycle Seat Clamp
Now, once you’ve identified exactly what type of clamp you have, it’s time to remove the old bicycle seat.
As most bicycles use a 5mm or 6mm Allen wrench/hex key for this step.
But you need to carefully insert the tool into the bolt/bolts underneath the bicycle seat and then turn it anti-clockwise to loosen it.
Also, if you’re working with a double-bolt clamp, you actually have to loosen both bolts equally, just enough to free the bicycle rail: but you have to make sure you don’t remove them completely unless it’s really necessary.
So, when you loosen the bolts, keep one hand on the bicycle seat to prevent it from falling or breaking.
Also, when the rail is completely free, you will need to gently pull or lift the old seat out of the clamp groove.
Also, you have to be very careful not to put too much stress on anything, specially the carbon seatpost or bicycle seat rails, as these are components that can break if excessive pressure is applied.
Plus, After removal it is a good idea to quickly inspect the clamp area for any possible dirt, rust or grease buildup: so if you find one, wipe it clean with a dry cloth, so that later when you install the new bicycle seat, you can work with a completely fresh surface.
Read More:
How to Install the New Bicycle Seat Properly (Step-By-Step Guide)
1. Insert the New Bicycle Seat Rails into the Clamp
You’ll need to carefully insert your new bicycle seat rail into the groove of the seatpost clamp.
As these grooves are actually designed to hold the bicycle seat rails securely in place, you also need to make sure that both rails are fully seated and aligned evenly: because the tracks must be parallel to each other and fit snugly within the clamp tracks.
And then you have to center the bicycle seat from left to right, as a centered bicycle seat actually helps in ensuring proper balance and even proper pressure distribution while cycling.
Also, if it is really offset too much to one side, it can cause discomfort or strain over time, which is why you have to get it aligned properly now which will actually save you from unnecessary adjustments later.
2. Adjust Tilt and Position
So, once the bike seat is in the clamp, it’s time to set the tilt/angle and fore-aft position as well:
a. Level the Bicycle Seat
Therefore, you will need to use a small spirit level that is placed on the upper surface of the bicycle seat or a smartphone app with a level function.
Because a flat bicycle seat is the starting point recommended by most bicycle fitters.
From there, you can adjust it a little forward or backward later as convenient.
b. Adjust the Fore-Aft (Forward & Backward) Position
Now, what this really means is how far back the bicycle seat sits in relation to your bottom bracket, from front to back.
A general guideline is to align the bicycle seat so that when the crank arms are horizontal, a vertical line from the front of your knee falls roughly through the pedal axle, also known as the “knee-to-pedal spindle” or KOPS rule.
And this improves pedaling efficiency and also reduces stress on joints.
c. Set the Bicycle Seat Height: Approximately
So, if you have actually marked or measured the previous bicycle seat height during preparation, now is the time to match it with that data.
Therefore, you can also estimate the correct height by making sure your leg is almost fully extended at the bottom of the pedal stroke: but with a slight bend in the knee, around 25° to 30°.
Additionally, having a bicycle seat that is too high or too low can also cause discomfort or knee pain.
In addition, a comprehensive 2024 review found that bicycle seat position does indeed affect lower back pain, knee problems, and perineal numbness, but studies vary widely, so there are several ways to reduce future injury risk, You should install the new bicycle seat according to your previous arrangement and adjust slowly.[²]
Also, for female cyclists, a wider bicycle seat is required: it should be 1 cm wider than the ischium width, as this leads to a significant reduction in the average and maximum pressure, resulting in a better level of comfort while riding.[³]
3. Tighten the Clamp Bolts
Once the bicycle seat is placed in the correct position and aligned, carefully tighten the clamp bolts.
Begin slowly turning each bolt in a clockwise direction to secure the rail, but do not overtighten yet.
- If your bicycle has a double-bolt clamp, you will actually need to tighten both of these bolts slowly and evenly, so that you can easily switch between a few turns at a time to maintain balance.
- And if you have a carbon seatpost or bicycle seat rails, it is extremely important to follow the manufacturer’s torque specifications, which are usually measured in Newton-meters. So, avoid over-tightening as this can break even lightweight components.
Now, if you actually have a torque wrench, this is the perfect time to use it: because it virtually ensures that you’re tightening the bolt to the exact recommended pressure, which for most clamps is typically between 5 and 7 Nm.
And if you don’t have one you can also tighten it firmly by hand, but if you feel resistance or see the clamp becoming flexible then stop tightening it.
Read More:
How to Tune The Bicycle Seat Position
1. Take a Test Ride and Note Any Discomfort
So, once you have properly installed your new bicycle seat, the most important next step is to take your bicycle on a short test ride: ideally around 10 to 15 minutes on familiar terrain.
And during this ride, you really need to pay attention to how your body is feeling, specially in areas like your lower back, buttocks, thighs, knees, and hands.
If you feel any discomfort, numbness or pressure then this is a sign that the bicycle seat may need a complete tune up.
Just remember: even a high-end bicycle seat can feel uncomfortable if not properly adjusted, which is why not only is a test ride recommended, but it’s also essential to identify what needs improvement before embarking on a long-distance ride.
So, tests conducted with trained cyclists actually show that a 5° forward tilt while climbing a 15% hill significantly reduces bicycle seat pressure and ideally also increases comfort, which is actually a good thing to consider.[⁴]
2. Make Small Adjustments to Tilt, Height or Setback
After your initial ride, it’s time to determine the bicycle seat position based on how it felt to you: tilt/angle, height, and fore-aft/setback.
a. Tilt/Angle
A bicycle seat that is tilted too much upward can cause pressure on soft tissues, while one that is tilted too much downward can cause you to slump forward and then put too much pressure on your hands and wrists.
As this should be a neutral and level position, this is usually ideal, but a slight downward tilt of 1 to 2 degrees can actually help relieve pressure in some cases as well.
b. Height
If your bicycle seat is too high, you may feel like you’re rocking from side to side or putting more force on the bottom of the pedal stroke.
And if it’s too low, you may feel cramps or knee pain, so simply adjust the seat height in small increments, say 2 to 3 mm at a time and test again.
c. Fore-Aft/Setback
Simply slide the bicycle seat slightly forward or backward, this will distribute your body weight and activate your leg muscles.
Here’s a small adjustment that can improve pedaling efficiency and balance.
NOTE: You should always make only one adjustment at a time, and retest with another short ride, as it is this step-by-step approach that allows you to feel the difference and find your personal “perfect spot” without guessing.
3. Recheck Bolt Tightness After a Short Ride
Now, that you have completed your ride and you have to make final adjustments, it is important to re-check all the bicycle seat clamp bolts.
Bicycle seats can actually slip a bit during initial use, particularly if the bolts are not fully seated or if there is grease or even vibration.
If you have an Allen wrench or a torque wrench, you can use that, just tighten the bolts gently to the recommended torque setting, as this step really ensures that your bicycle remains secure and does not gradually tilt or slip even during regular use.
Check the bolt tension regularly, specially after the first few rides with the new seat, as this is a good maintenance habit that can prevent long-term problems, such as: bicycle seat sagging or premature wear of components.
Conclusion On How to Change a Bicycle Seat
When you install a bicycle seat correctly, you have not only upgraded the component, but you have actually changed your overall cycling experience such as: comfort, posture and performance.
Remember that a well-fitted bicycle seat can greatly reduce fatigue, prevent joint stress and it literally makes every ride more comfortable and enjoyable, whether you’re cycling for fitness, commuting or adventure.
So, this is the guide on how to replace a bicycle seat, and now you can comment below for more questions and answers.
FAQ’s On How to Change a Bicycle Seat
Q1. Is it normal for a new bicycle seat to feel uncomfortable at first?
Answer: Yes, it is quite normal that it may take a few rides for your body to really adjust or for the bicycle seal foam to adjust a bit. However, if you feel pain for a long time, it is actually a sign that the bicycle seat is not right for your anatomy or riding style as well.
Q2. What’s the difference between men’s and women’s bicycle seat?
Answer: Men’s and women’s bicycle seats actually differ in width, shape and pressure relief channels, also taking into account anatomical differences. Like women’s bicycle seats, these are usually wider at the back and may also have a shorter nose. However, bicycle seat fit is a very personal thing: many riders find a unisex model that works best for them.
References:
[1] Changes in saddle setback and intensity affect comfort and lower limb kinematics in recreational cyclists
https://www.nature.com/articles/s41598-025-09649-w
[2] Vigário, P.C.; Ferreira, R.M.; Sampaio, A.R.; Martins, P.N. Effects of Saddle Position on Cycling: An Umbrella Review. Physiologia 2024.
https://www.mdpi.com/2673-9488/4/4/32
[3] Lin ZJ, Wang HH, Chen CH. The Effect of Bicycle Saddle Widths on Saddle Pressure in Female Cyclists
https://pmc.ncbi.nlm.nih.gov/articles/PMC10499128/
[4] Hynd, J., Cooley, D., & Graham, M. (2018). Saddle tilt during uphill cycling improves perceived comfort levels, with corresponding effects on saddle pressure in highly trained cyclists. Journal of Science and Cycling.
https://www.jsc-journal.com/index.php/JSC/article/view/352
Jonathan, the passionate owner of Bicycle Time, brings a lifelong love for bikes and automotive craftsmanship, that reflects into every corner of the shop. With deep passion in both cycling and automotive accessories, Jonathan is more than just an expert.
