 Skip to content
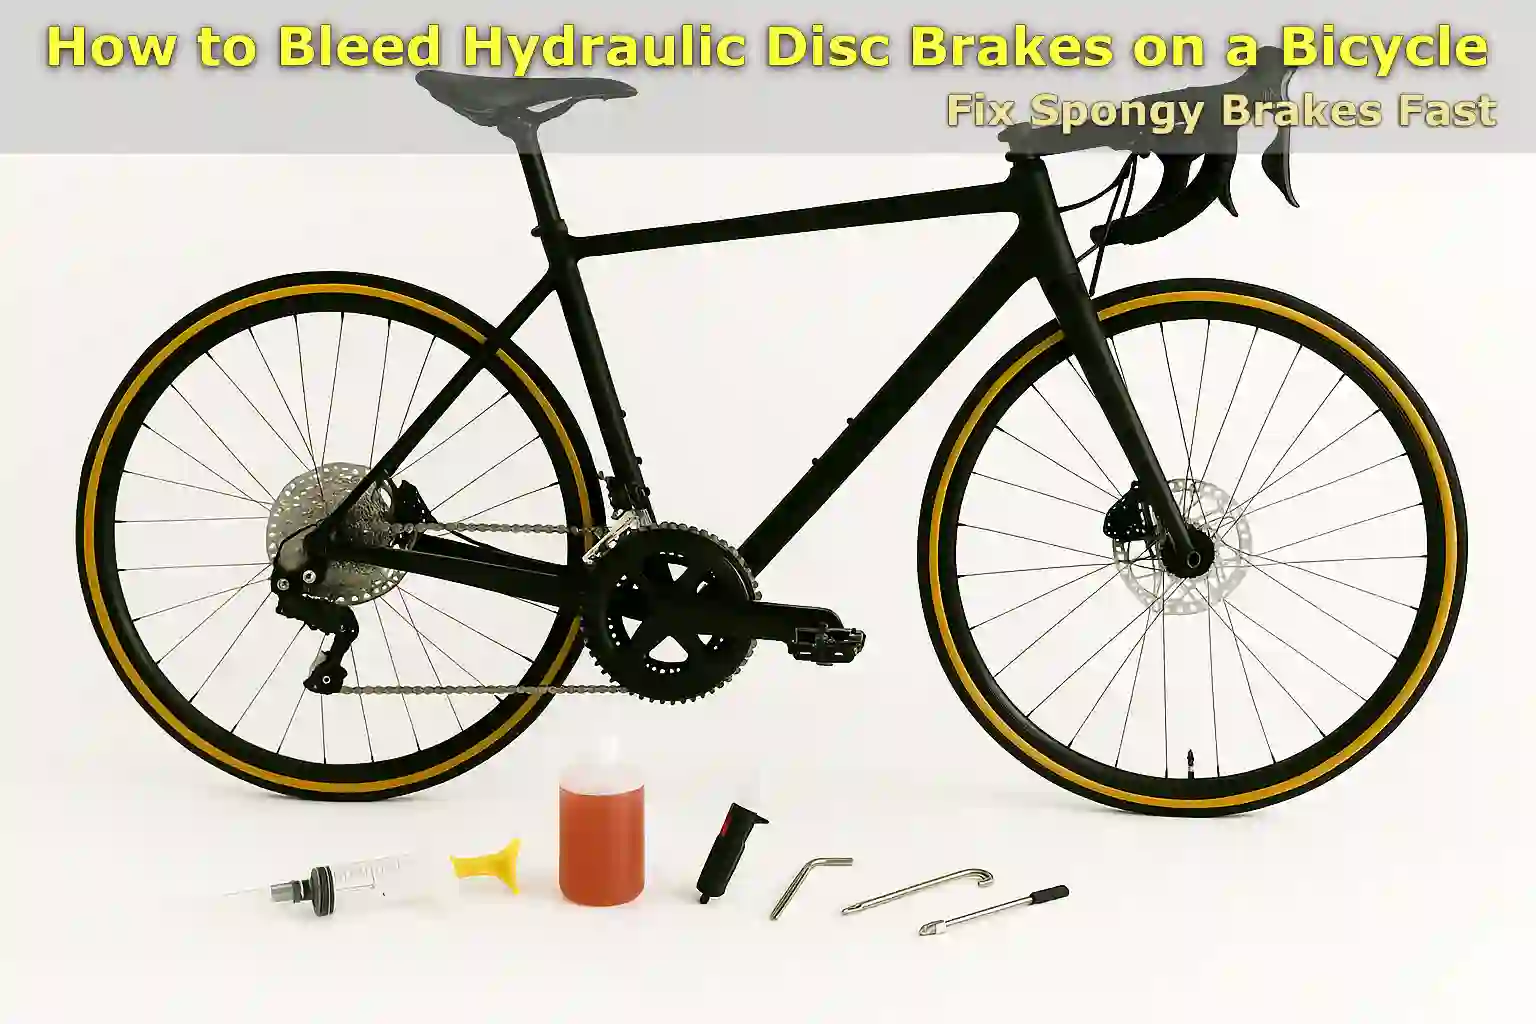
Written By: Jonathan
Fact Checked By: Caroline Dezendorf
Reviewed By: Matt Tanner
You can trust hydraulic disc brakes in terms of reliability and being one of the most powerful brakes.
As such this braking system is used on modern bicycles especially mountain bikes and high performance road bikes.
These are not mechanical disc brakes like rim brakes which are the traditional way of stopping a bicycle, as it transfers force from the brake lever to the brake caliper and uses a hydraulic system of fluid to do this.
That is why it gives you stronger, smoother and very consistent stopping power in all weather conditions.
Brake bleeding is the process of removing air bubbles from a bicycle’s hydraulic brake system, which is quite simple.[¹]
Yes, it is also true that tiny air bubbles can get trapped in brake lines over time which can happen due to regular brake use, carrying an object, an accident, or after service.
If your brakes feel soft or “spongy” and braking performance has decreased, it may be air entering the system, as it is compressed under pressure opposite to that of the brake fluid.
This is why you need to know How to Bleed Hydraulic Disc Brakes on a Bicycle because it is a maintenance task, that actually removes the air and replaces the old fluid, which really makes sure that your brakes respond quickly and safely.
Shimano, SRAM, Tektro and Magura are the most major brake manufacturers, all recommend bleeding your brakes at least once a year, or more often for aggressive riders or in mud and heavy riding conditions.
This process might seem very technical to you, but if you use the right tools and proper guidance then this job will get done easily.
Tools & Materials
You’ll need to gather the right type of tools before bleeding your hydraulic disc brakes to ensure that the job will be safe, clean, and truly effective.
1. Brake Bleed Kit
This is a special set of tools intended to bleed hydraulic brakes only, these kits are often brand-specific which means you need a specific type of brake kit that matches your brakes.
For example Shimano, SRAM, Tektro or Magura, as it is a specific bleed kit that includes a syringe or funnel, tubing, connectors and sometimes even a bleed block.
These tools are really helpful so that you can safely remove the air and old fluid from the brake system.
Note: You should always check the brand and model of your brakes before purchasing a bleed kit, as using the wrong kit could damage your brakes or even lead to poor results.
2. Brake Fluid
Brake fluid also plays a vital role, that is why you need a specific type of brake fluid depending on the brake such as:
- Shimano, Tektro and Magura typically use mineral oil.
- SRAM and Avid typically use DOT brake fluid such as DOT 4 or DOT 5.1.
Just keep in mind that these two fluids are not interchangeable, which means mixing them could permanently damage your brake system.
Additionally, DOT fluid absorbs moisture from the air over time, so you should always use a freshly sealed bottle.
IMPORTANT: You should never mix mineral oil and DOT fluid, always read your brake manual to find out which type is safe for your system and then proceed with the process.
3. Allen Keys
These are actually used to remove and reinstall the bolts on the brake lever, brake pad, or caliper.
Yes, you can remove the brake pads and insert a bleed block to stop the movement of the pistons.[²]
Most bicycles use Allen keys ranging in size from 2mm to 5mm, so you should have a good set of these as this will ensure that your work remains unhindered, allowing you to work smoothly without damaging any bolts.
4. Clean Rags or Paper Towels
It’s true that cleaning brakes can be a messy job, which is why you should always have clean cloths or paper towels on hand so you can easily wipe up spilled fluids and keep your workspace clean.
Be careful because brake fluid can really damage paint and rubber, which is why it’s so important to clean it up immediately if it spills.
5. Gloves and Safety Glasses
Both mineral oil and DOT brake fluid can irritate your skin or eyes, which is why you should wear nitrile gloves to protect your hands and safety glasses to protect your eyes from splashes or leaks.
6. Plastic Catch Bottle or Syringe
You should have a clear plastic catch bottle or syringe that helps you collect the old fluid that comes out during the bleeding process, and it helps you see if any air bubbles are coming out of the system and it also prevents mess.
7. Zip Ties
Yes, this is indeed optional, but it can prove very useful for keeping the hose and tube secure during bleeding, and it will give you more control and also free up your hands for other steps.
8. Bike Stand
Again, this is an optional thing but a bike repair stand literally keeps your bike stable and raises it comfortably above the ground, this makes the position of the brake levers level with the ground so that you can comfortably see and do the bleeding job properly.
If you don’t have a bike stand, you’ll need to lean the bike against a wall or hang it securely.
9. Isopropyl Alcohol
It will be important to clean your brake components before and after bleeding time, as oil, dirt, and fluid residue can be safely removed without damaging the parts by using at least 70% isopropyl alcohol.
Just don’t use general purpose cleaners as they can leave chemical residues that really affect brake performance.
Read More:
Preparation Before Bleeding
You have to prepare your bike properly and this is one of the most important steps before you start bleeding hydraulic disc brakes.
As you have to prepare your bicycle properly, it helps prevent mistakes, and keeps the process clean and it also protects your bike parts from any potential damage.
1. Stable Your Bike Position
If you have a bike repair stand then you need to place your bike on it, or you can keep the bike in a stable position or you can raise it above the ground, this should be done to make your work on the brakes easier.
If you don’t have a bike stand, you can lean the bike securely against a wall or use a sturdy workbench.
This matters a lot because a stationary bike keeps the brake lines in perfect condition and also it protects against accidental drops or falls
2. Remove the Wheel
This is completely up to you and optional, as it isn’t always necessary, but yes, it is a good idea to remove the bicycle wheel that is attached to the brake you’re working on.
Because it gives you better access to the brake caliper and it also protects your brake rotor from getting contaminated with the fluid.
Note: Brake fluid can literally ruin brake rotors and pads as well, so it would be a good idea to remove the wheel to keep them completely safe and clean.
3. Position the Brake Lever
Now, you have to adjust the brake lever so that it is completely horizontal to the ground, i.e., completely level.
As most hydraulic systems are designed to bleed with the lever in this position, this allows the air bubbles to float to the highest point where they can be released.
Instead, you can use the bubble level app on your phone or just eyeball it so you can make sure it’s perfectly level.
4. Clean the Caliper and Lever Area
You will need to use a clean cloth and at least 70% isopropyl alcohol to wipe down the brake lever, caliper, and surrounding parts.
This removes virtually all types of dirt, grime and contaminated oil that may enter the brake system during bleeding.
This actually helps keep the workspace cleaner, reduces the chance of contamination and makes it much easier to identify leaks or problems.
5. Remove the Brake Pads
You should remove the brake pads before you begin bleeding, as DOT fluid can easily soak into the pads and literally ruin them.
So simply use the Allen key to remove the pad retention bolt, and then gently slide the pad out.
This process is very important because contaminated brake pads often cannot be cleaned and may need to be replaced, which can sometimes be costly.
6. Insert Pad Spacers or a Bleed Block
Once your bicycle’s pads are removed, you’ll need to place a pad spacer or bleed block in the caliper in the spot where the pads previously were, as this holds the pistons in place during the bleeding process and also aids in preventing them from moving too far when you pull the lever.
Note: Most good bleed kits come with a bleed block, but if it is not provided with your kit you can use a clean plastic tool or order it separately as per your requirement.
How to Bleed Hydraulic Disc Brakes on a Bicycle (Step-by-Step Guide)
This is the process that literally removes the old brake fluid along with the air bubbles from your brake lines and replaces it with fresh fluid, which actually makes your braking system smooth, powerful and completely responsive.
Additionally, there are two types of hydraulic brake systems available on bicycles: Shimano which uses mineral oil and SRAM which uses DOT brake fluid.
Yes, you will have to follow different methods for each as the bleeding process is a bit different, so you will have to make sure that you follow the steps based on the particular type of brake brand your bicycle has.
1. How to Bleed Shimano Hydraulic Disc Brakes
This Shimano hydraulic brake actually uses mineral oil, which doesn’t really absorb moisture from the air like DOT fluid, so it’s a little easier to handle.
Shimano’s systems typically use a bleed funnel that must be attached to the lever and a hose connected to the caliper.
1. Attach the Bleed Funnel
The first thing you need to do is to remove the bleed port screw on the brake lever and put the funnel in place, as this will ensure that the bike is level and the brake lever is in a flat position that is actually aligned horizontally with the ground.
2. Fill the Funnel
Now, you need to pour a small amount of mineral oil into the funnel and pour enough to fill it halfway, and this fluid actually helps to push the air bubbles out of the system and prevent new bubbles from forming inside.
3. Open the Bleed Nipple
Now, place one end of a clear hose onto the bleed nipple, which is a small bolt near the brake caliper, and the other end into a catch bottle or syringe so you can collect the old fluid without any leakage.
4. Slowly Squeeze the Brake Lever
You have to gently pull the lever and open its nipple a little bit, and then you will see the fluid and possible air bubbles as well coming out through the hose, and don’t worry about it as it is a normal thing.
5. Let air Bubble Escape
Now, you’ll notice that as you continue to press and release the lever, little air bubbles will form that will move up into the fluid in the funnel, and then you can also see the old, discolored fluid that will come out through that.
6. Close the Nipple
After pressing the lever a few times, you now have to close the bleed nipple while pulling the lever, and this helps prevent air from re-entering the system.
7. Repeat the Process
You will need to continue the cycle of squeezing, opening, inspecting, and then closing until only clear liquid comes out and no air bubbles are visible in the funnel or hose.
IMPORTANT: Do not overfill the funnel or press the lever too hard as this may cause the oil to spill onto all important parts of the bike and damage them, so press slowly and steadily for best results.
2. How to Bleed SRAM Hydraulic Disc Brakes
Now, this SRAM hydraulic brake system actually uses DOT brake fluid which is typically DOT 4 or DOT 5.1, which is actually more sensitive and absorbs moisture over time.
Not only that, the SRAM system typically requires two syringes, one on the lever and one on the caliper, since you have to push and pull the fluid back and forth.
1. Attach Both Syringes
Now, simply remove the bleed port screw and you will need to securely attach a syringe filled with fresh DOT fluid to the caliper, and a partially filled or empty syringe to the lever.
2. Push and Pull
You’ll need to slowly push the fluid with the caliper syringe toward the lever, and then reverse it, as this is the critical movement that actually forces the old fluid out and expels any air bubbles.
3. Free The Trapped Air Bubbles
As you push or pull the fluid you will need to tap the brake hose and caliper with your finger or a soft tool, this will help the trapped bubbles to come to the surface and then escape the system.
4. Seal the System
When you see that there are no more bubbles visible, you must carefully remove both syringes, making sure no air is inhaled, then reinstall the bleed port screw securely.
5. Wipe Excess Fluid
You should also use isopropyl alcohol and a clean cloth to clean up any spilled DOT fluid and wipe off the excess fluid immediately, as it can literally damage paint, plastic, and even skin, so clean it thoroughly.
IMPORTANT: You should always use new DOT fluid from a sealed container, as old or reused fluid may contain moisture, which will later affect braking performance again.
Read More:
Post-Bleeding Steps
When you finally finish bleeding your hydraulic disc brakes, it becomes extremely important to complete the process properly because it actually ensures that your brakes work safely and efficiently after that job is done.
These final steps are what really help you avoid contamination, restore brake performance, and protect your components from damage.
1. Remove & Reinstall
Once you are confident there are no longer any air bubbles and the fluid is completely clear, gently remove the bleed kit, whether it is a funnel on Shimano or a syringe on SRAM.
Just be careful not to spill any remaining liquid on the ground, on yourself, or on the bicycle.
Then immediately reinstall the bleed screws or plugs on the brake lever and caliper, making sure they are screwed firmly but not too tight, as this can strip the threads or even damage the seal.
NOTE: Wipe any fluid off the screw threads before installation as this also prevents future leaks.
2. Reinstall the Brake Pads & Wheels
Now, you will need to slide the brake pads back into the caliper very carefully, as you will also need to make sure that they are clean and dry.
Then secure them using the pad retention bolts or clips.
Reinstall the wheel after installing the pads, and then align the rotor between the pads.
You have to be extra careful not to touch the rotor with oily fingers, as oil can reduce braking power and also cause squealing noises.
IMPORTANT: Never install contaminated pads, it is best to replace them if brake fluid has previously got on them.
3. Center the Caliper
If you notice that the rotors are rubbing against the brake pads after reinstalling them, all you need to do is center the brake caliper.
To do this, simply loosen the caliper mounting bolt slightly and then press the brake lever firmly and hold it down while tightening the bolt back down.
This will make it easier to align the caliper evenly on the rotor for quiet and drag-free braking.
4. Pump the Brake Lever
You’ll need to press the brake lever firmly several times to restore pressure in the brake system, and the lever should feel firm and fully responsive, not just soft or spongy.
If it still feels weak or moves up to the handlebars, there is a high chance that there is still air trapped, and you may need to repeat the bleed process again.
Be sure that you sometimes have to pull a few times to get the pads back into their normal position against the rotor, so don’t rush.
5. Test Brake Engagement
You need to test the brakes before driving, by spinning the wheels and then applying the brakes firmly, just to make sure they stop the wheel easily and quickly.
Do this test on a bike stand and with the bike moving on level ground, and make absolutely sure that both the front and rear brakes are working properly.
Just take a little test ride around your driveway or road which is a good way to confirm that everything is okay and working.
6. Clean the Area
Now you need to use at least 70% isopropyl alcohol and then use a cloth to thoroughly clean the caliper, rotor, lever, and any area where fluid may have spilled.
This will completely remove any remaining residue, which can actually damage the paint, attract dirt or reduce braking performance if left without being cleaned off.
How Often Should You Bleed Your Hydraulic Brakes?
| Riding Condition | Recommended Bleeding Frequency | Why It Matters |
|---|---|---|
| It you go for Casual or Regular Riding | Once every 12 months (1 year) | This is necessary because it prevents fluid loss and minor air build-up; maintains brake stability. |
| Frequent Ride on the Mountain Biking / Downhill Riding | Every 3 to 6 months | Otherwise there will be effects such as hard braking and high heat which will rapidly degrade the fluid; ensuring full braking power. |
| Rides on the Wet, Muddy, or Dusty Riding Conditions | Every 3 to 6 months | Debris and water increase the risk of contamination; bleeding actually helps maintain performance. |
| After you have a Crash or Bike Fall | Immediately after the incident | Accidents can damage hoses or seals and allow air to enter the system, so this is important. |
| After You have done Major Brake Component Changes | Right after installation | New hoses, calipers, or levers can actually introduce air into the system. |
Typically many cyclists bleed their brakes annually or when they actually notice a decrease in braking performance, such as a spongy lever feel.[³]
Or, if you cycle very frequently or cycle on aggressive terrain you will need to bleed your bicycle more frequently as this is necessary to maintain optimal performance.[⁴]
Conclusion On How to Bleed Hydraulic Disc Brakes on a Bicycle
Riding style, riding position and all other things don’t matter if you are not maintaining a clean and air-free brake system, as it is the key to safe, powerful and consistent braking that actually keeps you safe while driving.
It is natural that over time, air bubbles can get into the hydraulic lines and old fluid can also lose its effectiveness, so both of these factors can cause the brakes to weaken, If you ignore it for a long time then the stopping distance of the car can get longer and even the brakes may fail completely.
So, just learn How to Bleed Hydraulic Disc Brakes on a Bicycle, and you will not only save money on shop visits, but it will also extend the life of your brake components such as pads, rotors, and fluid lines.
After the bleeding process, you will feel that it will give you that solid, firm feel at the lever that every rider wants.
This is a valuable skill you can develop as a cyclist, it really does ensure top performance, which really protects your bike investment and it also helps keep you safe every time you ride.
If you have questions about this guide on How to Bleed Hydraulic Disc Brakes on a Bicycle, welcome to the comments section.
Frequently Asked Questions
1. What does it mean to “bleed” hydraulic brakes?
Answer: Actually bleeding hydraulic brakes means removing air bubbles and old fluid from the brake lines and replacing it with new brake fluid. Since air can actually reduce braking power, bleeding actually restores proper pressure and performance as well.
2. How do I know if my hydraulic brakes need bleeding?
Answer: There are several signs available that mean your brakes need bleeding such as: The brake lever will feel spongy or soft, when pulling the brake lever too close to the handlebar, also when you feel the braking power has reduced and when you notice that the braking performance of your bicycle is inconsistent then it means it is time to bleed the brakes.
3. Can I bleed my brakes without a bike stand?
Answer: Yes, of course you can do this without a bike stand, but a bike stand really does make the job a lot easier by keeping the bike stable and at the right height. If you don’t have one you can lean the bike securely against a wall or hang it from a hook as that will work just as well.
References:
[1] Epic Bleed Solutions. (n.d.). The Basics of Brake Bleeding. Retrieved from https://epicbleedsolutions.com/blogs/articles/basics-of-brake-bleeding
[2] Park Tool. (n.d.). How to Bleed Shimano® Drop Bar Hydraulic Brakes. Retrieved from https://www.parktool.com/en-us/blog/repair-help/brake-bleeding-for-shimano-drop-bar-hydraulic-brakes-using-the-bkm-1
[3] REI Co-op. (n.d.). Bike Disc Brake Care: Adjust & Repair. Retrieved from https://www.rei.com/learn/expert-advice/brakes.html
[4] SRAM. (n.d.). How often should I bleed my SRAM road brakes?. Retrieved from https://support.sram.com/hc/en-us/articles/5927733654811-How-often-should-I-bleed-my-SRAM-road-brakes
Jonathan, the passionate owner of Bicycle Time, brings a lifelong love for bikes and automotive craftsmanship, that reflects into every corner of the shop. With deep passion in both cycling and automotive accessories, Jonathan is more than just an expert.
