 Skip to content
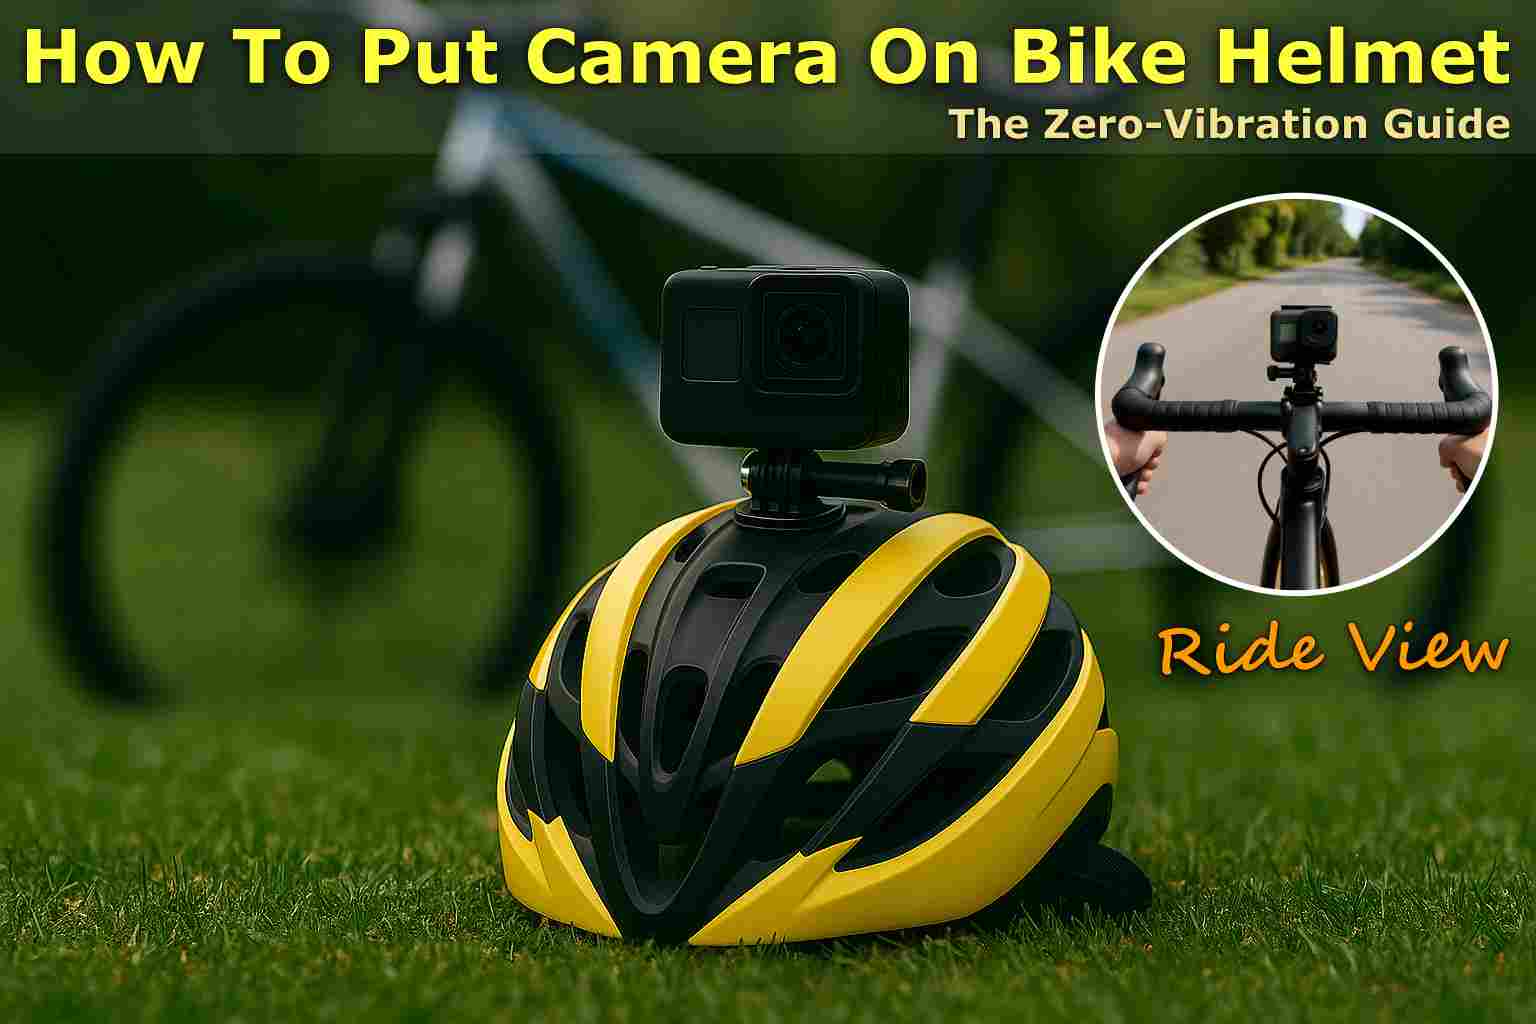
Written By: Jonathan
Fact Checked By: Caroline Dezendorf
Reviewed By: Matt Tanner
When you want to record your cycling trip, mounting a camera on your bike helmet is one of the smartest things you can do right now.
Plus, you can also use these as security gear as it captures footage for safety or social sharing in the city or wherever you go.
Additionally, a study in Melbourne, Australia collected 127 hours of helmet footage from 13 cyclists and found that drivers were the culprits in 87% to 88% of incidents involving cyclists, so these are studies that actually provide valuable data for urban planners and safety advocates, not just individual claims.[¹]
Unlike handlebar or frame mounts, helmet-mounted cameras actually provide a true first-person perspective and show exactly what the rider is actually seeing, making them especially valuable for capturing unexpected events or obstacles.
Yes, there are popularly used action cameras available like: 1. GoPro, 2. Insta360 and 3. DJI Osmo action cameras which are really lightweight, build quality is great and come with advanced image stabilization method, this makes them ideal for mounting on a helmet and you will not feel uncomfortable and will be able to balance easily.
But all you have to do is make sure that you learn How To Put Camera On Bike Helmet so that there are no vibrations or other things later on, which ensures a safe and effective recording system.
Tool & Materials
| Item | Purpose |
|---|---|
| Action camera (GoPro, Insta360 or DJI Osmo Action) | Bring whatever action camera you want to use. |
| Helmet mount kit | This is really important for keeping the camera securely mounted to the helmet. |
| Mounting adhesive or straps | It really depends on the type of helmet you have. |
| Screwdriver/Allen key (if needed) | It is necessary that the bolts be tightened. |
| Safety tether | This provides additional protection in case the mount fails. |
| Cleaning cloth & alcohol wipes | For easy preparation of the helmet surface. |
Choosing the Right Camera & Mount
Selecting the right action camera and mount is important, as this will be crucial to setting up your helmet recording system smoothly.
Just keep the right combination as it ensures safety, clear footage and leads to a comfortable journey later.
1. Camera Type
When you have to choose a camera for your helmet, you need to look for one that is compact and lightweight, as cameras weighing less than 150 grams are ideal for helmet mounting.
Like, if you install heavy cameras, they can really put pressure on your neck during long journeys and can also disturb the balance of the helmet.
So, some of these action cameras in lightweight are great because they are lightweight and come with a lot of useful features:
- GoPro HERO 11 Black
- DJI Osmo Action 4
- Insta360 GO 3
Yes, they are really small, lightweight and loaded with useful features that is their real popularity.
These have features like built-in image stabilization which is good enough to keep the footage smooth even on really rough terrains.
Moreover, these action cameras are waterproof which is another important feature because then you don’t have to worry about rain or muddy conditions.
2. Mount Type: Top, Chin or Side Mount
You actually get to choose where you want to mount the action camera on your helmet, so let’s first figure out what kind of angle will suit your preference.
- Top Mount: This is located at the top center of your helmet, and is also the most commonly used spot and you can easily install it there as it provides a bird’s eye view but can feel a bit top heavy too.
- Chin mount: This is primarily preferred by mountain bikers because it provides the most natural first-person view that is similar to what your eyes see, and it is ideal for full-face helmets.
- Side mount: You can add angled mounts to the left or right side when you want some creative angles, but may need angled arms to center the shot, this is useful if you don’t really want to block the top ventilation.
3. Compatibility
This is the first thing to consider, as you will need to check if your helmet is actually designed to support the action camera you wanted to mount, because the design of your helmet actually plays a huge role in which mount you can use.
- Vented Helmets: Yes, these are helmets commonly used for road cycling or commuting that actually allow you to use a strap mount that loops through the vents.
- Full-face helmets: These helmets are ideal for chin-mounted helmets, and are typically used by mountain biking or downhill racers.
- Skate-style or smooth helmets: For these types of helmets, it’s best to have an adhesive mount on flat or curved surfaces.
The main thing that you need to make sure of is that you always match your mount to the structure of your helmet for a safe and secure setup.
4. Stability Vs Perspective
First you need to decide what exactly is your main goal:
If your main goal is to achieve video stability then the helmet top actually offers the least vibration and with image stabilization it gets a lot better.
But if you want the most intense and realistic perspective, you can opt for chin mounts, as they actually match your line of sight.
The side mount does indeed produce a slightly off-center type of video, but this position provides good stability.
Note: Just keep in mind that the more central and lower the camera is positioned, the less motion distortion you will feel when your head turns or bounces while riding.
Preparing the Helmet
Before attaching any camera mount, you need to properly prepare the helmet which is a really important step that really ensures a strong and long lasting bond.
Skipping this part can actually result in weak adhesion, poor footage angles, or worst case scenario, the camera falling off while riding.
1. Clean the Surface Using Alcohol Wipes
The first step you should take is to clean the area where you plan to place the mount, as we know that helmets often accumulate dust, sweat, oils from your skin, and road grime: all of these things collectively weaken the adhesive bond.
Therefore, only use alcohol wipes or isopropyl alcohol, which should be at least 70% and a lint-free cloth so that you can clean the surface thoroughly.
By doing so it will easily remove any types of residue and actually prepare the plastic or shell material for stronger adhesive contact.
2. Dry the Helmet Completely
After cleaning the helmet, now you have to make sure that the helmet should be completely dry, as adhesive mounts like: 3M VHB Pads require a dry and clean surface to stick completely and firmly.
So, if you think a little moisture would be okay, remember that even a little bit of moisture can affect grip, especially in humid or cold conditions.
Now, the best thing that you need to do is to let the helmet completely air dry for a few minutes or you can wipe it with a clean and dry cloth.
3. Plan the Mount Placement Carefully
It is essential to decide where the mount should be placed, so before removing adhesive or adding straps, take some time and select the location first.
As you can choose a flat or slightly curved surface that actually ideally matches the base shape of your mount, but just make sure that the camera should be facing forward without blocking your line of sight or it should not interfere with the helmet vents as well.
For example: the top mount actually provides a higher view, while the chin mount actually provides a more natural angle.
So, just place the mount temporarily in its place and check the alignment from different angles or even preview with your camera app if possible.
Read More:
How To Put Camera On Bike Helmet (Step-by-Step)
Installing a camera on a bicycle helmet is actually very easy, you just have to follow some instructions correctly and you will have it installed successfully.
1. Top Mount: Most Common for Action Cameras
Many cyclists and motorcyclists really like this area and it is their preferred option, as it is really quick to set up and it provides a really focused, stable approach.
Now, you first need to choose the mid-top or a little forward part of your helmet, and then clean and dry that area first as we have mentioned earlier, and then you need to stick the flat or curved adhesive mount on that surface.
Also, you have to press it firmly for at least 30 seconds as it is really important to ensure that it has full contact with the surface.
Also, to get the best possible results, you need to let the adhesive dry for 24 hours before using it, and this actually allows the bond to fully strengthen, especially with the 3M VHB pads.
So, once you see that it is set up properly, attach your camera using the quick-release buckle or thumb screw.
Finally, you shouldn’t forget to double-check that it’s securely in place.
2. Chin Mount: Provides Great POV Angle
When you want the most natural, eye-level footage, which is especially useful when mountain biking, motorcycle riding or downhill cycling, as it captures very natural-looking scenes.
If your helmet is full-face this is really the best option, plus you can either use a curved adhesive mount that fits the contour of the chin or even a strap-based chin harness.
If your helmet has a really complex shape, you might need extension arms or a J-hook adapter to angle the camera outward and get it level with your line of sight.
But you need to test the scene with your camera app before finalizing the placement so that you don’t have to worry about the viewing angle later.
Plus, chin mounts also feel more balanced since they’re actually closer to your center of gravity.
3. Side Mount: For Having Secondary Viewpoint
If you want some creative angles or if you really don’t want to disturb the top holes or center balance, you should place the camera to the left or right and just above the ear line.
Additionally, you’ll need to use a swivel or pivoting arm mount because it allows you to adjust angles, and this is especially important because side-mounted cameras actually need to be rotated or tilted to maintain level horizon lines.
So, side mounts are very useful when paired with a secondary camera or if you just want to capture side views or passing traffic, so just make sure the camera doesn’t obstruct head movement or visibility and you’re good to go.
4. Vent Mount: For Vented Helmets
If you want a temporary option, this vent mount would work great, and if you just have a road or commuter style helmet, those tend to have larger vents.
All you have to do is use a strap-based mount so you can insert it through the vent hole and then tighten it securely at both ends.
These mounts can easily be removed and placed in any location if you wish, as this quality makes them ideal for shared helmets or temporary setups.
Besides this, you also need to make sure that the straps are pulled evenly and firmly and there is no slack in them so that the camera remains stable even on rough terrain.
Yes, it’s great that the vent mounts don’t actually need to be glued on, but they do in fact rely entirely on proper strap tension, so you’ll want to be sure to check them for tightness before every ride.
Read More:
Safety Considerations
Yes, you have to be sure about safety, as this should always be the first priority, as an incorrectly placed or insecure mount can cause discomfort, this could affect your visibility or, in the worst case, even compromise the protective function of the helmet.
1. Always Use a Tether as a Backup
Even if you’ve installed the best adhesive or strap mount it can fail, and you’ll especially need to carry a safety tether if you ride at high speeds, in hot weather, or over rough terrain.
This is why using a safety tether is important, as it literally acts as a backup strap that keeps your camera secured to the helmet in case the main mount becomes detached.
Therefore, most cameras come with a tether loop or they can also be attached using strong fishing wire, zip ties or Velcro straps.
Always remember that a little precaution can prevent damage to a camera worth hundreds of dollars.
2. Avoid Blocking Ventilation or Visibility
Your helmet is actually designed with air-vents to keep your head cool and a wide field of vision for safety purpose.
So, when you place your camera you need to make sure that it does not obstruct either ventilation or visibility.
For example: don’t block the main front or side vents of a road cycling helmet, and you also need to make sure the side mounts don’t actually interfere with your peripheral vision.
What’s more, avoid placing mounts in a location where they could be distracting or actually block your view of the road or path ahead.
3. Ensure Mount Doesn’t Weaken Helmet Structure
Helmets are essentially designed for impact absorption and you should not make any modifications to them such as: you should not drill holes in them or add thicker hardware as this may reduce their protective capabilities.
So the point is that you should always use non-invasive mounting methods such as: You can use adhesive pads or strap-based systems, which don’t really damage the helmet shell or even the liner.
Keep in mind that you should never cut or drill holes in your helmet, because this may lead to the safety certifications being voided and increases the risk of injury during a fall and thus the helmet will no longer provide protection and will be just a fashion accessory which will be completely useless.
Furthermore, a 2015 study by the UK’s Transport Research Laboratory found that installing small cameras on climbing helmets: on the front, side or even on the top did not actually increase the risk of head injury in standardized impact tests, the custom mount also did not compromise the performance of the helmet.[²]
Conclusion
Mounting a camera on your bicycle helmet is the best and practical way to record your journey confidently and clearly.
Also, it ensures safety point of view as when you go for a ride, you also have the proofs with you in case of an incident which can be a complete authentic witness for you.
Moreover, there are many optimal positions available where you can easily mount your camera without any kind of worry like: on top of the helmet, on the chin or on the side and this will also give you very stable footage without affecting the visibility or air flow.
Now, just play the record and travel with freedom.
If you are still confused about some questions then let us know by commenting on this guide.
FAQ’s
Q1. Will adding a camera make the helmet uncomfortable or unbalanced?
Answer: You should always avoid using a camera that weighs more than 150 grams, and don’t worry about that because most of the action cameras are really light which are less than 150 grams, but you also have to avoid wrong positioning as it can also put pressure on the neck on long rides. So you can place the camera near the center top or chin as it will definitely help in balancing the weight evenly.
Q2. How long do adhesive pads last?
Answer: Usually adhesive pads last for about 6 to 12 months, but yes it also depends on usage and exposure to heat, moisture and dirt, if you find something suspicious like the pad is peeling, loose or less sticky then replace it quickly, do not wait for it to fall off.
Q3. Can I use my phone instead of an action camera?
Answer: Smartphones are really bulky options and also less safe on the helmet, so preference should always be given to action cameras like: GoPro, Insta 360 or DJI Action, as these are better suited due to their compact size, stabilization and waterproof design.
References:
[1] Australian helmet cam study reveals motorists to blame in vast majority of cycling crashes (+ videos)
https://road.cc/content/news/46995-australian-helmet-cam-study-reveals-motorists-blame-vast-majority-cycling-crashes
[2] TRL. (2015). Safety Testing of Helmet‑Mounted Cameras. Transport Research Laboratory. UK.
https://www.trl.co.uk/publications/safety-testing-of-helmet-mounted-cameras
Jonathan, the passionate owner of Bicycle Time, brings a lifelong love for bikes and automotive craftsmanship, that reflects into every corner of the shop. With deep passion in both cycling and automotive accessories, Jonathan is more than just an expert.
