Written By: Jonathan
Fact Checked By: Caroline Dezendorf
Reviewed By: Matt Tanner
You need to understand that: a “SLIPPING CHAIN” is not just random thing to happen, as it is the clear mechanical warning you should never ever ignore.
And, this is something that every cyclist has to face it: but that sudden slip when you push hard on the pedals and the bike starts to hesitates for a slip second.
Then, it becomes annoying and tells you that drivetrain needs something to be correct.
Basically, chain skipping usually happens when small components fall out of sync: as a stretched chain, worn cassette teeth, poor derailleur alignment or even dirt buildup as well.
Also, there’s studies in bicycle maintenance manuals and drivetrain wear testing that consistently shows that the chains elongate gradually with the usage and once they pass the recommended wear limits, then they actually accelerate the wear on the cassette and chainrings as well.
That actually means that a minor skipping issue today can actually turn into the full drivetrain replacement tomorrow.
And, if it skips under the load then it can reduce the control, specially when you are climbing or sprinting, that literally very risky as sudden imbalance is the disadvantage of it.
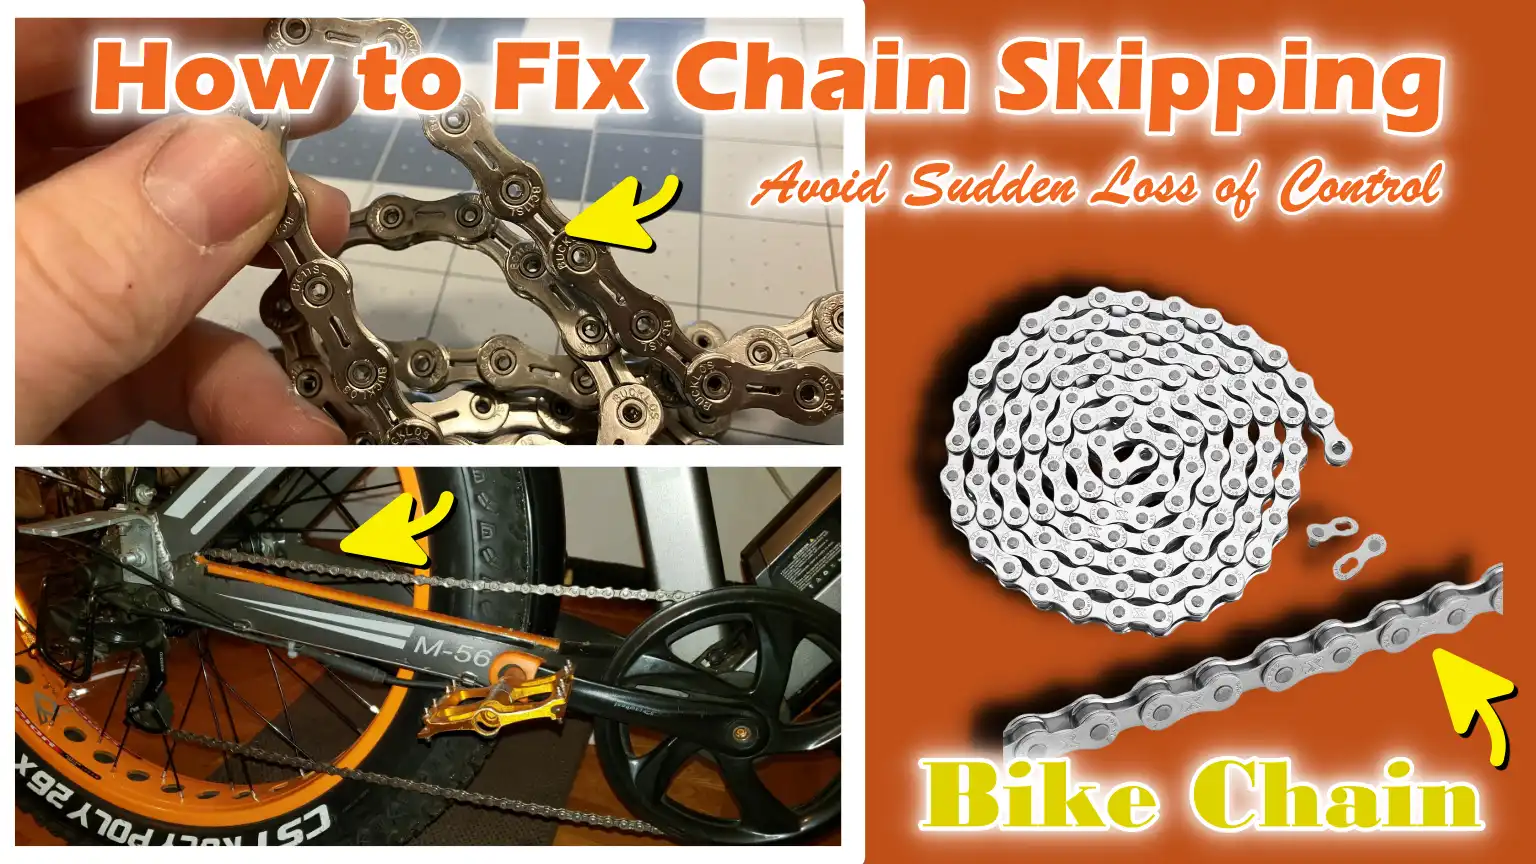
Now, with this guide you’ll learn How to Fix Chain Skipping, so that you can actually predict, diagnose and fix with simple adjustments by recognizing early symptoms.
Know, What is Chain Skipping?
Chain skipping occurs when the bicycle chain fails to engage fully with the teeth of the cassette, chainring, or freewheel, causing it to suddenly jump forward while you are pedaling.
Instead of efficiently transmitting your pedaling power to the wheels, the chain slips over the teeth and momentarily loses contact.
This typically happens because the chain and gear teeth are designed to fit together precisely, and even slight wear or misalignment can compromise that fit.
Over time, through normal use, the chain gradually stretches, and the gear teeth also wear down into shapes that can no longer securely hold the chain.
When these components do not mesh properly, the chain cannot seat itself securely in place, resulting in chain skipping.
This issue is common in bicycles that have seen heavy use, have not been properly maintained, or have undergone incorrect modifications; however, it can also occur when new components are installed that are incompatible with one another or have not been properly tuned.
1. Definition in Simple Terms
Simply put, chain skipping means that, even though your pedals continue to spin, the bicycle momentarily fails to move forward smoothly.
Instead of gripping the gear teeth firmly, the chain jumps over them.
It is akin to suddenly missing a step while climbing a staircase, causing your foot to slip forward unexpectedly.
The drivetrain is designed to transmit power from your legs to the rear wheel without interruption, and chain skipping disrupts this connection.
Even a minor skip is an indication that a specific component has become worn, dirty, loose, or misaligned.
Understanding this fundamental principle helps cyclists recognize that chain skipping is not a normal occurrence and should be addressed as soon as possible to prevent more serious problems.
2. What It Feels Like While Riding
When chain skipping occurs, you typically feel a sudden loss of resistance while pedaling, followed by a sharp jolt.
Your foot may suddenly lurch forward, and the bicycle may wobble slightly.
Some cyclists may also hear a distinct “click” or “snap” sound at the same moment.
This sensation is most pronounced when you are exerting significant force such as: when accelerating rapidly or climbing a hill.
In mild cases, skipping may occur only occasionally; however, as the underlying issue worsens, it begins to happen more frequently.
This can erode confidence, make shifting gears difficult, and if it happens while pedaling vigorously, as it can even cause you to lose your balance.
Riders often describe this phenomenon as “unstable power delivery,” wherein the bike does not respond to their efforts smoothly or predictably.
3. When It Typically Occurs – Hard Pedaling, Shifting Gears, Climbing
Chain skipping occurs most frequently when the drivetrain is under stress.
This includes situations involving hard pedaling, climbing hills that require significant physical exertion, or shifting gears while maintaining pressure on the pedals.
In these situations, the chain must remain firmly seated on the gear teeth; consequently, any wear or malfunction within the system becomes clearly apparent.
Skipping may be limited to specific gears where the cassette teeth have become excessively worn particularly those gears that are used most frequently.
Riders may feel that they experience this issue only while climbing, sprinting, or shifting into lower gears.
These patterns help identify the root cause of the problem; slipping under heavy load typically points to worn-out components, whereas slipping during gear shifts often indicates issues related to indexing or cable tension.
Know, Common Causes of Chain Skipping
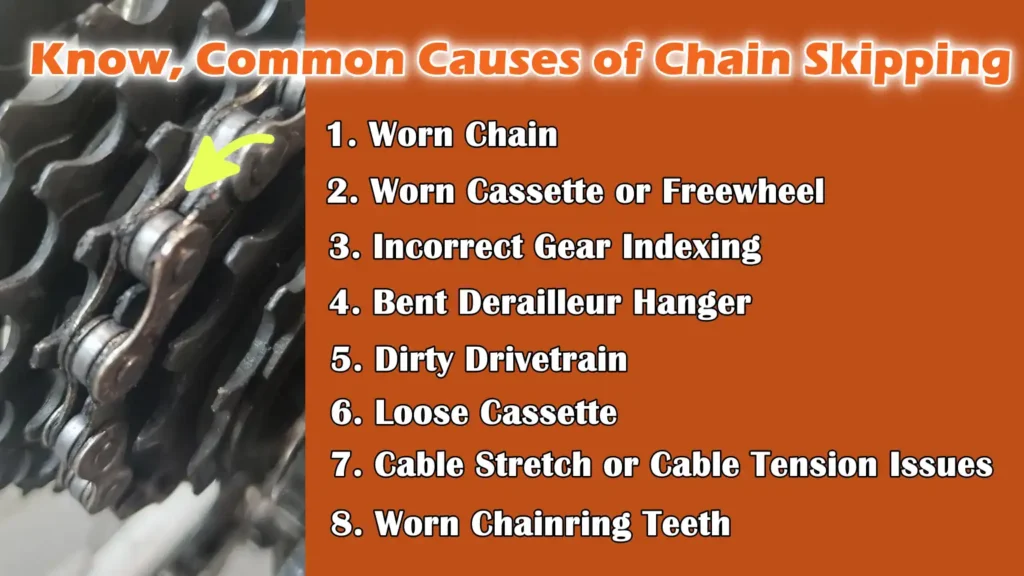
Chain skipping typically occurs when one or more components of the drivetrain fail to operate with the precise alignment for which they were designed.
A bicycle’s drivetrain relies on maintaining the correct spacing between the chain, cassette, and chainrings; even slight wear or misalignment can disrupt this smooth connection.
As parts wear down, dirt accumulates, cables stretch, or components fall out of alignment, the chain is unable to seat firmly onto the teeth.
This results in reduced power transfer and the issue of sudden slippage under load.
Understanding the most common causes helps riders quickly diagnose the problem and avoid unnecessarily replacing parts.
Many skipping issues develop gradually, and identifying the root cause early can prevent further damage to expensive drivetrain components.
1. Worn Chain
A worn chain is one of the most common causes of chain skipping.
Over time, the internal pins and rollers of the chain wear down, causing the chain to elongate slightly.
This phenomenon is often referred to as “chain stretch,” even though the metal itself does not actually stretch.
As the chain elongates, it no longer fits precisely into the gaps between the teeth of the cassette and chainrings.
When you pedal, the chain rides up on the teeth and may slip forward under pressure.
This issue becomes particularly noticeable when climbing hills or pedaling vigorously.
If a worn chain is not replaced in a timely manner, it will also accelerate the wear on the cassette and chainrings, potentially rendering the entire drivetrain unusable.
2. Worn Cassette or Freewheel
The cassette or freewheel consists of multiple gears with which the chain engages.
After many miles of riding, the teeth begin to wear down particularly on the gears that are used most frequently.
Worn teeth often become sharp or hook-shaped, reducing their ability to firmly grip the chain.
Even a new chain can slip on a worn cassette because the shape of the teeth no longer matches the chain correctly.
This type of skipping often occurs in specific gears rather than across the entire range.
Riders typically observe that some gears engage smoothly, while others slip under load.
This is a clear indication that the cassette or freewheel may need to be replaced.
3. Incorrect Gear Indexing
Gear indexing refers to the precise alignment between the shifter and the derailleur.
If the indexing is incorrect, the derailleur cannot position the chain directly onto the selected gear.
Even a slight misalignment can cause the chain to get stuck between two gears.
Under pressure, the chain may jump to the next gear or slip momentarily.
This often leads to issues such as erratic shifting, clicking noises, or hesitation while pedaling.
Incorrect indexing is frequently caused by cable stretch, changes in derailleur adjustment, or the installation of new components.
Properly adjusting the barrel adjuster typically resolves this issue.
4. Bent Derailleur Hanger
The derailleur hanger is a small metal component that connects the rear derailleur to the bike’s frame.
It is designed to bend slightly upon impact in order to protect the frame.
However, even a minor bend can compromise the positioning of the derailleur.
When the derailleur is not aligned straight, the chain cannot align correctly with the gears on the cassette.
This results in intermittent gear engagement, poor shifting performance, and excessive noise.
Derailleur hangers often become bent after a bike crash, an accident during transport, or a collision with an obstruction.
As this misalignment can be subtle, riders often overlook it as a potential cause.
Correcting this typically requires a hanger alignment tool or a professional inspection.
5. Dirty Drivetrain
Dirt, old lubricant, and debris can accumulate on the chain, cassette, and chainrings.
This buildup prevents the chain from seating properly between the gear teeth.
Thick grime can also hinder the movement of the chain links, creating stiff sections that do not flex easily.
When these stiff links reach the cassette, they may slip rather than engaging smoothly.
A dirty drivetrain also increases friction and accelerates wear and tear.
Regular cleaning and lubrication ensure better chain engagement and reduce the likelihood of skipping.
Many skipping issues can be resolved simply by performing a thorough cleaning.
6. Loose Cassette
The cassette is attached to the rear wheel hub using a lockring.
If this lockring becomes loose, the cassette may shift slightly while pedaling.
Even a minor shift in position alters the alignment between the chain and the gear teeth.
This can result in skipping, clicking noises, or unstable shifting.
A loose cassette often produces a distinct vibration that can be felt when rotating the gears by hand.
Tightening the lockring with the appropriate tool usually resolves this issue quickly.
It is crucial to address this problem as soon as possible to prevent further complications.
7. Cable Stretch or Cable Tension Issues
Shift cables control the position of the derailleur.
Over time, cables stretch slightly, and the housing may compress.
The result is a reduction in tension and a misalignment of the derailleur.
When the tension is too low, the derailleur cannot fully engage the selected gear.
Consequently, the chain gets caught between gears and slips.
Cable-related issues often manifest as delayed shifting or difficulty engaging specific gears.
Adjusting the cable tension using the barrel adjuster typically restores proper alignment.
On older bikes, replacing worn cables and housing significantly improves shifting performance.
8. Worn Chainring Teeth
A bicycle’s front chainrings also wear down with use.
The teeth may bend, break, or wear down into a sharp, pointed shape.
When this occurs, the chain cannot grip properly and may slip under load.
This issue is often felt while pedaling in specific front gears.
Riders may also perceive an unevenness in their pedaling motion or hear grinding noises.
Worn chainrings are typically caused by excessive use, poor shifting habits, or riding with a worn-out chain.
Replacing a worn chainring restores proper engagement and eliminates shifting problems caused by wear within the front drivetrain.
Tools
| Tool | Why It Is Needed | How to Use It |
|---|---|---|
| Allen keys | Most bicycle bolts including derailleur bolts, chainring bolts, and cable clamp bolts, require Allen keys to be loosened or tightened. Without these tools, many drivetrain adjustments cannot be performed, as modern bicycles utilize hex bolts to ensure a secure fit. | Select the correct size that fits snugly into the bolt. Insert the key fully into the bolt head, then turn it slowly. Turn anti-clockwise to loosen and clockwise to tighten. Always apply steady pressure to prevent damaging the bolt. |
| Chain checker tool | A chain checker tool measures chain wear. As a chain gradually elongates with use, this tool helps you determine if the chain has worn excessively, a condition that can cause the chain to slip. Replacing a worn chain in a timely manner helps protect the cassette and chainrings from damage. | Position the tool on the chain according to the instructions. If the measuring end drops completely down into the chain, it indicates that the chain is worn out. Compare the reading against the recommended wear limits. If the wear exceeds the acceptable limit, replace the chain. |
| Screwdrivers | Screwdrivers are used to adjust derailleur limit screws, and occasionally, for indexing adjustments. These screws control the range of the derailleur’s movement and help ensure that the chain aligns correctly with the gears. | Depending on the type of screw, use either a flathead or a Phillips screwdriver. Turn the screw slowly and in small increments. After each adjustment, rotate the bicycle pedals and test the gear-shifting mechanism before making any further changes. |
| Bike stand – Optional | A bike stand lifts the bicycle off the ground, making it easier to pedal and shift gears while performing adjustments. This improves both precision and safety, particularly when you are working on the drivetrain. Although not strictly essential, it makes the task faster and more comfortable. | Securely mount the bicycle onto the stand using either the seatpost or the frame. Lift the rear wheel clear of the ground. Manually rotate the pedals while adjusting the derailleur, chain, or cassette. Ensure that the bicycle is stable before you begin working. |
| Degreaser and brush | Degreaser removes dirt, accumulated oil, and grime from the chain and gears. A clean drivetrain allows the chain to engage properly and minimizes slippage caused by dirt buildup. | Apply degreaser to the chain, cassette, and chainrings. Use a brush to scrub between the teeth and chain links. Rinse with water or wipe clean, then allow it to dry completely before applying lubricant. |
| Lubricant | Lubricant reduces friction and helps the chain run smoothly. Proper lubrication ensures that the chain seats correctly on the gear teeth and prevents stiff links, which can lead to chain slippage issues. | While rotating the pedals backward, apply a small drop of lubricant to every link of the chain. Let it sit for a few minutes, then wipe off any excess lubricant with a clean cloth. Avoid applying too much lubricant, as this can attract dust and dirt. |
| Torque wrench – Optional | A torque wrench ensures that bolts are tightened to the correct tension. Overtightening can damage components, while undertightening may cause them to shift out of place, that potentially leading to issues such as chain slippage, particularly with chainrings and derailleur mounts. | Set the wrench to the specified torque value. Insert the correct bit, then slowly tighten the bolt until the wrench emits a ‘click’ sound. Stop tightening immediately once the designated torque value is reached. |
How to Fix Chain Skipping – Beginner Friendly
1. How to Inspect the Chain
Inspecting the chain is the first and most crucial step when troubleshooting chain skipping issues, as the chain is the primary component responsible for transmitting your pedaling power to the gears.
A worn, dirty, or damaged chain cannot seat properly on the cassette and chainrings.
Even slight wear alters the spacing between the links, preventing the chain from fitting correctly into the gear teeth.
Consequently, the chain rides up over the teeth and slips under pressure.
Regular inspections allow you to detect problems early before they cause damage to other drivetrain components.
As the chain wears out faster than other parts of the drivetrain, checking it first saves time and eliminates the need for unnecessary adjustments elsewhere.
Check for Stretch
Chain stretch occurs when the internal pins and rollers within the chain wear down through use.
This wear increases the spacing between the chain links, even though the metal itself has not actually stretched.
As the chain elongates, it falls out of alignment with the spacing of the cassette teeth.
While pedaling, the chain may slip forward because it cannot seat securely within the gear.
You can check for stretch by using a chain checker tool or by pulling the chain away from the front chainring.
If the chain lifts away easily, revealing a portion of the gear teeth, it indicates that the chain is worn out.
Chains used in wet or dirty conditions tend to wear out faster; once a chain exceeds its wear limit, skipping issues often begin to arise.
Detecting chain stretch early can prevent damage to both the cassette and the chainrings.
Check for Stiff Links
Stiff links occur when individual links within the chain are unable to pivot freely.
This is typically caused by accumulated dirt, rust, or inadequate lubrication.
When a stiff link passes through the derailleur and cassette, it cannot wrap smoothly around the gears.
This creates unevenness in the chain’s movement, significantly increasing the likelihood of the chain skipping or slipping.
You can identify stiff links by slowly pedaling backward while observing the chain as it moves through the drivetrain.
A stiff link will appear rigid or stuck rather than pivoting naturally.
Sometimes, simply cleaning and lubricating the chain is enough to loosen a stiff link; however, if the stiffness persists, the chain may need to be replaced.
Ignoring stiff links can lead to shifting difficulties and recurring chain-slipping issues.
Replace When Worn
If the chain shows clear signs of stretching, stiff links, or general wear, replacing the chain is the most effective solution.
Continuing to ride with a worn-out chain accelerates wear on the cassette and chainrings components that are generally more expensive to replace.
A new chain restores the proper interface between the chain and the gear teeth, making shifting smoother and eliminating chain-slipping problems.
When installing a new chain, it is crucial to ensure that its speed compatibility and length are correct.
After replacing the chain, test-shift through all the gears to verify that everything is functioning properly.
Replacing a worn chain in a timely manner not only resolves chain-slipping issues but also extends the overall lifespan of the entire drivetrain.
2. How to Clean the Drivetrain
Cleaning the drivetrain is crucial, as dust, old lubricant, and road debris accumulate over time, preventing the chain from engaging properly with the gears.
A dirty drivetrain increases friction and hinders the chain from seating fully between the teeth of the cassette and chainrings.
This poor contact often leads to chain slippage, noisy shifting, and accelerated wear on components.
Dust mixed with lubricant forms a thick paste that impedes the chain’s movement and causes its links to stiffen.
Regular cleaning restores proper contact between the chain and gears, improves shifting precision, and extends the lifespan of expensive drivetrain components.
Even a heavily worn drivetrain can perform better after a thorough cleaning; therefore, this step should always be performed before making any adjustments.
Clean the Chain
The chain accumulates the most dirt because it is in constant motion, attracting dust and old oil.
When dirt builds up, the chain rollers cannot rotate freely, and the chain fails to seat properly between the gear teeth.
To clean it, apply a degreaser along the entire length of the chain while rotating the pedals backward.
Allow the degreaser to sit for a short while so it can dissolve the old lubricant and grime.
Then, gently scrub the chain with a brush to dislodge any debris trapped between the links.
After cleaning, wipe the chain down with a cloth to ensure no residue remains.
A clean chain runs smoothly, engages better with the gears, and reduces the likelihood of slipping under heavy loads.
Clean the Cassette
The cassette consists of multiple gears, with very little space between their teeth; this is often where dirt tends to accumulate.
Due to this buildup, the chain cannot seat itself fully within the grooves of the gears.
When the chain fails to seat properly, it rides atop the dirt and slips forward while pedaling.
Use a brush and degreaser to clean the spaces between each individual cog.
Spinning the wheel will allow you to easily access all these areas.
Pay special attention to the gears you use most frequently, as these typically accumulate the most dirt.
After scrubbing, wipe the cassette down with a cloth to polish it and ensure that no residue remains.
A clean cassette helps ensure proper chain alignment and improves gear-shifting performance.
Clean the Chainrings
Dirt also accumulates on the chainrings located at the front of the bicycle, particularly between their teeth.
Dirt trapped in these areas slightly alters the shape of the teeth, preventing the chain from engaging properly.
This can result in an odd sensation while pedaling and may cause the chain to slip specially when you are applying significant force to the pedals.
Apply degreaser to the chainrings and carefully scrub around each individual tooth.
Remove all accumulated dirt from both the inner and outer surfaces of the rings.
After cleaning, wipe them dry to ensure that any leftover cleaning solution does not dilute the lubricant applied later.
Clean chainrings allow for smooth chain engagement and ensure consistent power transfer.
Re-lubricate Properly
After cleaning, it is crucial to apply lubricant to the drivetrain, as the degreaser removes all previously applied lubrication.
A dry chain leads to friction, noise, and premature wear, which can cause the chain to slip.
While rotating the pedals backward, apply a small drop of lubricant to every link of the chain.
Allow the lubricant a few minutes to penetrate deep into the rollers.
Then, wipe off the excess lubricant with a cloth, leaving behind only a thin film on the chain.
Excess lubricant quickly attracts dirt and negates the benefits of cleaning.
Proper lubrication ensures that the chain runs smoothly, remains silent during gear shifts, and maintains a reliable engagement with the cassette and chainrings.
3. How to Adjust Rear Derailleur Indexing
Rear derailleur indexing controls the precision with which the chain shifts from one gear to another.
Proper indexing ensures that the derailleur positions the chain directly above each cog on the cassette.
If the indexing is even slightly off, the chain may get stuck between gears rather than fully engaging with a specific one.
This misalignment leads to issues such as clicking noises, hesitation, and chain slippage, particularly when you are pedaling under heavy load.
Indexing issues are often caused by cable stretching, the installation of new cables, or general wear and tear from daily use.
The barrel adjuster is typically used to fine-tune the indexing by making small adjustments to the cable tension.
Correct indexing ensures smooth gear shifting and prevents chain slippage, even under heavy load.
Shift to the Smallest Cog
To begin, shift the chain to the smallest cog on the rear cassette.
This position reduces cable tension and establishes a stable starting point for making adjustments.
When the chain is on the smallest cog, the derailleur is in its most relaxed state, making it easier to identify any alignment issues.
If the derailleur is not properly aligned even in this position, shifting to the next gear may prove difficult.
Pedal slowly and observe whether the chain runs smoothly on the smallest cog.
If you hear a clicking sound or notice the chain attempting to drift toward the next gear, the indexing requires adjustment.
Starting from this gear ensures more precise tuning for all the remaining gears on the cassette.
Adjust the Barrel Adjuster
The barrel adjuster is typically located either near the rear derailleur or on the shifter itself.
It controls the cable tension, which determines the position of the derailleur.
Turning the barrel adjuster anti-clockwise increases cable tension, causing the derailleur to shift slightly toward the larger cogs.
Turning it clockwise decreases tension, causing the derailleur to shift toward the smaller cogs.
Make small adjustments while riding the bike, typically a quarter-turn at a time.
After each adjustment, shift to the next gear and observe whether the gear changes smoothly and silently.
Proper adjustment eliminates hesitation and prevents the chain from getting stuck between gears.
It is crucial to make small, gradual adjustments, as over-adjusting can create new problems with gear shifting.
Testing Gear Shifting
After adjusting the barrel adjuster, shift through all the gears one by one.
Maintain a consistent pedaling cadence and observe how the chain moves across the cassette.
Every gear shift should occur quickly and smoothly, without any noise or delay.
Pay particular attention to the specific gears where you previously experienced issues with skipping.
If the chain hesitates, makes clicking sounds, or skips a gear, further adjustments may be required.
Testing initially with light pedaling helps confirm the alignment, but applying slightly more force provides a better simulation of real-world riding conditions.
Smooth and consistent shifting across the entire cassette indicates that the indexing is nearly perfect.
Fine-Tuning the Alignment
Fine-tuning the alignment involves making very minute adjustments to achieve absolutely precise results.
Even after the initial tuning, some gears may still produce a faint noise or feel as though they are sticking.
Turn the barrel adjuster in very small increments, and then test the shifting again.
The objective is to center the derailleur so that the chain moves through every gear without making any noise.
This process may require shifting back and forth between gears to ensure consistent performance.
Proper adjustment ensures that the chain seats perfectly on every cog, thereby minimizing wear and preventing the chain from slipping.
Once the alignment is correct, the drivetrain should operate smoothly, providing reliable gear shifting and stable power transfer.
4. How to Check for Cassette Wear
The cassette plays a crucial role in how securely the chain engages while you are pedaling.
Each cog on the cassette is designed with a specific profile that helps keep the chain in place and facilitates smooth movement during gear shifts.
Over time, friction between the chain and the metal surfaces causes these cogs to wear down.
When the cassette becomes worn, the chain cannot seat properly between the cogs, causing it to slip under pressure.
Cassette wear often becomes more apparent when riding with a worn-out chain; this is because a stretched chain grinds against the cogs and alters their shape.
Checking for cassette wear helps determine whether chain slippage is caused by worn-out gears rather than a mechanical malfunction.
This step is vital, as installing a new chain on a worn cassette can actually exacerbate the slipping problem rather than resolve it.
Inspect the Cog Profiles
To check for cassette wear, carefully examine the shape of each cog.
On a new cassette, the cogs typically have a uniform and slightly rounded profile, allowing the chain to move smoothly.
As wear progresses, the cogs may become thin, jagged, or “hooked” (leaning to one side).
This irregular shape prevents the cogs from gripping the chain securely.
Compare the individual cogs on the cassette particularly those that are used most frequently, as these are the ones that wear out the fastest.
If some cogs appear significantly different from others, it indicates that the wear has not occurred evenly.
As you spin the wheel, observe how the chain seats itself within each cog.
If the chain appears to ride up on the teeth or fails to seat properly, the cogs may be worn out.
A careful inspection helps determine whether the cassette is still serviceable or requires replacement.
Replace the Cassette If the Teeth Resemble “Shark’s Teeth”
When cassette cogs become excessively worn, they often take on a sharp or hooked appearance commonly referred to as a “shark’s teeth” profile.
This shape develops because the repetitive pressure of pedaling causes the chain to pull against one side of the teeth.
Cogs with a “shark’s teeth” profile are unable to grip the chain effectively, particularly when you are pedaling with force.
The chain frequently rides up the surface of the cog and then suddenly slips forward.
If this type of wear is clearly visible, replacing the cassette is typically the only reliable solution.
Continuing to ride with gears shaped like “shark’s teeth” exacerbates chain slippage issues and accelerates the wear on the chain itself.
Replacing the cassette restores the correct cog profile, allowing the chain to engage fully, thereby improving power transfer and shifting precision.
Tighten the Lockring If It Is Loose
Occasionally, the cause of chain slippage is not worn cogs, but rather a loose cassette.
The cassette is secured to the hub via a lockring; if this lockring becomes loose, the cassette may shift slightly while you are pedaling.
Even the slightest movement disrupts the alignment, preventing the chain from seating properly in its designated position.
When you rotate the cassette by hand, you may feel a slight wobble or hear a ‘clicking’ sound under pressure.
To resolve this issue, it is essential to tighten the lockring using the correct cassette lockring tool.
Proper tightening ensures that the cassette remains stable and maintains correct alignment with the derailleur.
A securely tightened cassette improves shifting precision and eliminates chain slippage issues caused by unnecessary movement.
5. How to Inspect the Chainrings
Chainrings are the front gears attached to the crankset; they interact directly with the chain to transmit your pedaling power to the rear wheel.
Because they are under constant stress particularly during climbs and hard riding, as they gradually wear down over time.
When chainrings become worn, the chain cannot seat properly between their teeth, resulting in reduced grip and an increased risk of the chain slipping.
This issue becomes most apparent when using specific front gears specially those you utilize most frequently.
Inspecting the chainrings is crucial because, even if the chain and cassette are in good condition, worn chainrings can still cause the chain to slip.
A thorough inspection ensures that the entire drivetrain operates smoothly and consistently.
Check for Worn Teeth
To check for wear, carefully examine the shape of the chainring teeth.
New teeth typically have a uniform shape with slightly rounded edges, allowing the chain to engage with them easily.
As the chainring wears down, its teeth may become thin, pointed, or angled to one side.
This irregular shape prevents the teeth from gripping the chain effectively, particularly when you are pedaling with significant force.
Worn teeth can also cause the chain to “climb” up the chainring and slip forward.
Compare different sections of the chainring, as wear is often most pronounced in the areas where you apply the greatest pressure to the pedals.
If the chain does not seat evenly, or if the shape of the teeth appears irregular, the chainring may be worn out and this could be the root cause of the chain slipping.
Check Bolt Tightness
Chainrings are attached to the crank using bolts, and it is crucial that these bolts remain tight to ensure everything stays securely in place.
If the bolts become loose, the chainring may shift slightly while pedaling.
Even the slightest movement affects how the chain engages with the teeth, potentially causing the chain to slip or making pedaling difficult.
Loose bolts may also emit a distinct “clicking” sound when subjected to pressure.
To check for tightness, use the appropriate tool to gently inspect each bolt.
Tightening them evenly ensures that the chainring remains firmly anchored in position.
Properly tightened chainrings stay aligned and facilitate the smooth movement of the chain over the teeth.
Replace If Necessary
If the chainring shows signs of excessive wear, bent teeth, or other forms of damage, replacing it is the best course of action.
Continuing to use a worn-out chainring can lead to repeated chain slippage and accelerate the wear on the chain itself.
Replacing the chainring restores the proper tooth profile and improves chain engagement.
When installing a new chainring, it is essential to select the correct size and ensure that it is compatible with your drivetrain.
After replacement, test the shifting across all front and rear gears to verify that everything is functioning correctly.
A properly functioning chainring transfers power efficiently and helps prevent chain slippage caused by wear on the front drivetrain components.
6. How to Check the Derailleur Hanger Alignment – Straightness
The derailleur hanger is a small metal component that connects the rear derailleur to the bike’s frame, and its alignment (straightness) is crucial for precise gear shifting.
The rear derailleur must be perfectly straight so that the chain can align correctly with every gear (cog) on the cassette.
Even a slight bend in the hanger can displace the derailleur, causing the chain to get stuck between gears rather than seating directly onto them.
This misalignment often leads to chain skipping, noisy shifting, and difficulty engaging specific gears.
Hangers are designed to bend if the bike falls, strikes an obstacle, or sustains impacts during transport.
This protects the frame, but a bent hanger frequently results in chain-skipping issues.
Checking the alignment ensures that the derailleur is correctly guiding the chain across all gears.
View from the Rear
To check the alignment, stand directly behind the bike and carefully observe the rear derailleur and the cassette.
From this angle, you can determine whether the derailleur appears parallel to the gears.
The derailleur’s upper pulley wheel should be vertically aligned (in line) with the selected gear.
If it appears tilted inward or outward, the hanger may be bent.
While this is a simple visual check, it is effective for identifying obvious alignment issues.
Slowly rotate the pedals and shift through the gears while observing from behind.
If the derailleur does not consistently align with each gear, it indicates an alignment problem.
Viewing the setup from this angle reveals issues that might not be apparent when viewed from the side.
Ensure the Derailleur is Straight
A correctly aligned derailleur should operate smoothly and remain perpendicular to the cassette.
When the alignment is correct, the pulley wheels guide the chain directly onto each gear without any obstruction.
If the derailleur is even slightly bent or twisted, the chain may rub against adjacent gears or slip under pressure.
This issue is most evident in the middle gears, where precise alignment is critical.
You can also verify this by observing from behind to see if the derailleur cage (frame) appears straight.
A straight derailleur enhances shifting accuracy and minimizes uneven wear on the drivetrain.
Even minor adjustments can lead to significant improvements in performance.
Repair or Replace the Hanger
If the hanger is bent, it can often be straightened using a ‘derailleur hanger alignment tool.
‘ This tool gently bends the hanger back into its correct position, thereby correcting the derailleur’s alignment.
Caution should be exercised during the realignment process, as hangers are designed with a certain degree of flexibility but can weaken if bent repeatedly.
If the hanger is severely bent, cracked, or cannot be properly aligned, the safest course of action is to replace it.
A new hanger restores proper alignment and ensures reliable shifting performance.
After repairing or replacing the hanger, you should cycle through all the gears to confirm that everything is functioning correctly and that any issues related to chain slippage have been resolved.
7. How to Check Cable Tension
Cable tension determines how the rear derailleur moves across the cassette.
When you shift gears, the shifter either pulls or releases the cable; this movement positions the derailleur precisely beneath each cog.
If the cable tension is too loose or too tight, the derailleur cannot align correctly.
This misalignment causes the chain to track slightly off-center from the gears, leading to issues such as clicking noises, delayed shifting, and chain slippage.
Cable tension issues often develop gradually, as the cable stretches slightly with use and its housing compresses over time.
Dirt inside the housing can also increase friction, hindering the cable’s ability to move freely.
Checking the cable tension ensures that the derailleur functions correctly with every shift and that gear engagement remains consistent.
Check for Broken Cable Strands
Over time, the internal strands of a shift cable may begin to fray, particularly near the derailleur clamp or inside the shifter mechanism.
Strands break when the individual fibers of the cable begin to separate, weakening the cable and compromising its ability to move smoothly.
A damaged cable cannot slide freely within its housing, resulting in inconsistent tension.
This can lead to shifting malfunctions and issues such as chain slippage.
To inspect the cable, carefully examine its exposed sections for any broken strands, signs of rust, or rough spots.
Additionally, check the point where the cable enters the housing, as this is often where damage begins.
If the cable appears frayed or rough, it may no longer be capable of maintaining consistent tension.
Detecting faults and wear and tear early on can prevent sudden cable failure and improve the reliability of gear shifting.
Adjust the Tension
Cable tension can be adjusted using a barrel adjuster; this is typically located near the rear derailleur or directly on the shifter itself.
A slight turn of the barrel adjuster alters the effective length of the cable, thereby shifting the position of the derailleur.
If you are experiencing difficulty shifting into larger gears, or if the chain appears to hesitate, increasing the tension by turning the adjuster anti-clockwise may be helpful.
Conversely, if the chain struggles to shift into smaller gears or feels excessively tight, reducing the tension by turning the adjuster clockwise may resolve the issue.
Make adjustments gradually while riding the bike.
After each adjustment, shift through several gears to ensure that the problem has been resolved.
Proper tension ensures that the derailleur aligns precisely beneath each cog, thereby minimizing hesitation and enhancing accuracy during gear shifts.
Replace the Cable When Necessary
If the cable is excessively worn, corroded, or difficult to adjust, replacing it is often the best solution.
Old cables frequently fail to maintain consistent tension even after adjustment, leading to recurring issues with chain slippage.
Replacing both the cable and its housing restores smooth movement and provides precise control.
New cables glide more freely, reduce friction, and facilitate precise indexing adjustments.
Once installed, the cable tension must be set correctly and verified by shifting through all the gears.
Replacing worn-out cables enhances reliability, prevents sudden malfunctions during gear shifting, and helps resolve chain-slippage issues caused by irregular derailleur movement.
How to Test After Repairs
After making adjustments or replacing worn-out parts, it is crucial to thoroughly test the bike to ensure that the chain-slipping issue has been completely resolved.
While the bike is stationary, the drivetrain may appear to function correctly; however, it may still slip during actual riding.
Testing ensures that the chain engages properly with every gear, the derailleur alignment is precise, and the cable tension is set correctly.
It also helps you identify minor issues before they escalate into major problems.
A comprehensive test should involve shifting through all gears, applying significant pressure to the pedals, and riding the bike on both flat terrain and inclines.
Each type of test evaluates a distinct aspect of the drivetrain’s performance and confirms its reliable operation.
1. Shift Through All Gears
To begin, shift through every gear on the cassette while pedaling continuously.
Shift one gear at a time and observe how quickly and smoothly the chain moves between the gear teeth.
You should not experience any hesitation, noise, or jarring sensation during each gear shift.
Pay particular attention to the specific gears that were previously causing the chain to slip.
If the chain hesitates or produces a “clicking” sound, the indexing may still require some fine-tuning.
Shifting through all gears ensures that the derailleur alignment remains consistent across the entire cassette.
This step also confirms that the cable tension is balanced and that the chain is engaging correctly with the specific position of each gear.
2. Apply Pressure While Pedaling
Once you have confirmed that the gears shift smoothly under light pedaling, apply a little more force to the pedals to simulate actual riding conditions.
Chain slippage often manifests precisely when pressure is applied to the pedals, as worn or misaligned components struggle to hold their position under load.
Gradually increase the pressure on the pedals and observe whether the chain remains stable.
If the drivetrain holds firm without slipping, it indicates that it is properly engaged.
However, if it begins to slip again under pressure, further investigation may be required.
Testing under load is crucial, as it reveals issues that might otherwise go unnoticed during light pedaling.
3. Ride on Flat Terrain
To test the bike’s performance in a controlled environment, ride it on a flat road for a while.
Shift through the different gears while maintaining a consistent speed.
This allows you to evaluate the shifting mechanism under real-world conditions and listen for any unusual noises.
Testing on flat ground ensures that the drivetrain is operating smoothly without any external strain.
It also gives you the opportunity to observe how the chain behaves during normal cycling.
Smooth pedaling and the absence of noise during gear changes indicate that the adjustments have been executed correctly.
4. Hill Climb Test
Riding uphill is the most effective method for confirming that the issue has been fully resolved, as it places the greatest strain on the drivetrain.
While climbing, downshift to a lower gear and maintain a steady pedaling cadence.
This test demonstrates whether the chain remains firmly in place, even under high pressure.
If the chain remains stable and does not slip, it indicates that the drivetrain has been correctly adjusted.
Conversely, if the chain slips while climbing, it often signifies that underlying issues such as: wear or misalignment still persist.
The hill-climbing test ensures that the bicycle operates reliably even under demanding conditions, providing the assurance that the repair work has been successfully completed.
Read More:
How to Install a Bike Crankset
How to Remove a Bicycle Crankset
How to Quickly Fix Chain Skpping Problems
Quick troubleshooting helps identify why a chain is slipping by observing when and how the problem occurs.
Different patterns of slipping typically point to specific drivetrain issues.
By observing whether the chain slips in a single gear, in all gears, under heavy load, or immediately after shifting, you can quickly pinpoint the problem.
This approach saves time because, rather than attempting to fix everything at once, you can prioritize inspecting the most critical components.
Understanding these common patterns allows riders to diagnose issues more accurately and avoid unnecessarily replacing parts.
1. Slipping in Only One Gear – Worn Cassette
When the chain slips in just a single gear or a few specific gears, as it often indicates that the teeth (cogs) on that particular section of the cassette are worn out.
Riders typically use certain gears specially the middle ones, more frequently than others, causing them to wear out faster.
As the teeth wear down, they lose their original profile and can no longer properly grip the chain.
Consequently, the chain slips only when those specific, worn-out gears are engaged.
The rest of the cassette may continue to function correctly, as its teeth are less worn.
This issue can be confirmed by visually inspecting the shape of the teeth on the affected gear and comparing them to the others.
Replacing the worn cassette allows the chain to engage properly again, thereby eliminating the slipping issue in those specific gears.
2. Slipping in All Gears – Worn Chain
If the chain is slipping across multiple gears, the primary culprit is often the chain itself.
A worn chain becomes slightly elongated (stretched), preventing it from seating properly on any of the cassette’s teeth.
As the chain engages with every gear, the issue of slipping manifests across the entire cassette.
This problem typically develops gradually and can become significantly more pronounced when pedaling under heavy load.
A worn chain also accelerates the wear rate of other components; therefore, replacing it at the appropriate time helps preserve both the cassette and the chainrings.
This issue can be confirmed by checking the chain for wear using a chain checker tool or through a visual inspection.
Installing a new chain often resolves the slipping problem across all gears.
3. Slipping Under Load – Worn Chainring
Chain slippage, which primarily occurs when you pedal with significant force (such as while climbing an incline or accelerating) is often an indication of a worn chainring.
Under heavy load, the chain must maintain a firm grip on the teeth of the front chainring.
If these teeth are worn, bent, or misshapen, the chain may ride up and slip forward.
This type of slippage may go unnoticed during light pedaling, but it becomes clearly apparent when greater force is applied.
Inspecting the chainring teeth to observe how sharp or angular they have become can help identify signs of wear.
Replacing a worn chainring improves chain engagement and ensures efficient power transfer during strenuous riding.
4. Chain Stuttering After Shifting – Indexing Issues
When the chain stutters or hesitates immediately after a gear shift, the cause is typically incorrect derailleur indexing.
If the derailleur is not perfectly aligned, the chain cannot fully engage with the specific gear; Instead, it often remains stuck or lodged somewhere in between.
This frequently results in a clicking sound, and the chain may even continue to slip until it settles into a stable position.
This malfunction can occur when the cable tension is either too loose or excessively tight.
Properly setting the barrel adjuster helps fine-tune the derailleur so that the chain seats correctly on every cog.
Correct indexing ensures smooth transitions between gears and prevents the chain from getting stuck after a gear shift.
How to Prevent Chain Skipping in the Future
Preventing chain skipping is easier and less expensive than fixing it once it has started.
Most skipping issues arise gradually due to wear and tear, dirt accumulation, and misalignment.
Regular maintenance ensures that the drivetrain continues to operate smoothly and extends the lifespan of its components.
When the chain, cassette, and chainrings are clean and properly aligned, they engage with one another more precisely and transfer power efficiently.
A few simple habits such as: cleaning, lubrication, and timely component replacement, as it reduce friction and prevent uneven wear.
Adopting these preventive measures also improves shifting accuracy, reduces noise, and makes the riding experience safer and more comfortable over time.
1. Clean the Drivetrain Regularly
Regular cleaning removes accumulated dirt, dust, and old lubricant from the chain and gears.
This buildup creates friction and prevents the chain from seating properly between the teeth.
When dirt hardens, it acts as an abrasive agent, accelerating wear on both the chain and the cassette.
Cleaning the drivetrain every few rides or more frequently in dusty or wet conditions, as it ensures that the chain continues to run without obstruction.
A clean drivetrain facilitates smooth engagement between components and significantly reduces the likelihood of skipping.
Consistent cleaning also makes it easier to identify early signs of wear before they develop into serious problems.
2. Replace the Chain at the Right Time
With continuous use, a bicycle chain gradually wears out; Replacing it at the right time helps prevent damage to other drivetrain components.
A worn-out chain no longer aligns correctly with the spacing between the cassette teeth, causing the chain to slip and accelerating wear and tear on the gears.
Many riders delay replacing their chain for too long, which ultimately results in them having to replace the cassette and chainrings as well.
Periodically checking the chain for wear helps determine exactly when it needs to be replaced.
Installing a new chain before excessive wear occurs ensures proper drivetrain alignment and keeps the system running smoothly.
Replacing the chain at the appropriate time is the most effective way to prevent skipping and extend the lifespan of your components.
3. Avoid Cross-Chaining
Cross-chaining occurs when the chain runs at an excessively diagonal angle such as: using the largest front chainring in combination with the largest rear cog, or using the smallest front chainring with the smallest rear cog.
These combinations cause the chain to twist laterally, increasing friction and leading to uneven wear.
Over time, cross-chaining causes the chain to stretch prematurely and damages the gear teeth.
This misalignment also affects shifting precision and increases the risk of the chain slipping.
Using more balanced gear combinations keeps the chain running straight and reduces the stress placed on the drivetrain.
Avoiding extreme gear angles helps maintain smooth performance and enhances the durability of the components.
4. Lubricate Correctly
Proper lubrication reduces friction between the chain links and ensures smooth movement.
Without lubrication, the chain becomes stiff and noisy, and it is unable to wrap properly around the gears.
Due to this stiffness, the chain may slip when placed under load.
Applying a small amount of lubricant to each link allows the rollers to rotate freely and seat properly against the gear teeth.
Excess lubricant should be wiped off to prevent it from attracting dirt.
Regular lubrication following cleaning protects the chain from rust and wear.
A well-lubricated chain improves gear-shifting performance and reduces the risk of slippage.
5. Regularly Inspect Cables
Over time, shift cables tend to stretch slightly, causing the derailleur’s alignment to become compromised.
When cable tension is inconsistent, the chain cannot align correctly with the cassette gears.
This misalignment leads to hesitation during shifting and can sometimes result in slippage issues.
Regularly checking the condition and tension of the cables helps maintain precise shifting.
Inspect the cables for signs of wear, rust, or stiffness.
Minor adjustments using the barrel adjuster can restore proper alignment.
Replacing worn cables when necessary ensures the smooth operation of the derailleur.
Regular cable inspection maintains the responsiveness of the drivetrain and prevents interruptions caused by incorrect indexing.
When to Replace Parts Instead of Repairing
Sometimes, adjustments and cleaning fail to resolve chain-slipping issues because certain components have worn out beyond their usable limit.
Bicycle drivetrain components are designed to operate in precise synchronization with one another; when this precision is lost due to wear and tear, simple adjustments alone cannot restore proper performance.
Continuing to ride with excessively worn or bent components can exacerbate chain-slipping problems, compromise shifting accuracy, and potentially cause damage to other parts as well.
Knowing when to replace components helps ensure the bicycle runs smoothly and prevents costly repairs in the future.
Replacing worn parts at the appropriate time ensures that the chain engages correctly and the drivetrain transfers power efficiently.
Plus, there’s research on the drivetrain efficiency and wear modeling that explains that abrasive wear between the chain pins and rollers actually increases the resistance torque and that causes elongation over the time, so as elongation grows, then the alignment between the chain and gear teeth actually worsens that actually leads to the poor engagement and skipping under the load, so this study clearly explains why proper lubrication and timely part replacement literally helps you to prevent chain skipping.[¹]
1. Excessive Chain Wear
During use, as the pins and rollers of the chain rub against one another, the chain gradually wears down.
This wear causes the spacing between the chain links to increase, effectively elongating the chain.
When chain wear exceeds its acceptable limit, it no longer fits properly onto the teeth of the cassette and chainrings.
This leads to chain-slipping issues, even if the gears themselves are in good condition.
An excessively worn chain cannot be remedied through cleaning or lubrication, as its internal metal components have already been compromised by wear.
In such cases, replacing the chain restores the correct spacing and prevents further damage.
Riding with a severely worn chain often necessitates the premature replacement of the cassette and chainrings as well.
2. Worn-out Cassette Teeth
Broken, bent, or excessively worn cassette teeth are unable to grip the chain securely.
Damage often manifests as teeth that appear sharp, bent, or jagged.
Due to these irregular shapes, the chain frequently rides up over the teeth and slips forward under pressure.
Even a brand-new chain will slip on worn cassette teeth, as the contact surface has been compromised.
Minor issues involving dirt or alignment can often be remedied, but physical damage to the teeth necessitates their replacement.
Installing a new cassette ensures that the teeth retain their proper profile, thereby improving chain engagement.
Replacing worn-out cogs also prevents excessive wear and tear on a new chain.
3. Bent Derailleur Hanger
Derailleur hangers are designed to bend upon impact with an object; however, once severely bent, they often cannot be properly realigned even if attempts are made to adjust them.
A bent hanger causes the derailleur to sit at an angle (askew), preventing the chain from aligning correctly with the cassette cogs.
This misalignment leads to shifting difficulties and frequent gear skipping.
While minor bends can sometimes be corrected, severely bent hangers may be structurally compromised and prone to failure upon reuse.
Replacing the hanger ensures that the derailleur remains properly aligned, guaranteeing precise shifting performance.
A correctly installed hanger enhances shifting accuracy and reduces mechanical stress on the drivetrain.
4. Excessively Worn Chainrings
Chainrings wear down over time, particularly on bicycles that are frequently ridden in the same gear.
The teeth of excessively worn chainrings become thin, sharp, or uneven.
These deformed shapes compromise the chain’s grip, causing it to slip while pedaling specially under load.
Unlike minor wear, severe damage cannot be remedied through simple adjustments or cleaning.
Replacing worn chainrings restores the proper tooth profile and ensures smooth chain operation.
Installing new chainrings also improves power transfer efficiency and reduces mechanical stress on the remaining drivetrain components.
When You Should Visit a Bike Shop
While many chain-slipping issues can be resolved at home, certain situations require professional tools, expertise, and diagnostics.
Bike shops are equipped with alignment gauges, torque tools, and replacement parts that aid in accurately diagnosing complex drivetrain problems.
Professional mechanics also inspect for hidden issues such as: frame misalignment, worn bearings, or component incompatibility that might go unnoticed during home repairs.
Visiting a bike shop at the right time can prevent further damage, ensure safety, and often save money by correctly addressing the root cause of the problem.
1. Persistent Chain Slipping
If chain slipping persists even after cleaning the chain, adjusting the indexing, and inspecting the components, it may indicate a more serious underlying issue.
Persistent chain slipping often occurs when multiple components such as: the chain, cassette, and chainrings have worn out simultaneously and no longer mesh properly with one another.
It can also stem from subtle alignment issues that are difficult to detect with the naked eye alone.
Professionals at a bike shop can accurately measure component wear and determine exactly which parts require replacement.
Conducting a professional inspection under load (pressure) can also reveal issues that might be missed during a standard home inspection.
In such situations, seeking expert assistance helps restore the drivetrain to its optimal performance.
2. Derailleur Alignment Issues
Proper derailleur alignment requires precise measurements to ensure that both the derailleur hanger and the derailleur itself are perfectly straight.
Even a slight misalignment can cause the chain to slip in certain gears, and correcting this often necessitates the use of a derailleur hanger alignment tool.
Without this specialized instrument, accurately straightening the hanger is extremely difficult.
Bike shops utilize specialized equipment to measure derailleur hanger alignment relative to the wheel and cassette.
Proper alignment improves shifting precision and prevents uneven wear on components.
If the derailleur has become bent due to an accident or during transport, having it professionally repaired is generally the safest course of action.
3. Internal Hub Issues
Some bicycles employ internal gear hubs rather than traditional derailleurs.
In these systems, the sealed internal gears and mechanisms are housed entirely within the hub itself.
If gear slippage occurs in these systems, the root cause is likely located within the hub rather than in the external drivetrain components.
Repairing or servicing internal hubs requires specialized knowledge and tools.
Attempting to open or adjust them incorrectly can result in further damage.
A bike shop can diagnose whether the issue stems from cable tension, hub indexing, or internal wear.
Professional servicing ensures that the hub functions correctly and safely.
4. Lack of Tools
Certain drivetrain repairs require specialized tools such as: cassette lockring tools, chain wear gauges, torque wrenches, and alignment tools.
Without these tools, making precise adjustments or properly tightening components is difficult.
If components are not tightened correctly, they may come loose; Conversely, overtightening poses a risk of damaging the threads or the components themselves.
A bike shop possesses the necessary tools and expertise to perform these tasks safely.
When you lack the proper tools, visiting a shop ensures that the repairs are executed correctly and helps prevent any potential damage.
Conclusion – How to Fix Chain Skipping
So, when you maintain the drivetrain then it actually turns your efforts into the motion without any hesitation or wasted energy as well.
Your bicycle’s drivetrain relies on the precise synchronization of the chain, cassette, chainrings, derailleur, and cables.
Even minor wear, dirt accumulation, or alignment issues can disrupt this precision and lead to chain slippage.
By first inspecting the chain, cleaning the drivetrain, adjusting the indexing, and checking for component wear, most issues related to chain slippage can be resolved without unnecessarily replacing any parts.
Regular maintenance plays a crucial role in preventing future problems, as clean and properly lubricated components last longer and operate with greater precision.
Timely replacement of a worn chain protects the cassette and chainrings, while avoiding “cross-chaining” reduces the uneven stress placed on the drivetrain.
After making the necessary adjustments, take the bicycle for a test ride to ensure that the repairs function correctly under actual riding conditions particularly during hard pedaling or while climbing hills.
If the problem persists, having a professional inspect the bike can help uncover hidden issues related to alignment or component compatibility.
Understanding these steps helps riders maintain smooth shifting, improve power transfer, reduce noise, and ride with greater safety and confidence.
Now, that’s it from this guide on How to Fix Chain Skipping, so that you can comment for more genuine information.
Frequently Asked Questions
Q1: Why does the bike chain slip while pedaling?
Answer: Chain slipping typically occurs when drivetrain components become worn, dirty, or misaligned. The chain must fit securely into the teeth of the cassette and chainrings; if any of these parts are worn, the fit becomes loose. A stretched chain is one of the most common culprits, as its pitch no longer aligns with the spacing of the gear teeth. Accumulated grime can also prevent the chain from seating fully within the gears. Improper derailleur indexing, a loose cassette, a bent hanger, or worn chainrings can also contribute to chain slipping. This issue often manifests during hard pedaling, as the increased force applied at that moment prevents the chain from seating securely in place.
Q2: Can a worn chain cause slipping in every gear?
Answer: Yes, a worn chain can cause slipping across multiple gears. As a chain wears, the spacing between its links increases, preventing it from engaging properly with the teeth of the cassette. As the chain interacts with every gear, slipping issues can occur throughout the entire cassette range. Therefore, checking for chain wear is typically the first step when troubleshooting chain slipping problems. Replacing a worn chain often results in an immediate improvement in gear shifting; however, if the cassette has also worn down to match the old chain, it may be necessary to replace both components to achieve the best results.
Q3: Why does my chain slip only in a specific gear?
Answer: If the chain slips in only one specific gear, it usually indicates that the particular cog (sprocket) on the cassette associated with that gear has worn out. Riders often favor specific gears, leading to accelerated wear on those particular teeth. When the shape of the teeth becomes distorted, the chain cannot engage with them properly and slips under pressure. Other gears may still function correctly because they have experienced less wear. This pattern is a definitive sign that the cassette is wearing out. In most cases, replacing the entire cassette or simply replacing the worn-out sprocket which resolves the issue.
Q4: Can a slipping bicycle chain be dangerous?
Answer: A slipping chain can be dangerous, specially when you are pedaling with great force. When the chain slips, your foot can suddenly shoot forward without any resistance. This sudden movement can disrupt your balance particularly while climbing hills or riding at high speeds. Riders may even momentarily lose control of their bike, thereby increasing the risk of an accident. Even if it doesn’t result in a crash, a slipping chain undermines your confidence and makes riding the bike more difficult. Addressing this issue immediately enhances safety and ensures consistent power transfer.
Q5: How often should I replace my bicycle chain?
Answer: Chain replacement depends on riding conditions, maintenance practices, and mileage. Chains tend to wear out much faster in wet, muddy, or dusty environments. Regular cleaning and lubrication can significantly extend the lifespan of a chain. Many riders use a chain checker tool to periodically monitor the degree of chain wear. Replacing the chain before it becomes excessively worn prevents the cassette and chainrings from wearing out prematurely. Waiting too long often necessitates replacing multiple drivetrain components rather than just the chain.
Q6: Can improper lubrication cause the chain to skip?
Answer: Yes, improper lubrication can indeed cause the chain to skip. A dry chain generates friction, and its links may stiffen, preventing them from flexing easily around the gears. This prevents the cassette and chainrings from engaging properly. Conversely, applying excessive lubricant causes dust to adhere to the chain, leading to a buildup of grime that hinders its smooth movement. Applying the correct amount of lubricant and wiping off any excess, that ensures that the chain runs smoothly and minimizes the risk of skipping.
Q7: Why does my chain skip when climbing hills?
Answer: The primary reason for chain skipping during a climb is the immense pressure placed on the drivetrain. Under such heavy loads, worn or misaligned components are unable to grip the chain securely. Common culprits include worn chainrings, a stretched chain, or a worn cassette. When you pedal forcefully on an incline, even minor alignment issues become glaringly apparent. Testing your bike on climbs is crucial, as it reveals issues that might otherwise go unnoticed on flat terrain.
Q8: Can I fix a skipping chain without replacing any parts?
Answer: In many cases, a skipping chain can be fixed without replacing any components. Cleaning the drivetrain, adjusting the derailleur indexing, tightening a loose cassette, or correcting cable tension will often resolve the issue. However, if a component is excessively worn or damaged, replacing it becomes necessary. Identifying the root cause of the problem helps determine whether an adjustment or a replacement is the correct solution.
References:
[1] A novel model for bicycle drivetrain efficiency
https://www.researchgate.net/publication/392961985_A_novel_model_for_bicycle_drivetrain_efficiency
Jonathan, the passionate owner of Bicycle Time, brings a lifelong love for bikes and automotive craftsmanship, that reflects into every corner of the shop. With deep passion in both cycling and automotive accessories, Jonathan is more than just an expert.