Written By: Jonathan
Fact Checked By: Caroline Dezendorf
Reviewed By: Matt Tanner
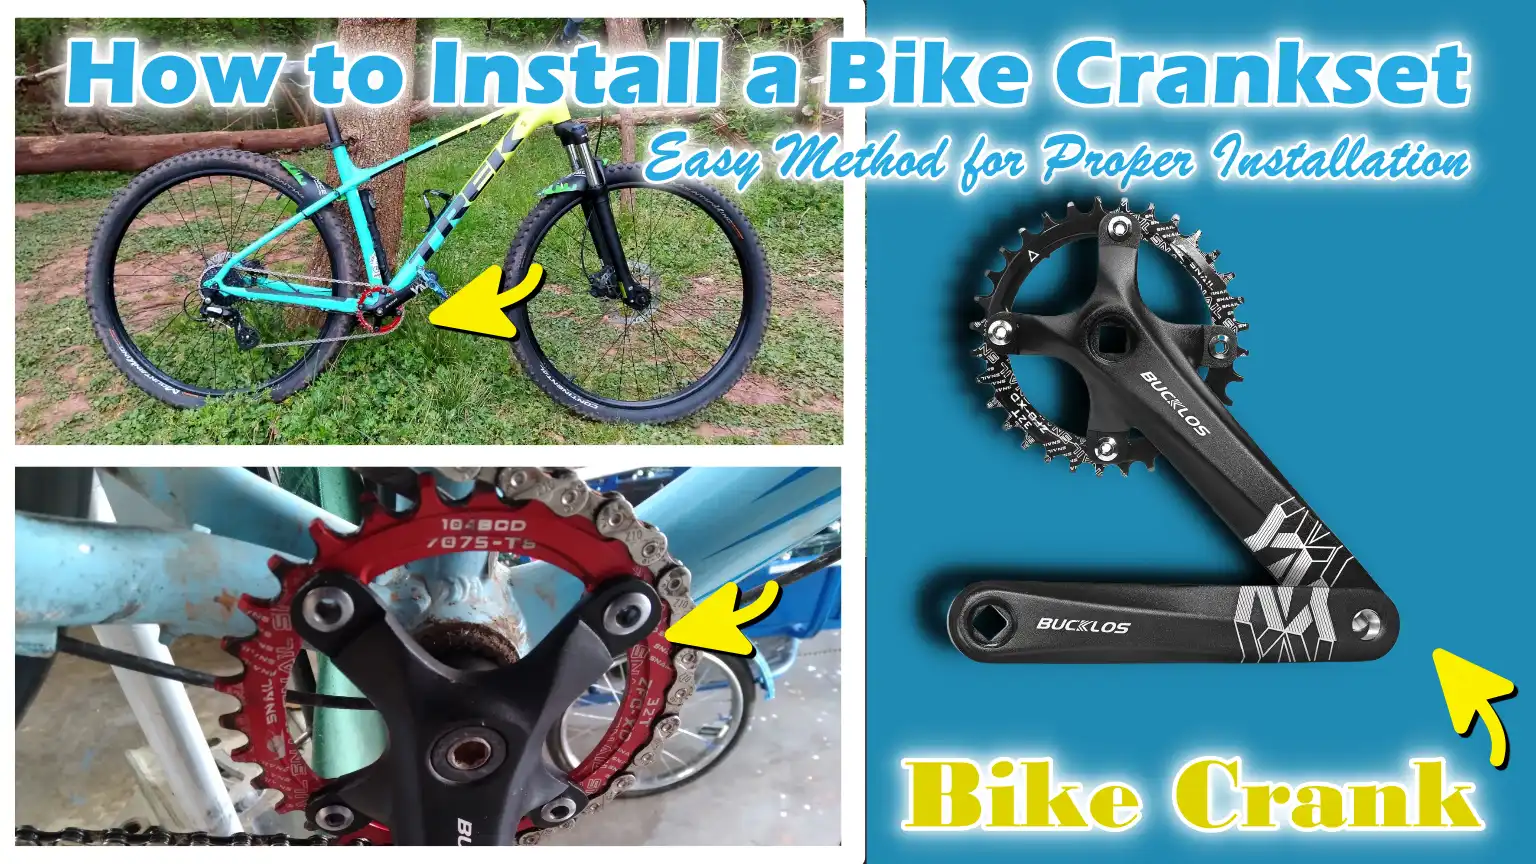
LITERALLY, whenever you press the pedals, your bike actually converts your leg power into the forward motion through the one of the most important components called “CRANKSET”.
Not only this, there’s scientific biomechanics research shows that a bicycle actually coverts the work produced at the crank directly into the forward motion, so whenever the crankset is correctly aligned and tightened, then more of the rider’s effort literally becomes useful motion rather than the wasted energy, so that clearly shows that smoother pedaling, better acceleration and improved efficiency is determined by how perfectly you have installed the bike crankset: so even small installation errors can reduce the pedaling efficiency and increases the wear on surrounding parts.[¹]
As, a loose or poorly installed crankset doesn’t just create the annoying noises, but it can gradually damage the bottom bracket, chainrings and even the bike frame as well.
Even, all of those things: many riders literally ignores early signs such as: clicking sounds, pedal wobble or uneven rotation, but these are often warnings that the crankset isn’t properly secured at all.
And, you need to apply the correct torque, proper greasing and accurate alignment as it literally important to prevent long-term mechanical failures.
Now, in this guide you’ll learn best way on How to Install a Bike Crankset, so that you can understand each step and avoid any possible mistakes that could lead to expensive repairs later on.
Know, The Types of Bike Cranksets
Understanding the different types of bike cranksets helps you choose the right one and install it correctly.
Each crankset design connects to the bottom bracket in a unique way, which impacts its strength, durability, weight, and maintenance requirements.
Some designs are older yet remain reliable, while others are modern and engineered for superior power transfer.
Knowing these distinctions also helps you avoid compatibility issues such as: attempting to install a crankset that does not match your bike’s bottom bracket.
Below, the most common types are explained in simple, practical terms so that you can easily identify them and understand how they function.
1. Square Taper Cranksets
The Square Taper crankset is one of the oldest and most widely used designs, particularly on commuter bikes, entry-level mountain bikes, and older road bikes.
One end of the spindle features a square profile; the crank arm slides onto this square section and is then secured with a bolt.
As the bolt is tightened, the crank arm seats firmly onto the spindle, creating a solid connection.
These cranksets are known for being affordable, easy to install, and if installed correctly then it becomes durable.
However, careful tightening is essential; if under-tightened, the crank arm may loosen over time, whereas over-tightening can damage the mating surfaces.
Many riders still prefer the Square Taper system because its components are readily available and its maintenance is straightforward.
2. Hollowtech/External Bearing Cranksets
Hollowtech, or external bearing, cranksets are modern designs typically found on mid-to-high-end bicycles.
In this system, the spindle is attached to a crank arm and passes through external bearings mounted outside the frame.
This wider bearing stance enhances rigidity and facilitates better power transfer during pedaling.
Because the spindle is often hollow, the crankset remains lightweight without compromising its structural integrity.
These systems typically feature a preload cap that eliminates lateral play before the pinch bolts are tightened.
Proper installation is crucial, as incorrect preload adjustment can lead to premature bearing wear or crank instability.
Riders often choose this type of crankset because it strikes an excellent balance between weight, performance, and durability.
3. Press-Fit Cranksets
In press-fit cranksets, the bearings are installed by being pressed directly into the bike frame, rather than being threaded in.
The crank spindle then passes through these bearings.
This design allows manufacturers to utilize larger spindle diameters, thereby increasing stiffness and improving pedaling efficiency.
Press-fit systems can also reduce frame weight, as they eliminate the need for threaded metal inserts.
However, proper installation is critical; if not seated correctly, they can cause creaking noises or lead to premature bearing wear.
Maintenance can also be slightly more challenging, as removing or installing the bearings often requires specialized tools.
When installed correctly, press-fit cranksets rotate very smoothly and transfer power efficiently.
4. One-Piece Cranksets – BMX/Children’s Bicycles
One-piece cranksets are typically found on BMX bikes, children’s bicycles, and some standard cruiser bikes.
In this design, both the crank arms and the spindle are formed from a single bent piece of steel.
The entire crankset passes through the bottom bracket shell and is secured in place using simple bearings and locknuts.
These cranksets are extremely durable and can withstand rough use, making them ideal for jumping, performing stunts, and riding on challenging terrain.
Although they are slightly heavier than other types of cranksets, they require very little maintenance and are easy to understand.
Due to their simple construction, installation is usually straightforward and does not require any specialized tools.
5. Direct Mount Cranksets
Direct mount cranksets feature a modern design in which the chainring attaches directly to the crank arm, rather than being bolted on separately.
This reduces weight and allows for quick chainring changes without having to remove the entire crankset.
Many mountain bikes utilize a direct mount system, as riders frequently swap between different chainring sizes to suit the specific terrain.
These cranksets typically feature an integrated spindle and are constructed from premium materials such as aluminum or carbon fiber.
For proper installation, it is crucial to ensure the spindle is perfectly aligned and that the correct amount of torque is applied.
If installed correctly, direct-mount cranksets are very robust, transfer power efficiently, and adapt easily to various cycling styles.
Tools
| Tool | Why It Is Needed | How to Use It |
|---|---|---|
| Allen Keys / Hex Wrenches | These are used to loosen and tighten crank bolts, pinch bolts, and, occasionally, chainring bolts. Most modern cranksets rely on hex bolts; therefore, this tool is essential for installation and adjustment. | Fully insert the correct-sized hex key into the head of the bolt. Turn clockwise to tighten and anti-clockwise to loosen. Always apply consistent pressure and avoid using an incorrect-sized key to prevent damaging the bolt. |
| Torque Wrench | A torque wrench ensures that bolts are tightened to the correct specifications. It prevents overtightening, which can damage components, as well as undertightening, which could cause the crankset to loosen while riding. | Insert the appropriate hex bit into the torque wrench. Set the recommended torque value. Slowly tighten the bolt until the wrench emits a ‘click’ sound or indicates that the correct torque has been reached. Stop immediately once the signal is received. |
| Crank Puller (if replacing) | This tool removes an old crank arm from the spindle without damaging the crankset or the bottom bracket. This tool is indispensable when replacing an existing crankset, particularly those featuring a square taper interface. | Fully insert the crank puller into the crank arm. Then, apply pressure against the spindle by turning the handle or bolt. Continue turning until the crank arm separates. Once the arm is loose, carefully remove the tool. |
| Bottom Bracket Tool | This tool is used to install or remove the bottom bracket, which supports the crank spindle. It ensures that the bottom bracket is properly seated and tightened before the crankset is installed. | Fit the tool into the splines of the bottom bracket. Use a wrench or handle to rotate it. Tighten according to the instructions, ensuring that the tool remains firmly seated in place to prevent it from slipping. |
| Grease/Anti-Seize Compound | Grease reduces friction, prevents creaking, and protects metal parts from corrosion. It also makes it easier to remove parts in the future and facilitates the smooth tightening of bolts. | Apply a thin layer of grease to the spindle surfaces, bolt threads, and contact points. Spread it evenly using your finger or a cloth. Do not apply excessive grease, as this can cause dirt and dust to adhere to the parts. |
| Rubber Mallet – Optional | A rubber mallet helps to gently seat the crank arm into place without causing any damage. It is useful when parts fit tightly, but it should never be used to strike with excessive force. | Seat the crank arm into place by tapping it gently and in a controlled manner. Do not apply excessive force. Stop tapping once the crank arm is properly aligned. |
| Clean Rag | A clean cloth removes dirt, old grease, and debris. Clean surfaces ensure a proper fit and minimize the likelihood of creaking or improper installation. | Wipe down the spindle, crank arms, and surrounding components before installation. Additionally, use a cloth to remove any excess grease remaining after tightening the parts. |
Know, The Components of a Bike Crankset
A bike crankset consists of several interconnected components that work together to convert the effort you put into pedaling into forward motion.
Each component plays a specific role in power transfer, alignment, and stability.
If any single part becomes worn, loose, or improperly installed, it can negatively impact shifting performance, cause noise, and even lead to damage to the drivetrain.
Understanding these components helps you install the crankset correctly, diagnose issues early, and enjoy a more comfortable pedaling experience.
The sections below explain each essential component in clear and simple terms, enabling you to easily identify them and understand how they function.
1. Crank Arms
Crank arms are long levers that connect the pedals to the crankset.
When you apply downward force on the pedals, the crank arms rotate and drive the chainrings.
On most bicycles, there are two crank arms positioned directly opposite each other at a 180-degree angle to ensure a smooth and fluid pedaling motion.
Crank arms are typically made from aluminum, steel, or carbon fiber, depending on the type of bicycle and its performance level.
Their length influences pedaling comfort and efficiency; common sizes range from approximately 165 mm to 175 mm.
If the crank arms are loose or misaligned, you may experience wobbling, clicking sounds, or an unusual sensation while pedaling.
Proper installation and tightening are crucial, as the crank arms are subjected to constant stress while riding.
2. Chainrings
Chainrings are toothed gears attached to the crankset that engage with the bike’s chain.
As the crank arms rotate, the chainrings pull the chain, causing the rear wheel to spin.
Depending on the design of the bike’s drivetrain, it may feature one, two, or three chainrings.
Larger chainrings help propel the bike forward at higher speeds but require greater effort to pedal; conversely, smaller chainrings make pedaling easier, particularly when climbing an incline.
Chainrings are typically constructed from aluminum or steel and are designed with specially shaped teeth to optimize gear-shifting performance.
Worn or bent chainrings can lead to issues such as shifting difficulties, chain slippage, or mechanical noise.
To ensure a smooth and efficient transfer of power, it is crucial that the chainrings are correctly aligned and securely fastened.
3. Spindle / Axle
The spindle (also referred to as the axle) is the central rod that connects the two crank arms and facilitates their rotation.
It passes through the center of the ‘bottom bracket’ and supports the entire crankset assembly.
In some cranksets, the spindle is integrated into one of the crank arms, while others utilize a separate, independent spindle.
To ensure smooth rotation and prevent lateral movement, it is essential that the spindle remains straight and is correctly installed.
Modern spindles are often hollow internally to reduce weight while simultaneously maintaining their structural integrity.
If the spindle is damaged, bent, or improperly installed, you may experience resistance or hear strange noises while pedaling.
Proper installation ensures correct alignment and efficient power transfer.
4. Bottom Bracket Interface
The bottom bracket interface is the point where the crankset spindle meets the bike’s frame.
It houses bearings that facilitate the smooth rotation of the crankset.
Different cranksets utilize various interface designs, such as square taper, spline, or external bearing systems.
To ensure proper functionality, the interface must be compatible with the specific type of crankset being used.
Clean and properly greased surfaces help minimize friction and prevent creaking noises.
If the interface is worn or improperly installed, the crankset may feel loose or rough.
A precise fit at this junction is crucial, as it bears the entire load generated during pedaling.
5. Chainring Bolts
Chainring bolts securely fasten the chainring to the crank spider or crank arm.
These bolts hold the chainring firmly in place, allowing the chain to run smoothly during pedaling and gear shifting.
These bolts are typically small but critically important; if loose, they can cause rattling, shifting difficulties, or even cause the chainring to dislodge.
Most chainring bolts require a hex key or specialized tools for tightening.
Applying a small amount of grease to the bolt threads prevents seizing and facilitates proper tightening.
Properly tightened chainring bolts secure the chainring in place and ensure consistently excellent performance.
What to Do Before You Begin – Initial Preparation
Proper preparation is crucial before installing a bike crankset, as most issues such as: creaking noises, loose crank arms, and compromised pedaling efficiency stem from an incorrect setup.
Dedicating a few minutes to preparation ensures that the crankset fits correctly, rotates smoothly, and lasts for a long time.
Many professional mechanics emphasize preparation because clean surfaces, proper lubrication, and accurate component identification minimize wear and tear, thereby preventing damage to expensive parts.
The steps outlined below help establish a solid and reliable foundation for the installation, ensuring that the crankset operates both securely and efficiently.
1. Check for Compatibility with the Bottom Bracket
Before installing a crankset, you must ensure that it is compatible with the specific type of bottom bracket currently installed on your bike.
Different cranksets are designed for specific interfaces such as: square taper, splined, or external bearing systems.
If the crankset and bottom bracket are incompatible, the components will not fit together correctly; this can lead to wobbling, misalignment, or even permanent damage.
Checking for compatibility involves verifying the spindle’s diameter, width, and design.
Using compatible components ensures proper bearing contact, smooth rotation, and efficient energy transfer during pedaling.
2. Cleaning the Bottom Bracket Shell
The bottom bracket shell is the section inside the bike frame where the crankset rotates.
The presence of dust, old grease, or debris in this area can hinder proper fitting and lead to noise or uneven movement.
Cleaning the shell ensures that the bearings seat evenly and helps to minimize friction.
A clean surface allows the grease to function effectively and prevents impurities that could shorten the lifespan of the bearings.
Carefully wiping down the shell prior to installation improves alignment and ensures that the crankset spins smoothly.
3. Inspecting Threads and Bearings
Inspecting the threads and bearings before installation can prevent future mechanical issues.
The threads must be clean and free of damage to ensure that bolts and components can be tightened securely.
Damaged threads impede proper tightening, potentially causing components to loosen or bolts to strip.
The bearings should rotate smoothly without any friction or resistance.
Rough or worn bearings can generate noise and reduce pedaling efficiency.
Inspecting these components ensures that the crankset operates silently and minimizes the risk of premature wear and tear.
4. Apply Grease as Needed
Applying grease is essential for smooth installation and long-term performance.
Grease reduces friction between metal components, prevents corrosion, and helps to eliminate creaking noises.
By preventing parts from seizing together, this also makes them easier to remove in the future.
A thin layer of lubricant should be applied to spindle surfaces, bolt threads, and contact points.
Proper lubrication facilitates the correct tightening of bolts and ensures that pressure is distributed evenly across all components, thereby guaranteeing durability and smooth rotation.
5. Identify the Left and Right Crank Arms
Crank arms are specifically designed for the left and right sides of a bicycle; installing them incorrectly can lead to serious alignment issues.
The right crank arm typically features the attached chainrings, while the left crank arm is installed on the opposite side.
For smooth and circular pedaling, these arms must be positioned at a precise 180-degree angle relative to one another.
Most crank arms feature “L” and “R” markings to indicate their correct placement.
Identifying them prior to installation helps prevent errors and ensures a balanced transfer of power while cycling.
How to Install a Bike Crankset – Easy & Working Method
Properly installing a bike crankset facilitates easier pedaling, ensures efficient power transfer, and extends the lifespan of the components.
Each step builds upon the previous one; therefore, paying close attention to detail and precision throughout the entire process is crucial.
Many common issues such as: creaking noises, loosening crank arms, and premature bearing wear, occur when a step is skipped or performed in the incorrect order.
Adhering to the correct installation procedure ensures that the crankset remains securely mounted, minimizes stress on the bearings, and provides a safe riding experience.
The steps outlined below explain this process in a clear and straightforward manner, enabling you to install your crankset with complete confidence.
1. Install or Check the Bottom Bracket
The bottom bracket supports the crankset and allows it to rotate smoothly; therefore, it is essential to verify that the bottom bracket is correctly installed before attaching the crank arms.
Ensure that the bottom bracket is fully seated within the frame and properly aligned.
If it is loose or not fully tightened, the crankset may wobble or make noise while pedaling.
Tightening the bottom bracket to the torque specifications recommended by the manufacturer ensures that the bearings remain firmly seated in place and prevents them from sustaining damage.
A correctly installed bottom bracket establishes a solid foundation and protects the components from premature wear and deterioration.
2. Apply Grease to the Spindle
Applying grease to the spindle helps reduce friction between the crankset and the bearings.
This step prevents the creaking sounds that often occur when dry metal parts rub against one another.
Grease also protects against corrosion caused by moisture and dirt, damage that can make removing parts difficult later on.
Applying a thin, even layer is sufficient to ensure that parts rotate freely and the crank arms seat correctly.
This small step enhances the durability of the parts and simplifies future maintenance.
3. Install the Right Crank Arm
The right crank arm typically features the chainrings and is the first component to be installed.
Carefully slide the spindle, which is attached to the right crank arm through the bottom bracket shell.
It should slide in easily, without requiring any force.
Proper alignment is crucial; attempting to force it in at an angle risks damaging the bearings or preventing the parts from rotating correctly.
When installed properly, the crank arm should remain upright and rotate smoothly without any obstruction.
4. Install the Left Crank Arm
The left crank arm is installed only after the right crank arm is securely seated in place.
It is essential to position it directly opposite the right crank arm, creating a 180-degree angle.
This alignment ensures balance while pedaling and allows the pedals to move in a smooth, circular motion.
Press the left crank arm firmly onto the spindle until it is fully seated in its correct position.
Correct installation ensures a smooth, consistent pedaling motion and reduces the stress placed on the crankset during riding.
5. Tighten the Crank Bolts
The crank bolts secure the crank arms to the spindle; Therefore, it is essential to tighten them correctly.
Using a torque wrench ensures that the bolts are subjected to the precise amount of pressure preventing them from being either overtightened or left too loose.
Overtightening can damage the bolt threads or cause a component to fracture, whereas leaving them loose can result in the crank arms becoming loose over time.
Tightening the bolts to the specified torque ensures that the crankset remains securely attached, thereby maintaining stability while pedaling.
6. Install the Preload Cap – If Applicable
Some modern cranksets feature a preload cap designed to eliminate any play (side-to-side movement) within the bearings.
This cap should be tightened gradually until all play in the bearings is completely eliminated.
Its purpose is to prevent the bearings from shifting or moving out of position.
Overtightening the cap can compress the bearings, making pedaling difficult.
When the preload is set correctly, the bearings rotate smoothly and are protected from premature wear.
7. Tighten the Pinch Bolts – For Two-Piece Systems
In two-piece cranksets, pinch bolts located on the left crank arm are often used to secure the spindle.
To ensure even pressure, these bolts should be tightened gradually and alternately.
Fully tightening one bolt before the other can result in uneven clamping and compromise alignment.
Applying uniform pressure ensures that the crank arm seats properly onto the spindle.
Properly tightened pinch bolts keep the crankset stable and prevent it from shifting while cycling.
Know, About The Torque Specifications
The most critical aspect of correctly installing a bike crankset is adhering to the specified torque specifications.
Torque refers to the rotational force applied when tightening a bolt.
Applying the correct torque ensures that components are tightened sufficiently to remain secure, yet not overtightened to the point of sustaining damage.
Many crankset malfunctions, creaking noises, and premature bearing wear are caused by bolts being either too loose or excessively tight.
Manufacturers determine specific torque values based on material strength, bolt size, and design tolerances.
Adhering to these values maintains proper alignment, enhances safety, and extends the lifespan of drivetrain components.
1. Why Torque Matters
Correct torque ensures that all crankset components remain firmly secured without sustaining damage, which could otherwise result from excessive stress.
When bolts are tightened according to the prescribed specifications, the crank arms remain in proper alignment, and power transfer remains efficient.
Proper torque distributes pressure evenly across contact surfaces, thereby minimizing movement and preventing creaking noises.
Modern cranksets are often constructed from lightweight aluminum or carbon materials; therefore, tightening them correctly is crucial to prevent material deformation or damage.
Utilizing the correct torque facilitates smooth rotation, protects the bearings, and ensures that components do not loosen during a ride.
2. Common Torque Ranges
Most crankset bolts fall within a medium torque range, which varies depending on the specific design and the manufacturer.
Main crank bolts typically require a torque of between 35 and 55 Nm, whereas the pinch bolts found on two-piece cranksets generally require a torque of between 12 and 14 Nm.
Preload caps typically require very low torque, as they are designed merely to eliminate lateral play, not to bear structural load.
Chainring bolts often fall within a torque range of 8 to 12 Nm.
These values may vary slightly, so it is always essential to consult the manufacturer’s recommendations.
Adhering to these ranges ensures that components remain securely fastened without being subjected to excessive stress.
3. The Dangers of Overtightening
Overtightening is a common mistake that can lead to serious damage.
Applying excessive force can strip threads, crack crank arms, or compress bearings.
When bearings are compressed, they cannot rotate freely; this increases friction and reduces pedaling efficiency.
Overtightening can also warp lightweight aluminum components or cause permanent structural damage to carbon crank arms.
In some instances, overtightened bolts can seize up, making them extremely difficult to remove in the future.
These issues can result in costly repairs and compromise safety; therefore, it is crucial to tighten components in a controlled manner.
4. The Risks of Undertightening
Undertightening can cause crank arms and bolts to gradually loosen during a ride.
This instability often manifests as clicking noises, shifting components, and inefficient power transfer.
Loose crank arms can damage the spindle interface, potentially rendering the entire crankset permanently unusable.
Continuously riding with loose components also places excessive strain on the bearings and increases the risk of sudden mechanical failure.
In severe cases, a loose crank arm may detach while pedaling, a situation that poses a significant safety hazard.
Applying the correct torque prevents such movement, ensuring that the crankset remains stable and that the riding experience remains both safe and efficient.
Read More:
How to Remove a Bicycle Crankset
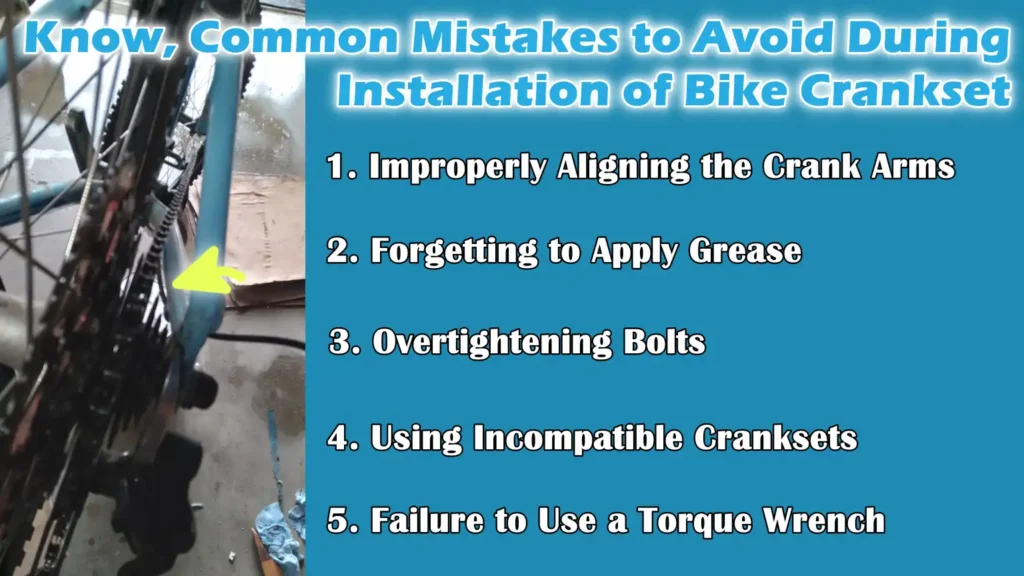
Know, Common Mistakes to Avoid During Installation of Bike Crankset
Avoiding common mistakes when installing a crankset is just as important as following the correct procedures.
Many drivetrain issues such as: creaking, poor shifting, and loose crank arms, are often caused by minor errors made during the installation process.
These mistakes may not be immediately apparent, but over time, they can lead to premature component wear, reduced performance, and even safety hazards.
Understanding these potential risks helps you install the crankset correctly, protect expensive components, and ensure a comfortable pedaling experience.
The sections below outline the most common mistakes and explain why they should be avoided.
1. Improperly Aligning the Crank Arms
The crank arms must be positioned directly opposite each other, at a 180-degree angle.
If they are not properly aligned, pedaling becomes uneven and uncomfortable.
Misalignment also places excessive stress on the spindle and bearings, increasing the likelihood of premature wear.
While pedaling, riders may experience awkward foot positioning, reduced power transfer, or a slight wobble.
Proper alignment ensures balanced rotation and a smooth, fluid pedaling motion.
Checking the alignment before tightening the bolts helps prevent these issues and improves overall riding efficiency.
2. Forgetting to Apply Grease
Failing to apply grease during installation is a common oversight that often leads to creaking noises later on.
Without lubrication, metal components rub directly against one another, generating friction and noise.
A lack of grease also increases the likelihood of rust formation, particularly in wet or humid environments.
Over time, dry components can seize up, making them extremely difficult to remove.
Applying a thin layer of grease to spindle surfaces, bolt threads, and contact points reduces friction and ensures that components seat properly in place.
This simple step enhances component durability and guarantees noise-free operation.
3. Overtightening Bolts
Applying excessive force when tightening bolts can damage crankset components.
Overtightening can strip threads, cause cracks in the crank arms, or compress the bearings.
When bearings are compressed, they cannot rotate freely, leading to increased resistance while pedaling.
Lightweight materials such as: aluminum and carbon, that are particularly sensitive to excessive torque (tightening pressure).
This mistake often occurs when people tighten bolts based solely on guesswork rather than using a torque wrench.
Tightening in a controlled manner protects the parts and ensures smooth rotation.
4. Using Incompatible Cranksets
Using a crankset that does not match the bottom bracket or spindle interface can lead to serious problems.
Incompatible parts fail to seat properly, resulting in vibration, noise, or uneven rotation.
Even if a crankset appears to fit correctly, improper contact surfaces can cause premature wear and damage at the interface.
Compatibility factors include spindle dimensions, bottom bracket type, and crank design.
Ensuring the compatibility of all components prevents installation-related issues and enhances long-term reliability.
5. Failure to Use a Torque Wrench
Failing to use a torque wrench increases the risk of both overtightening and undertightening components.
Tightening by feel often results in uneven pressure and improper clamping.
Undertightened bolts can loosen during a ride, while overtightened bolts can damage components.
A torque wrench applies precise force based on the manufacturer’s recommendations.
Using one ensures uniform tightness and helps maintain a secure and stable installation of the crankset.
How to Verify Proper Installation
After installing a bike crankset, it is crucial to inspect your work to ensure that everything is secure and functioning correctly.
Even after carefully following the installation steps, minor alignment issues or loose bolts may still occur.
Proper verification helps prevent noise during rides, poor performance, and mechanical failures.
These checks take only a few minutes, yet they can significantly enhance safety, functionality, and the lifespan of the components.
The methods outlined below help ensure that the crankset has been installed correctly and is ready for use.
1. Rotate the Crank Arms
To begin, gently rotate the crank arms by hand.
They should spin smoothly and without any obstruction.
Smooth rotation indicates that the spindle is correctly aligned and that no excessive pressure is being placed on the bearings.
If the crank arms feel stiff or come to an abrupt halt, it may indicate that the preload cap has been overtightened or that undue pressure is being applied to the bearings.
If they do not rotate properly, the crank arms may not be seated correctly.
A properly installed crankset should rotate with a consistent motion.
2. Check for Side-to-Side Movement
Grasp one of the crank arms and gently push it toward the frame, then pull it back outward.
There should be no clearly visible side-to-side movement.
Any lateral movement indicates that the crankset has not been tightened correctly or that the preload adjustment is incorrect.
Lateral movement can result in creaking noises, and during riding, this can lead to premature bearing wear.
If any movement is detected, tightening the preload cap or crank bolt typically resolves the issue.
A correctly installed crankset should feel solid and exhibit absolutely no looseness.
3. Pay Attention to Sounds
Listen closely for any clicking, grinding, or creaking sounds while rotating the crank arms.
These noises often indicate dry contact surfaces, loose bolts, or alignment issues.
A grinding sound may signal a problem with the bearings, while a clicking sound could point to loose crank arms or chainring bolts.
A correctly installed crankset should operate silently.
If any noise occurs, re-checking the lubrication and bolt torque usually resolves the problem.
Silent rotation is a definitive sign of proper installation.
4. Check Shifting Performance
Following the manual inspection, shift through the gears while pedaling the bicycle slowly.
The chain should transition smoothly between the chainrings without any hesitation or snagging.
Erratic shifting can indicate improper chainring positioning or crank misalignment.
Smooth gear shifting confirms that the chainrings are correctly aligned and the crankset is stable.
Performing this check ensures that the drivetrain functions efficiently during actual riding conditions.
How to Solve The Common Problems After Installation of a Bike Crankset
Even after careful installation, you may notice some minor issues with the crankset during the first few rides.
These issues are typically caused by slight alignment errors, incorrect torque, or a lack of lubrication.
Detecting problems early can prevent damage to the bottom bracket, chainrings, and bearings.
Most crankset issues, if identified in a timely manner, can be easily resolved.
Understanding common symptoms and their root causes allows you to fix them before they escalate into costly repairs or unsafe riding conditions.
1. Loose Crankset
If the crankset feels loose, you may notice slight movement when pushing the crank arms side-to-side or while pedaling.
This typically occurs when the crank bolts have not been tightened correctly or when the preload adjustment is incorrect.
Loose crank arms can damage the spindle interface over time, potentially rendering the crankset permanently unusable.
The solution is to inspect the crank bolts and tighten them according to the recommended torque specifications.
If the crankset utilizes a preload cap, gently adjust it to eliminate any side-to-side play before tightening the pinch bolts.
Once properly tightened, the crankset should feel solid and stable, with no perceptible movement.
2. Creaking Noises
Creaking noises often occur when metal components rub slightly against one another under pressure.
This typically happens when grease has not been applied to the spindle, bolt threads, or contact surfaces.
Dirt lodged between components can also generate noise.
Loose crank bolts or chainring bolts can produce similar sounds.
To resolve this issue, remove the crank arms (if necessary), clean all contact surfaces, and apply a thin layer of grease.
Reinstall the components and tighten all bolts according to the correct torque specifications.
A properly lubricated and tightened crankset should operate silently.
3. Difficulty in Rotation
If the crank arms feel stiff or difficult to rotate, the bearings may be under excessive pressure.
This typically occurs when the preload cap has been overtightened, or when the crank bolts exert excessive pressure on the bearings.
Overtightened bearings increase friction, which reduces pedaling efficiency and can lead to premature bearing wear.
To resolve this issue, slightly loosen the preload cap and check if the crank arms now rotate more freely.
The goal is for the cranks to rotate smoothly without any lateral play.
Proper adjustment ensures that the crankset spins without obstruction and transmits power effectively.
4. Chainring Misalignment
Chainring misalignment can lead to issues such as difficulty shifting gears while pedaling, chain rub, or intermittent chain movement.
This problem can arise if the crankset is not fully seated in its position, the bottom bracket spacing is incorrect, or the chainring bolts have not been tightened evenly.
Improper positioning weakens the engagement between the chain and the chainring, thereby reducing the overall efficiency of the drivetrain.
Verifying that the crank arms are fully and correctly seated, and ensuring that the chainring bolts are tightened evenly, often resolves this issue.
With proper alignment, the chain will shift gears smoothly, without any noise or hesitation.
How to Ensure Safety
Safety is paramount when installing a bike crankset, as this component is subjected to constant stress during pedaling.
Even a minor error during installation can lead to loose components, a loss of bike control, or a sudden mechanical failure while riding.
Devoting just a few extra minutes to follow some basic safety guidelines ensures the safety of both the bike and the rider.
These precautions guarantee that the crankset remains secure, functions correctly, and remains reliable over the long term.
The safety tips listed below are simple, yet highly effective in preventing common issues associated with installation.
1. Always Use a Torque Wrench
Using a torque wrench ensures that bolts are tightened with the precise amount of force required.
If insufficient force is applied, the crank arms may loosen while riding; conversely, if excessive force is applied, threads can become stripped or components may break.
Modern cranksets are often constructed from lightweight materials that require very precise tightening.
A torque wrench eliminates the need for guesswork, applying consistent pressure in accordance with the manufacturer’s recommendations.
This maintains proper alignment, protects the bearings, and minimizes the risk of bolt failure.
2. Double-Check Alignment
Before heading out for a ride, it is crucial to verify that both crank arms are positioned directly opposite one another.
Proper alignment ensures smooth pedaling and maintains a balanced distribution of power.
If the crank arms are misaligned, pedaling difficulties may arise, undue stress can be placed on the spindle, and components may experience premature wear.
Checking the alignment and rotating the crank arms a couple of times ensures that they are seated correctly.
A properly aligned crankset offers greater comfort and minimizes the risk of long-term mechanical damage.
3. Begin with a Slow Test Ride
After installing the crankset, your initial ride should always be slow and cautious.
A slow-paced test ride allows you to detect any unusual noises, looseness, or binding issues before riding at higher speeds.
During this test, pay close attention to the smooth movement of the pedals and the uniform rotation of the cranks.
If you notice any clicking sounds, wobbling, or stiffness, stop immediately and re-examine the crankset installation.
This cautious approach prevents minor issues from escalating into dangerous situations while riding.
4. Re-check the Bolts After the First Ride
After the initial ride, a newly installed crankset may loosen slightly due to the stresses of use and the components settling into their proper positions.
Re-checking the bolts ensures that they remain tightened to the correct torque specifications.
This step is crucial, as even properly tightened bolts can become slightly loose after initial use.
Inspecting them and re-tightening them if necessary, helps maintain stability and prevents future shifting or movement.
Regularly checking the bolts during the initial “break-in” period enhances safety and extends the lifespan of the components.
Know, How to Maintain Bike Crankset After Installation
Proper maintenance of the bike crankset after installation is crucial for ensuring its long-term performance and safety.
Even if the crankset has been installed correctly, its components are continuously subjected to stress from pedaling forces, road vibrations, and external factors such as dust and dirt.
Over time, these factors can cause bolts to loosen slightly, dirt to accumulate at contact points, and the crankset’s rotation to become stiff.
Regular maintenance helps maintain the crankset’s alignment, prevents squeaking noises, and extends the lifespan of both the crankset and the bottom bracket.
Timely execution of a few simple checks can help you avoid costly repairs and maintain consistent pedaling efficiency.
1. Retighten Bolts After the First 50 Kilometers
After riding the bike for approximately 50 kilometers, it is essential to re-inspect the crank bolts and retighten them according to the torque specifications recommended by the manufacturer.
During the initial rides, as the components bear weight and load, they settle into their proper positions and their contact surfaces undergo slight compression.
This “seating-in” process can reduce the tension on the bolts, even if they were tightened correctly during installation.
Retightening the bolts restores the proper clamping force, ensuring that the crank arms do not come loose.
This step is particularly important for new cranksets and recently installed components.
This check helps maintain the stability of the crankset and minimizes the risk of wear and tear at the component interfaces.
2. Keep the Crank Area Clean
Keeping the crankset area clean prevents dust and dirt from infiltrating the moving parts.
Dust, mud, and moisture can accumulate around the spindle and chainrings, potentially causing creaking noises from the crankset and increasing friction.
Regularly wiping down the crank arms, chainrings, and surrounding components removes dirt before it has a chance to build up, thereby preventing issues.
On clean surfaces, loose bolts, cracks, or any signs of unusual wear are easily visible.
Maintaining cleanliness ensures that the crankset rotates smoothly and prevents premature wear of the bearings.
3. Regular Inspection Schedule
Establishing a simple inspection schedule helps keep the crankset safe and in good working order for the long term.
Checking for loose bolts, unusual noises, and smooth rotation every few weeks or after long rides, allows for the timely detection of any potential problems.
Riders who frequently cycle on wet or rough terrain may need to perform inspections more often.
A regular inspection routine should include rotating the crank arms, checking the tightness of the bolts, and monitoring the condition of the chainrings.
Regular inspections help maintain efficient power transfer, prevent sudden mechanical failures, and ensure that the drivetrain continues to operate smoothly.
When to Replace the Crankset
A bicycle’s crankset is designed to withstand the intense and repetitive forces generated during pedaling; however, over time, it can wear out or become damaged.
Riding with a worn or damaged crankset can negatively impact performance, cause mechanical noise, and increase the risk of mechanical failure.
Recognizing early symptoms helps prevent damage to other drivetrain components, such as the chain, cassette, and bottom bracket.
Replacing the crankset at the appropriate time makes pedaling easier, ensures a safer ride, and maintains optimal performance over the long term.
The conditions listed below are the most common indicators that a crankset needs to be replaced.
1. Worn Chainrings
As the chain runs across their teeth, chainrings gradually wear down.
Over time, the teeth may become sharp, thin, or irregularly shaped.
Worn chainrings often lead to chain slippage, difficulty shifting gears, and reduced power transfer.
Cyclists may experience chain slippage when applying significant force particularly while climbing hills.
Continuing to ride with worn chainrings can accelerate chain wear and cause damage to other drivetrain components.
If the teeth appear visibly worn, or if shifting performance deteriorates, replacing the crankset or chainrings becomes necessary to restore smooth and efficient cycling operation.
2. Cracked Crank Arms
Crank arms are subjected to constant stress during pedaling; consequently, metal fatigue, impact damage, or overtightening can cause fine cracks to develop within them.
These cracks can appear anywhere, within the pedal threads, at the spindle joint, or on the crank arm itself.
Even a tiny crack can compromise the structural integrity of the component and significantly increase the risk of sudden failure.
A broken crank arm while cycling can lead to a loss of balance and result in injury.
Regular visual inspections help in the early detection of such cracks.
If a crack is discovered, the crank arm or the entire crankset, should be replaced immediately to ensure safety.
3. Bent Spindle
The spindle connects the two crank arms; to ensure smooth rotation, it is essential that it remains perfectly straight.
Collisions with heavy objects, aggressive riding, or prolonged use with loose components can cause the spindle to bend.
When the spindle is bent, cyclists may experience unevenness in pedaling, wobbling in the crank arms, or increased resistance.
Such imbalance places excessive stress on the bearings and negatively impacts overall performance.
A bent spindle cannot be reliably repaired; therefore, replacing it is the safest course of action.
Installing a new crankset restores proper balance and ensures smooth pedaling.
4. Persistent Creaking Sounds
A persistent creaking sound, even after proper tightening and lubrication may indicate excessive wear in the crankset joints.
This persistent noise often occurs when contact surfaces have worn down or when the crank arms do not fit securely onto the spindle.
The movement resulting from the force applied during pedaling generates this noise and gradually causes further damage to the components.
If the noise persists even after cleaning, greasing, and retightening, it may indicate that the crankset has reached the end of its service life.
Replacing it restores the machine to silent operation and prevents further damage to the drivetrain.
Conclusion – How to Install a Bike Crankset
Now, you have clearly understood that a properly installed crankset quietly determines how smooth every future ride will feel.
It directly impacts how efficiently your pedaling power propels the bike forward, how smoothly the drivetrain operates, and how secure your ride feels.
A correctly installed crankset ensures that the crank arms remain aligned, friction within the bearings is minimized, and there is no unwanted movement that could lead to noise or damage.
When the installation is performed with care, you benefit from superior power transfer, quieter operation, and extended component longevity.
Conversely, minor errors such as: incorrect torque, poor alignment, or insufficient lubrication, as it can gradually give rise to issues ranging from creaking noises and loose components to premature wear and tear.
This guide outlines every essential step, from an initial understanding of crankset types and necessary tools, through the step-by-step installation process and torque control, to troubleshooting and long-term maintenance.
Each stage plays a crucial role in ensuring that the crankset remains both secure and efficient.
Checking alignment, applying the correct torque, and performing timely maintenance can prevent most common issues from escalating into serious problems.
Now, that’s it from this guide on How to Install a Bike Crankset, now you can comment for more.
Frequently Asked Questions
Q1: What is a bike crankset, and why is it important?
Answer: A bike crankset is the component that connects the pedals to the chainring and transmits your pedaling force to the drivetrain. Every time you push the pedals, the crankset rotates and drives the chain, causing the rear wheel to turn. Because it is constantly subjected to significant stress, proper installation is crucial to ensure smooth pedaling, efficient power transmission, and rider safety. If the crankset is not installed correctly, it can lead to noise, loosening of components, and premature wear on other parts.
Q2: How can I tell if my crankset is installed correctly?
Answer: You can check if the crank arms are properly installed by rotating them; they should spin smoothly and without any obstruction. When you gently push the crank arms toward the frame, there should be no looseness or wobbling. The crankset should also operate quietly, without any clicking or creaking sounds. After riding the bike for a short while, pedaling should feel effortless, and shifting gears between the chainrings should be smooth and precise.
Q3: Do I need special tools to install a bike crankset?
Answer: Yes, installing a crankset correctly typically requires a few basic tools. These often include hex keys, a torque wrench, and depending on the specific type of crankset, a bottom bracket tool. A torque wrench is particularly important, as it helps ensure that the bolts are tightened to the precise specifications recommended by the manufacturer. Using the correct tools ensures that everything fits together properly and minimizes the risk of damaging the components.
Q4: Why is it so important to use a torque wrench when installing a crankset?
Answer: A torque wrench ensures that the bolts are tightened with a precise amount of force. If the bolts are too loose, the crank arms may wobble and damage the spindle. If the bolts are overtightened, their threads may strip, or the components could break. Correct torque secures the crankset while also protecting delicate parts. This allows the crankset to rotate smoothly and extends the lifespan of the components.
Q5: Should I apply grease when installing a crankset?
Answer: Yes, applying grease is strongly recommended. Grease reduces friction, prevents creaking noises, and protects metal parts from corrosion. It also makes it easier to remove the parts in the future. A thin layer of grease should be applied to the spindle, the bolt threads, and the mating surfaces. This ensures that the parts seat correctly and maintain optimal performance over time.
Q6: How tight should crank bolts be?
Answer: Crank bolts should be tightened according to the torque specifications provided by the manufacturer. Most crank bolts fall within a medium torque range, but the exact value depends on the specific crankset design. Tightening by feel alone is not advisable, as this can result in bolts being either overtightened or left too loose. Using a torque wrench ensures that the bolts are tightened correctly and helps prevent potential problems.
Q7: What happens if my crank arms are not properly aligned?
Answer: If the crank arms are not positioned directly opposite each other, pedaling will feel awkward and uncomfortable. Misalignment can also place excessive stress on the spindle and bearings. Over time, this can lead to increased wear and tear, as well as the development of creaking noises. Proper alignment at 180 degrees ensures balance while pedaling and facilitates efficient power transfer.
Q8: Why is my crankset making a creaking noise after installation?
Answer: Creaking noises typically occur when parts are slightly loose or lack sufficient lubrication. This noise can also arise if dust or dirt becomes trapped between the contact surfaces. This issue can often be resolved by removing the crank arms, cleaning the contact points, applying grease, and tightening the bolts to the correct torque specifications. If the noise persists, it may be an indication that the parts have become worn out.
Q9: How often should I check my crankset after installation?
Answer: It is recommended to re-check the bolt tightness after the first 50 kilometers of riding, as the components may settle slightly further into place. Subsequently, performing regular checks every few weeks or after long rides, helps ensure that everything remains securely tightened. Regular inspections prevent parts from coming loose and ensure that the bicycle continues to operate smoothly.
Q10: Can I go for a ride immediately after installing the crankset?
Answer: Yes, but it is advisable to start with a short test ride at a slow pace. This allows you to listen for any unusual sounds and check whether pedaling feels comfortable. If you feel any wobbling or hear any strange noises, stop and re-check the installation. A cautious initial ride ensures both safety and proper functionality.
References:
[1] Cycling Biomechanics and Its Relationship to Performance
https://www.researchgate.net/publication/342188954_Cycling_Biomechanics_and_Its_Relationship_to_Performance
Jonathan, the passionate owner of Bicycle Time, brings a lifelong love for bikes and automotive craftsmanship, that reflects into every corner of the shop. With deep passion in both cycling and automotive accessories, Jonathan is more than just an expert.