 Skip to content
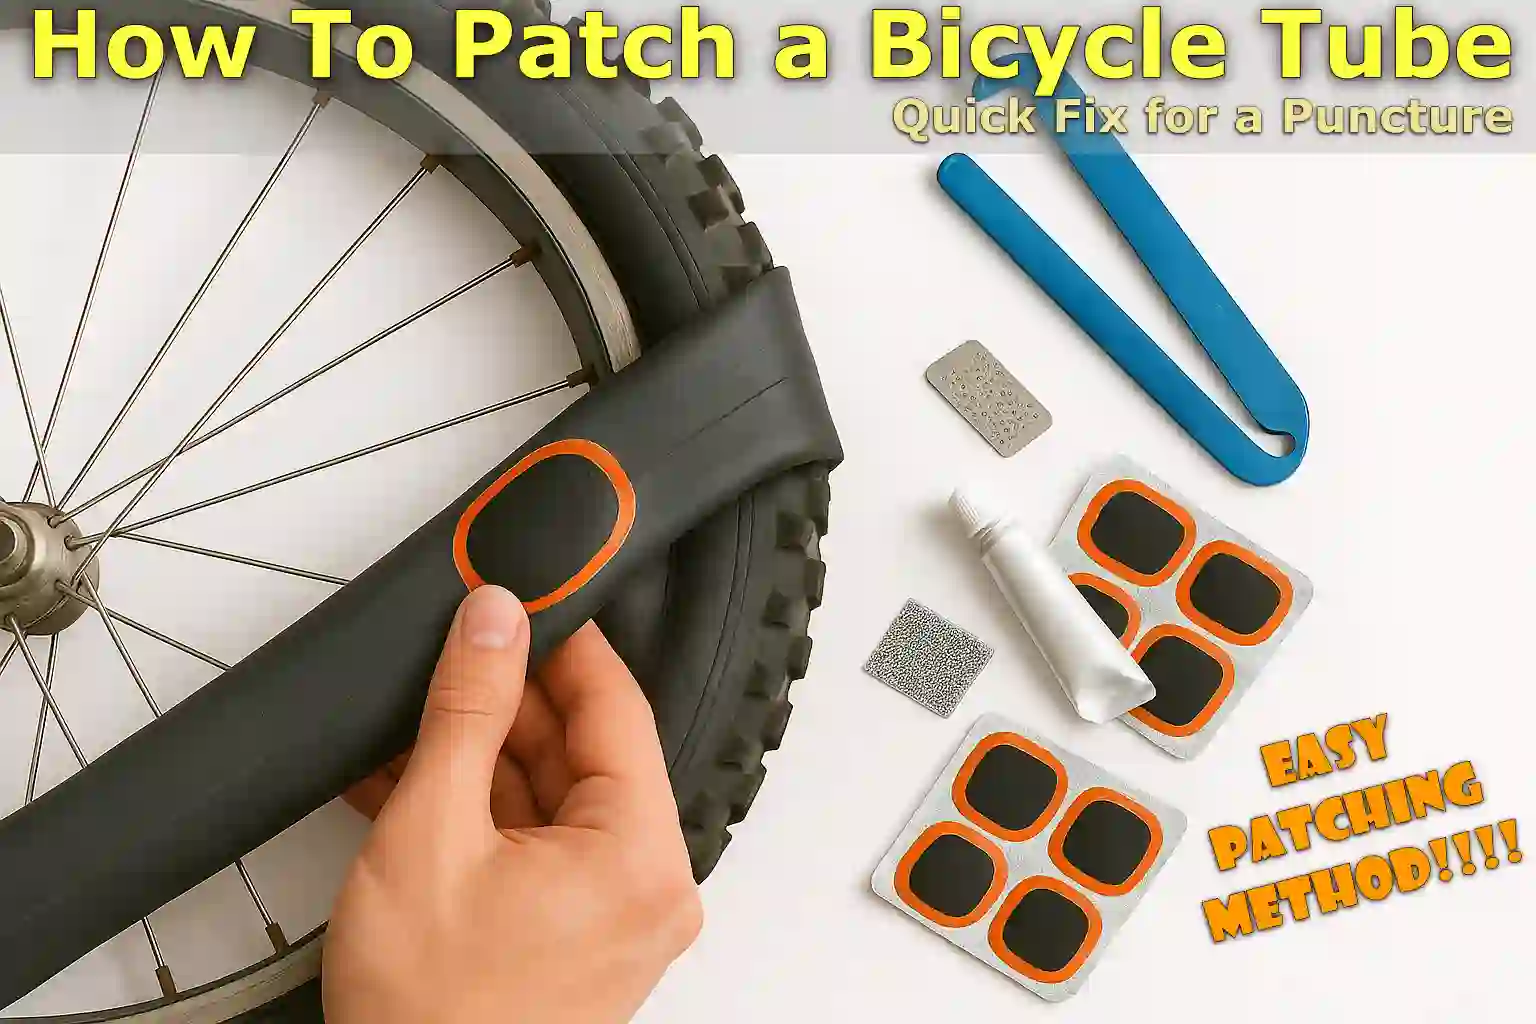
Written By: Jonathan
Fact Checked By: Caroline Dezendorf
Reviewed By: Matt Tanner
Actually tire puncture is one of the most common problems every cyclist faces, and yes it can happen to anyone, no matter whether you are cycling on a city street, a mountain trail or a smooth road.
Plus, studies actually show that over 90% of bicycle punctures are actually caused by sharp objects, such as: glass, planks, nails or even some small types of stones penetrating the tire tread.
But you don’t actually need to buy a new tube every time, as you can easily patch a bicycle tube which is actually pretty simple and is also a budget-friendly and environmentally conscious solution that can get you back on the road in less than 15 minutes or less.
And most modern patch kits cost less than a few dollars and can easily be carried on a small bike seat or even in your backpack.
Not only that, with these patched tubes it can last for hundreds of miles without any problems if you do the job correctly.
With this guide on How To Patch a Bicycle Tube, you can save a lot of money and reduce waste and also become a more self-reliant rider.
What are The Signs You Have a Punctured Tube
The signs are pretty clear as you can easily identify a flat or punctured bicycle tube in advance which can literally save you from getting your wheel rim damaged or even getting stranded away from home.
1. Sudden Loss of Tire Pressure
If you find that your tire has become soft or gets punctured easily, then it is actually a clear indication that the air is escaping from the tube due to a punctured tire.
A typical bicycle tire should actually hold air for several days or even weeks, depending on the type of tire.
So, if you put air in your tire and a few hours later the air is out, there’s probably a small leak, but the leak is there.
And in some cases, if a large hole is created by a sharp object, the pressure can be lost immediately, so you’ll need to patch the area right away.
2. Wobbliness or Spongy Ride Feel
So, when you notice that your tube is actually losing air it means that the tire is low on air and that is why it feels very unstable, flexy or bouncy while riding.
Also, this is specially noticeable when you turn, pedal fast or cycle on uneven ground, as a properly inflated tire actually supports your weight and keeps your bicycle stable.
This is why when the tube gets a hole in it, it means a soft, unstable feel due to the lack of pressure.
And when you drive in this condition, it can also cause damage to your rim or tire sidewall.
3. Hissing Sound or Visibly Deflated Tube
A hissing sound often indicates that air is actually escaping from the hole in the inner tube, and this sound may be heard immediately after the puncture occurs, specially if the leak is large.
So, if you are unsure you can bring your ear close to the tire and then turn the wheel slowly.
Not only this, you can also clearly see the tube inside the tire either loose or completely collapse.
Also, if a tube appears “sunken” or does not spring back out when pressure is applied to the tire, there is a very high chance that the tire is actually punctured.
Tools
| Tool / Material | Purpose | Notes |
|---|---|---|
| Tire Levers | It is necessary to remove the tire from the rim. | Not too many, as two is usually enough, plus the plastic levers are the safest for the rim. |
| Bicycle Pump or CO₂ Inflator | You can easily inflate the tube before and after patching with the help of these tools. | Actually floor pumps with gauges are more accurate, but the CO₂ is faster for roadside repairs. |
| Patch Kit | This is to seal the puncture in the inner tube. | Additionally, it can be glue-free or glue-based and usually consists of several patches. |
| Rubber Cement (if not glueless) | This really helps in attaching the rubber tube to the patch. | Traditional kits are available that allow the patch to become sticky before applying it. |
| Sandpaper or Metal Scraper | This is actually needed so that you can roughen the surface of the tube for better patch adhesion. | Usually included in a patch kit as well. |
| Water Basin or Sink | This would be really useful and great to actually help you identify the leak using the air bubbles. | This is actually optional if you are at home, as you won’t be able to get this feature outside, so skip this step outside. |
| Marker, Chalk, or Fingernail | You can use this to mark the leak location on the tube. | This prevents losing track of the puncture easily after testing. |
| Clean Rag or Tissue | It’s a good idea to dry the tube and wipe away debris before and after the puncture has healed. | This will give your tube a thoroughly cleaned surface which makes patch adhesion much stronger. |
How to Remove the Wheel and Tube
So, you actually have to take the tube out of the tire that you wanted to patch, this means you have to remove the wheel from the bicycle and then you have to carefully separate the tube from the tire and the rim as well.
1. Shift the Bicycle Into an Easy-Gear Position: For Rear Tire Only
So, if you actually want to remove the rear wheel, simply shift your bicycle into the smallest rear gear which is actually the smallest cog on your cassette.
Plus, this step makes it much easier to remove and reinstall the wheel later as the chain moves away from the larger gear, which also loosens the tension.
Not only that, but it also helps keep the derailleur and chain from getting in the way while you’re working on it.
2. Release the Brakes if Needed
In addition, there are some bicycles available such as: old road bicycles or V-brake systems as they have stiff brake calipers that prevent the wheel from slipping easily.
And in such cases, you will need to ease the brake tension by opening the brake quick-release lever or untangling the cable.
And on bicycles with disc brakes, you can usually skip this step, but you should always double-check as there should be enough room to remove the wheel easily.
3. Remove the Wheel from the Frame
Now, you can remove the wheel comfortably, so first turn the bicycle upside down or you can also place it safely on a repair stand.
And then two possibilities will occur:
- If you have a quick-release skewer, simply open the lever and then loosen the nut slightly so you can easily pull the wheel out.
- Or if your bicycle has a thru-axle or solid axle, you will need a wrench or Allen key to open the axle and then pull it out.
Also, you should gently pull the wheel down to remove it from the dropout, which is the frame slot, and if it’s a rear wheel you may need to carefully remove it through the derailleur so you can avoid getting the chain caught.
4. Use Tire Levers to Remove the Tire from the Rim
Also, tires are ideally held tightly in place by the rim edges, also known as “beads,” and you can simply use two tire levers to remove one side of the tire and access the tube:
- Then you just need to insert the first lever under the edge/bead of the tire.
- Also, take it off of the rim and hang it on the spoke so you can hold it in place.
- Next, you’ll need to use a second lever located a few inches away so you can continue lifting the bead.
- Finally, slide the other lever around the rim so you can easily free one side of the tire completely.
Additionally, you should avoid using any sharp tools such as a screwdriver, as this could damage the tire or puncture the tube further.
5. Carefully Pull Out the Inner Tube
Now, when one side of the tire is completely separated from the rim, you can easily pull the tube out:
- So, first of all remove the valve from the rim hole.
- And then you have to work around the tire, and then slowly pull the tube out from under the tire bead.
- Additionally, you should make sure that the tube does not stretch or burst, specially if it is stuck to the tire due to pressure or moisture.
Also, if you’re actually planning to patch the tube right away, it’s a really good idea to keep the tire and tube correctly aligned: because this can help you locate the sharp object that caused the puncture, simply by matching its position on the tire as well.
Read More:
How to Locate the Leak
Now, before you actually patch the bicycle tube and solve the air leaking problem, firstly you need to find out where the air is leaking from and it should be the absolutely exact location so that you can get the right solution.
Sometimes the hole is easy to spot, but in many cases it is a small hole that remains hidden.
That’s why you must first determine the exact location of the puncture, as this ensures that the patch sticks in the right place and reliably blocks the air.
1. Inflate the Tube and Listen for Escaping Air
Now, first of all you need to partially inflate the tube with the pump, as this will provide the necessary air to the tube and it should be enough air to be able to reveal any leaks without making it too stiff to work with.
Simply place the tube near your ear and then move it around slowly, and you will hear a very clear hissing sound which is actually an indication of air coming out.
This method actually works pretty well, and these leaks can be caused by anything from: small pins or pinholes so it may not be a loud noise, which is why you’ll need to continue investigating carefully if you don’t actually hear anything at first.
2. Submerge the Tube in Water and Look for Bubbles
After some time, if you cannot hear the leaking sound, you can use the most reliable method which is to use water to find air bubbles.
Simply fill the sink, bucket or basin with water and then slowly dip the inflated tubes into the water one at a time, and as you move the tube around in the water you will need to keep a close eye on it for any tiny air bubbles as these will rise up from the puncture site.
This method will also show slow leaks, making it even more useful in finding those tricky pinholes or “soak leaks” that only appear over time.
So, when you see bubbles, note the exact spot before removing it from the water.
3. If Outdoors, Feel for Airflow or Use Soapy Water
If you’re on the road or don’t really have access to water, you can still find the leak with this simple method:
Feel With Your Hands
All you have to do is run your hand slowly over the inflated tube and then feel the cool air touching your skin, and even if there are small leaks that create a noticeable draft.
Use Soapy Water
You can also find this out by mixing a small amount of soap with water and then applying it to the surface of the tube using your fingers or a piece of cloth.
So wherever there is a hole, the air escaping will create tiny bubbles in the soap film: making the leak easy to spot even without a bucket.
And this method is very commonly used by both cyclists and auto mechanics.
4. Mark the Leak with a Pen, Chalk or Fingernail Indentation
Therefore, once you actually locate the leak point, it becomes very important that you mark the exact location before you forget it.
You can use a ballpoint pen, permanent marker, chalk or a light nail press to do this and draw a circle, or you can make a mark around the hole.
Plus, this step will definitely help you ensure that you can easily place the patch in the right place when you are ready to actually apply it.
Furthermore, many people actually skip this step and then end up not finding the hole: after which they have to locate it again, which wastes time and also results in a failed repair.
How to Prepare the Tube Surface
Now, you need a proper surface to ensure that your patch sticks securely and holds the air for a long time.
So, if the surface is not clean, dry, and properly roughened, the patch may basically peel off or not stick at all.
1. Let the Tube Dry If It Was Submerged
Now, if you actually used water to locate the leak, you need to make sure that the tube is completely dry before applying the patch.
Because patches, specially those that use rubber cement, do not stick properly to wet or damp surfaces.
Therefore you should use a clean cloth or allow the tube to air dry naturally, as even a small amount of water or moisture left around the hole can interfere with the adhesive and cause the repair to fail.
2. Use Sandpaper to Roughen the Area Around the Leak
So, the next step is to take the small piece of sandpaper or metal scraper that comes with most patch kits and then gently rub the area around the hole.
Also, you should sand it in a circular motion and cover about 1 inch (2.5 cm radius) around the leak.
So, basically the goal is to remove any shiny or smooth layers on the rubber to provide a grippy, textured surface for the patch to adhere properly.
And this process is also known as “mechanical abrasion” and it literally helps to create a stronger bond between the patch and the tube that is why you should strictly not skip this step: even glueless patches need a slightly rough surface to hold properly.
3. Clean Off Debris or Moisture
So, after sanding the area you now need to make sure that the area is clean and there is no dust, rubber particles, dirt, or oil on it.
That’s why you’ll need to wipe the sanded surface with a dry cloth or your fingers so you can remove any loose parts.
Additionally, you should avoid touching the area too much with bare hands, as the natural oils from your skin can actually reduce the effectiveness of the adhesive.
And if the tube was really dirty or greasy, you may need to get a little bit of rubbing alcohol on a clean cloth so you can wipe the area and let it dry completely before applying the patch.
How To Patch a Bicycle Tube: Can Be Applied in 2 Ways
So, now you have a properly prepared tube that is completely clean and dry, so it’s time to apply the patch.
Also, there are two commonly used patches available: glue-free patches, which are quick and convenient, and traditional rubber patches with glue, which are actually stronger and longer lasting.
Basically both can be very effective if used correctly, but what would be the right type of patch depends entirely on your situation: whether you want a quick roadside repair or a tube repair at home.
How to Apply Glueless Patch: Quick Fix
In fact glueless patches are very popular because they are quite quick, clean and do not actually require any type of glue or drying time.
This also makes them very useful for quick roadside repairs, basically perfect for emergency repairs.
1. Peel Off the Backing
Now, you have to carefully remove the backing from the glueless patch and you should not touch the sticky side too much.
As these patches come with a pre-applied adhesive, it instantly sticks to the tube.
2. Press Firmly on the Leak Area for 30+ Seconds
Now, you will need to place the patch directly over the hole, also you will need to align it as precisely as possible and then press it very firmly with your thumb and hold it for at least 30 seconds so that you can ensure a good seal.
It is actually this pressure that activates the adhesive and helps it bond properly with the rubber.
3. Tap It Lightly With Hard Wood Brush
Now, to make sure that it is perfectly attached to the tube, place it on a hard surface which should be smooth and clean as there should be no dust, dirt or any hard particles on it.
And then lightly tap it a few times with the hard wooden part of the brush which will be enough to get it completely right.
4. Wait a Minute Before Inflating
Now, you should give the patch a minute to set completely before you inflate the tube, this will definitely help the adhesive to set properly.
What’s more, although glue-free patches don’t actually require as much time to cure as glue-based patches, waiting a little longer actually improves the grip.
Plus, a patch kit can save you 98% of your time, which is why patch kits have always been effective in real-world roadside repairs.[¹]
How to Apply Traditional Patch with Glue
Now, if you want to use the traditional patches, which are widely trusted by cyclists, because they form a chemical bond with the tube, and that process actually takes a little bit longer to complete but the result will be a more permanent type of repair and ideally even with pressure resistant repairs.
1. Apply a Thin Layer of Rubber Cement Over Sanded Area
Now, first of all you need to squeeze out a small amount of rubber cement and then spread it evenly on the sanded area, but make sure it should be a little bigger than the patch.
Additionally, you should avoid using too much glue, as this will create thick layers that will take longer to dry and won’t adhere as well.
Not only that, rubber cement actually works by softening the rubber of the tube and then it creates a sticky surface to join.
2. Wait Until the Glue Becomes Tacky
Now, you need to let the glue sit for about 30 to 60 seconds or until it starts to look dull or matte instead of shiny.
And it should feel sticky to the touch, but there shouldn’t be any glue on your finger, so be careful.
So, if you apply the patch too early: while the glue is still wet, it will also prevent proper adhesion, so you need to wait until the glue becomes a little tacky, not wet.
3. Apply the Patch and Press Firmly for at Least 1 Minute
Now, you need to peel the foil off the patch and then carefully place it on the glued area.
Also, make sure to press firmly, concentrating more on the edges.
And then hold it in place for at least a minute so it seals tightly.
Additionally, you can use a small hard object such as a coin or tire lever to help you apply additional pressure evenly.
4. Tap it With the Wooden Part of the Brush
Now, you need to place the tube on the properly cleaned surface which should be free from all kinds of dirt, mud, and debris and then tap it several times with the wooden brushed part so that it sticks like glue.
5. Let It Cure for 5 to 10 Minutes
Additionally, you will need to allow the patch to dry completely for 5 to 10 minutes before reinserting and inflating the tube.
Because this curing time is very important and it gives the glue time to adhere securely to both the tube and the patch.
If you rush this step the patch may come off when the tube tightens, so wait a few minutes.
How to Inspect and Reinstall the Tube
So, once you have successfully applied the patch the next thing to do is to double check your work and carefully reinstall the tube into the tire, as this is important as well.
This step really ensures that your repair actually holds up under pressure and that the wheel is reassembled safely and properly.
1. Check the Patch Seal by Inflating the Tube Slightly
So, before reinserting the tube, test it by inflating it gently: just enough to give it a round shape, but it should be a bit much, so that it doesn’t have to be stretched to get it into a perfectly round shape.
And that’s because it makes it easier to handle and it allows you to actually check whether or not the patch is sealed correctly.
So, if you want to be more sure then place the patched area near your ear or dip it in water for a while.
And if you see that there is no air leaking out then the patch is holding really well and you are ready for the next step.
2. Insert the Tube Back into the Tire
So, inflate the tube slightly and carefully insert it into the tire, first inserting the valve stem into the valve hole of the rim.
Next, you’ll need to slowly insert the remainder of the tube underneath the tire bead, working evenly around the wheel.
Ideally, slightly inflating the tube helps it to maintain its shape, greatly reducing the chance of it becoming bent, twisted or bunched, which can also lead to re-puncture.
3. Carefully Remount the Tire onto the Rim Using Hands
So, once the tube is in place you will need to reinstall the loose portion of the tire bead onto the rim.
Start at the valve area and then work around using your hands, and if the end feels tight then push the opposite edges of the tire inwards towards the centre of the rim to create even looseness.
Also, you have to avoid using any type of metal tools like screwdrivers as they can nick or damage the tube.
Not only this, In fact if you use your hands properly for reinstallation it can easily prevent any kind of “pinch flats”, also known as snake bites, which is actually when the tube gets stuck between the rim and the tire edges.
4. Inflate Fully to Recommended PSI
Now that the tire is properly back in place, you’ll need to properly inflate the tube to the manufacturer’s recommended PSI, which you can usually find out because it’s printed on the tire’s sidewall.
In fact, road bike tires often range from 80 to 120 PSI, while mountain and hybrid tires can range from 30 to 60 PSI.
Plus, you can use a pressure gauge to be very accurate about the PSI, because if you ride with too little air it can literally cause another flat and too much air can also cause a blowout, so it is important that the tube is inflated properly.
5. Spin Wheel to Ensure It’s Seated Properly
Finally, just rotate it a few times while looking carefully from the side, as this confirms a number of things such as:
- So just confirm that the tire bead is seated evenly around the rim.
- This also shows that the valve stem is straight and not being pulled to the side.
- Apart from this, you can also ensure that your bicycle wheel does not have any bulges, potholes, or any vibration in the tire.
If you think something is wrong, let some air out and then adjust it before refilling the tire with air.
And a properly seated tire improves both safety and performance, giving you a really smooth and more stable ride.
Conclusion On How To Patch a Bicycle Tube
So, let’s face it flats do happen, all you really need is the right tools and knowledge and they will no longer have the power to ruin your ride or your day because you can now deal with them on your own in just a few minutes.
The process is quite simple: you first need to remove the wheel, and then identify the spot where the air is leaking, then just prepare the surface of the tube for patching and then apply the patch, this is a simple and very beneficial guide on How To Patch a Bicycle Tube that also saves a lot of bucks.
You can also share your thoughts in the comment section or in the question.
Frequently Asked Questions on How To Patch a Bicycle Tube
Q1. How long does a patched tube last?
Answer: If you patch the tube correctly it can literally last hundreds or even thousands of miles, specially if the patch is applied correctly and the hole is small. Also, traditional patches with rubber cement last longer than glueless patches, specially for high-pressure tires, such as those used on road bicycles.
References:
[1] Reddit, r/cycling. Is a tire patch kit sufficient (instead of carrying a spare tube)?
https://www.reddit.com/r/cycling/comments/1bpjcin/is_a_tire_patch_kit_sufficient_instead_of/
Jonathan, the passionate owner of Bicycle Time, brings a lifelong love for bikes and automotive craftsmanship, that reflects into every corner of the shop. With deep passion in both cycling and automotive accessories, Jonathan is more than just an expert.
